
Are you ready to take your cooking to the next level? Roasting trays are one of the most useful tools in your kitchen, but only if you use them the right way.
With a few simple tips, you can make your meals juicier, flavors richer, and clean-up easier. Keep reading, and you’ll discover how to get the most out of your roasting trays every time you cook. Your next delicious dish is just a few steps away!
Choosing The Right Roasting Tray
Picking the right roasting tray can improve your cooking results. Different trays suit different recipes and ovens.
Consider the material, size, shape, and surface before buying a roasting tray.
Material Matters
Roasting trays come in various materials. Each offers different heat distribution and durability.
- Aluminum heats up quickly and is lightweight.
- Stainless steel is durable and resists rust.
- Ceramic holds heat evenly but can be heavy.
- Cast iron retains heat well and adds flavor.
Size And Shape Considerations
Choose a tray size that fits your oven and the food you roast. The shape affects cooking evenness.
| Shape | Best Use | Advantages |
| Rectangular | Roasting large cuts of meat | Fits most ovens, easy to handle |
| Oval | Whole poultry or fish | Good for even heat around food |
| Square | Vegetables and smaller portions | Compact and stackable |
| Shallow | Roasting vegetables | Allows moisture to evaporate quickly |
Non-stick Vs. Traditional Surfaces
Non-stick trays reduce food sticking and make cleaning easier. Traditional trays may need more care.
- Non-stick trays work well for sticky or delicate foods.
- Traditional metal trays can handle high heat better.
- Non-stick coatings may wear off over time.
- Traditional trays can be seasoned for better performance.

Credit: food52.com
Prepping Your Tray
Getting your roasting tray ready helps your food cook evenly. Proper prep keeps food from sticking and makes cleaning easier.
Simple steps before roasting improve your cooking results. Let’s look at how to season, use liners, and preheat trays.
Seasoning Techniques
Seasoning your tray adds flavor and protects the surface. It also helps to prevent food from sticking during roasting.
Use oil or fat to coat the tray lightly. Spread it evenly with a brush or paper towel before placing food on the tray.
- Choose oils with a high smoke point like vegetable or canola oil
- Apply a thin, even layer to cover the entire tray surface
- Reapply oil if roasting for a long time to keep the tray non-stick
Using Liners And Foils
Liners and foil help keep your tray clean and make food easier to remove. They also protect trays from burnt bits.
Place parchment paper or aluminum foil on the tray before adding food. This creates a barrier between food and tray.
- Parchment paper works well for baked goods and veggies
- Aluminum foil is good for roasting meats and foods with sauces
- Use reusable silicone liners for an eco-friendly option
Preheating For Best Results
Preheating the roasting tray helps start cooking food immediately. It creates a crisp outer layer and seals juices inside.
Place the empty tray in the oven while it heats up. Wait until it is hot before adding your food to the tray.
- Preheat the tray for 5-10 minutes depending on oven temperature
- Use oven mitts to handle the hot tray safely
- Adding cold food to a hot tray improves browning and texture
Placement In The Oven
Using roasting trays correctly helps cook food evenly and well. Placement inside the oven affects how heat reaches your food.
Knowing where to put your trays can improve cooking results. This guide covers key tips for tray placement.
Middle Rack Positioning
The middle rack is the best spot for most roasting trays. It lets heat circulate around the food evenly.
This position avoids burning the top or undercooking the bottom. Use the middle rack for balanced cooking.
Utilizing Multiple Trays
When using two or more trays, place them with space between. This helps heat flow well to all trays.
| Tray Position | Tip |
|---|---|
| Top Rack | Use for quick roasting or browning |
| Middle Rack | Best for even cooking of main dishes |
| Bottom Rack | Use for slow roasting or crisping |
Rotating For Even Cooking
Turn trays halfway through cooking. This prevents hot spots and cooks food evenly on all sides.
- Slide trays out carefully.
- Turn trays 180 degrees.
- Swap positions if using multiple trays.
- Return trays to the oven to finish cooking.

Credit: www.crateandbarrel.ca
Maximizing Flavor
Roasting trays help create rich and tasty dishes. Using them right brings out the best flavors in your food.
Small tips during roasting can make a big difference. Adding herbs, basting, and making sauces boost taste deeply.
Adding Aromatics And Herbs
Aromatics and herbs fill the air with good smells and add layers of flavor to your roast. Place them under or around your food on the tray.
- Use garlic cloves, onion slices, or lemon wedges for bright taste
- Fresh rosemary, thyme, or sage work well with meats and vegetables
- Place herbs on top or beneath the food for slow flavor release
- Adding whole spices like peppercorns can give a mild kick
Basting And Glazing Tips
Basting keeps your roast moist and adds shine. Glazing gives a sweet or tangy crust. Both boost flavor and improve texture.
| Type | When to Use | Effect |
| Basting | Every 15–20 minutes | Keeps meat juicy |
| Glazing | Last 10 minutes of roasting | Creates a glossy, tasty coating |
| Common Glazes | – | Honey, mustard, balsamic vinegar |
Deglazing For Rich Sauces
After roasting, use the pan juices to make a sauce. Deglazing lifts tasty bits stuck to the tray and adds deep flavor.
Try these deglazing liquids:
- Red or white wine
- Chicken or vegetable stock
- Apple cider or balsamic vinegar
Pour liquid into the hot tray. Scrape the bottom gently with a wooden spoon. Simmer until sauce thickens.
Cleaning And Maintenance
Keeping your roasting trays clean helps them last longer. Good care stops stains and damage. You can enjoy better cooking results with clean trays.
Learn simple tips to avoid mistakes, use safe cleaners, and store trays well. These steps protect your trays and keep them ready for your next meal.
Avoiding Common Mistakes
Many people hurt their trays by using wrong cleaning methods. Avoid these errors to keep your trays in good shape.
- Do not use metal scouring pads that scratch the surface.
- Avoid soaking trays too long in water to prevent rust.
- Never use harsh chemicals that can damage the tray finish.
- Clean trays soon after use to stop food from hardening.
Safe Cleaning Products
Choose cleaning products that protect your trays and the environment. Use gentle options that remove grease without harm.
| Product Type | Recommended Use | Avoid |
| Mild Dish Soap | Daily cleaning | Harsh chemicals |
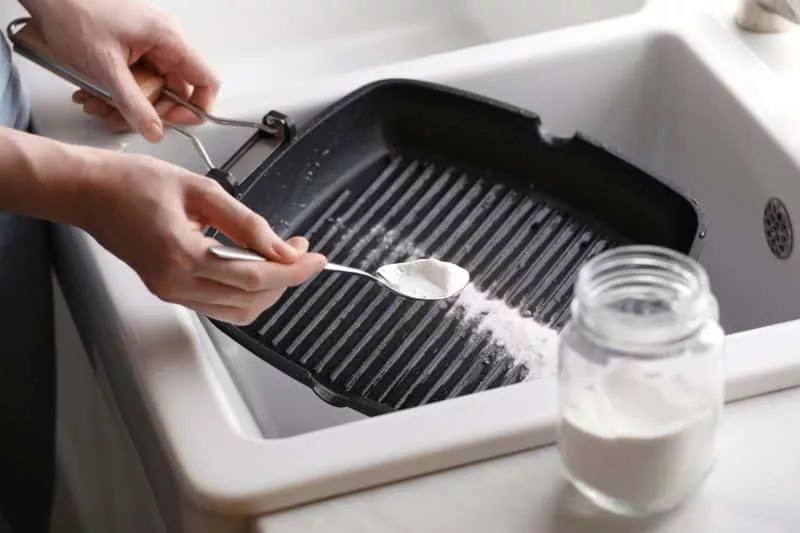
| Baking Soda | Remove stains and odors | Strong abrasives |
| White Vinegar | Cut grease and disinfect | Bleach or ammonia |
Storing For Longevity
Proper storage keeps trays safe from damage and dirt. Store trays in dry, cool places to avoid rust and warping.
- Stack trays with paper towels between them to stop scratches.
- Keep trays away from heavy items that can bend them.
- Dry trays fully before storing to prevent rust.
- Use storage racks if possible to keep trays upright.
Troubleshooting Common Issues
Roasting trays are great for cooking many dishes. Sometimes problems like sticking or uneven cooking happen. Fixing these issues makes cooking easier and tastier.
Below are some tips to help you use roasting trays better. These tips solve common problems and improve your results.
Preventing Sticking
Food sticking to the tray can ruin your meal and make cleaning hard. You can stop sticking with simple steps.
Always grease the tray before cooking. Use oil, butter, or cooking spray to create a smooth surface. You can also line the tray with parchment paper or aluminum foil.
- Use enough oil or butter to cover the tray bottom
- Try parchment paper for easy food release
- Avoid cooking sprays with additives that burn easily
- Preheat the tray to create a hot surface that sears food quickly
Managing Uneven Cooking
Sometimes food cooks unevenly on a roasting tray. Some parts cook fast while others stay raw. This problem comes from hot spots or crowded trays.
Space food evenly and avoid stacking. Rotate the tray halfway through cooking. Use trays that match your oven size for better heat flow.
- Leave space between food pieces for air to circulate
- Turn or stir food during cooking
- Choose a tray size that fits your oven
- Use a baking rack on the tray to lift food for even heat
Addressing Burnt Bits
Burnt bits on food or tray happen when heat is too high or cooking time is long. Burnt food tastes bad and can be unhealthy.
Lower the oven temperature if food burns often. Check food early to avoid overcooking. Cover the tray with foil to protect food from direct heat.
- Reduce oven temperature by 10-20 degrees if burning occurs
- Use foil to cover food during cooking
- Check food 5-10 minutes before the end time
- Remove burnt bits quickly to prevent bitter taste

Credit: chatelaine.com
Frequently Asked Questions
What Materials Make The Best Roasting Trays?
Roasting trays made from stainless steel or cast iron offer excellent heat distribution. Non-stick trays are easier to clean. Choose trays with sturdy handles for safe handling. Material choice impacts cooking results and durability.
How To Prevent Food From Sticking To Roasting Trays?
Coat the tray with oil, butter, or use a non-stick spray before adding food. Lining trays with parchment paper or foil also helps. This prevents sticking and makes cleanup easier. Proper preparation ensures better roasting results.
Can Roasting Trays Be Used For Other Cooking Methods?
Yes, roasting trays are versatile. You can use them for baking, broiling, or slow roasting. Their design allows even heat circulation. This makes them useful beyond roasting meats and vegetables. Always check tray material for oven safety.
How To Clean Roasting Trays Effectively?
Soak trays in warm, soapy water immediately after use. Use a non-abrasive sponge to remove residue. For tough stains, baking soda paste works well. Avoid harsh chemicals to maintain the tray’s surface and longevity.
Conclusion
Roasting trays help cook food evenly and keep your oven clean. Choose the right size and material for best results. Always preheat your tray before adding food for better cooking. Use foil or parchment paper to make cleaning easier. Avoid overcrowding the tray to ensure proper heat circulation.
Clean trays soon after use to keep them in good shape. These simple tips make roasting easier and tastier every time. Enjoy cooking with confidence and great results!