
Are you tired of uneven glazing or messy pastry brush strokes ruining your baked treats? Using a pastry brush might seem simple, but mastering it can make a huge difference in your cooking results.
Whether you’re glazing a pie, basting a roast, or spreading butter on dough, knowing how to use your pastry brush efficiently saves time and enhances your dish’s appearance and flavor. Keep reading, and you’ll discover easy tips that will transform your kitchen skills and impress everyone at your table.
Your next perfect bake is just a few brush strokes away!
Choosing The Right Pastry Brush
Using a pastry brush helps you spread butter, oil, or glaze on your baked goods. Picking the right brush makes your work easier and cleaner.
Different brushes suit different tasks. Look at the bristles, handle, and size to find the best fit for your kitchen.
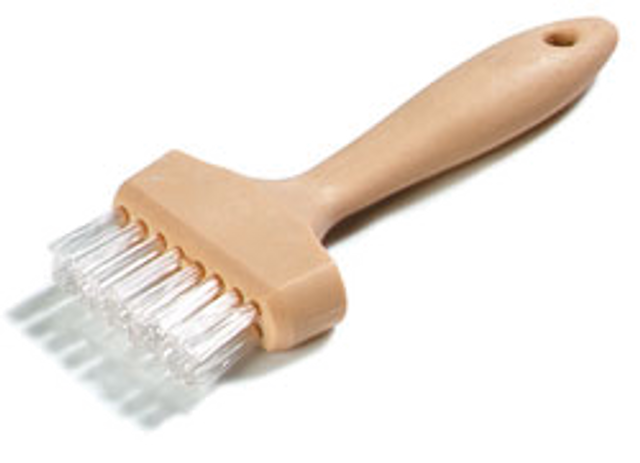
Types Of Bristles
Bristles come in many materials. Each type holds liquids differently and lasts for different times.
- Natural bristles are soft and hold liquids well.
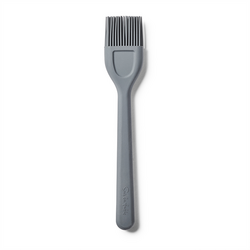
- Silicone bristles are heat-resistant and easy to clean.
- Nylon bristles are durable but may melt near heat.
Handle Materials
The handle affects comfort and grip. Choose a handle that feels good in your hand and is easy to clean.
- Wood handles offer a classic feel but may absorb moisture.
- Plastic handles are lightweight and water-resistant.
- Metal handles are sturdy but can be slippery.
Size And Shape Options
Brush size and shape change how you apply liquids. Pick a size that fits your baking needs.
- Small brushes work well for delicate tasks like glazing pastries.
- Medium brushes are good for general use.
- Wide brushes cover large surfaces quickly.
- Flat brushes spread liquids evenly.
- Round brushes reach tight spots easily.
Preparing Your Pastry Brush
Using a pastry brush properly starts with good preparation. Clean brushes work best and last longer.
Before you begin baking, take time to ready your brush. This helps you apply glazes and oils evenly.
Cleaning Before Use
Clean your pastry brush well before each use. This removes dust and any leftover food particles.
- Rinse the brush with warm water.
- Use mild soap to clean the bristles gently.
- Rinse thoroughly to remove all soap.
- Shake off excess water before use.
Soaking For Better Absorption
Soaking your brush helps it hold liquids better. This makes spreading butter or glaze easier and smoother.
| Soaking Time | Effect |
| 1 minute | Brush holds a small amount of liquid |
| 3 minutes | Brush absorbs enough for medium coverage |
| 5 minutes | Brush fully saturated for heavy application |
Techniques For Applying Glazes And Oils
Using a pastry brush correctly helps spread glazes and oils evenly. This improves the look and taste of baked goods.
Learn simple ways to avoid common mistakes. These tips make your baking smoother and more effective.
Even Coating Methods
Brush the glaze or oil in light, smooth strokes. Start from the center and move outward to cover all areas.
- Use a soft-bristled brush for gentle spreading.
- Dab off extra glaze before brushing.
- Apply thin layers to avoid dripping.
- Rotate the pastry to cover all sides evenly.
Avoiding Overloading
Too much glaze or oil makes pastries soggy and uneven. Control how much liquid the brush holds.
| Tip | Reason |
| Dip brush lightly | Prevents dripping and pools |
| Tap off excess on bowl edge | Controls the amount applied |
| Use multiple thin layers | Builds shine without sogginess |
Layering For Best Results
Apply glaze or oil in several layers. Let each layer dry or set before the next one.
Follow these layering tips:
- Wait 5-10 minutes between layers.
- Use a clean brush for each layer.
- Check the surface for even shine.

Credit: www.webstaurantstore.com
Maintaining Control And Precision
Using a pastry brush well helps you get even coatings. It also prevents mistakes like dripping or missing spots.
Focus on control and precision to apply sauces, glazes, or oils smoothly. This will improve your baking results.
Brushing Angles
Hold your brush at different angles to reach all parts of the pastry. A slight tilt helps spread liquids evenly.
A flat angle works well for large surfaces. A steeper angle helps in tight or curved spots.
- Flat angle (around 30 degrees) for wide coverage
- Steeper angle (45-60 degrees) for edges and corners
- Adjust angle based on pastry shape and size
Hand Movements
Use smooth, even strokes with your hand. Avoid quick or jerky moves to keep the coating uniform.
Try short back-and-forth motions for small areas. Longer strokes suit larger surfaces better.
- Keep your wrist flexible but steady
- Move your whole arm for larger strokes
- Use fingers for fine control in small spots
Pressure Tips
Apply light pressure to avoid squeezing out too much liquid. Too much force can damage delicate pastries.
Press gently and let the brush hold the liquid. Use firmer pressure only if you want a thicker layer.
- Light touch for thin, even layers
- Medium pressure for thicker coatings
- Adjust pressure based on liquid thickness
Cleaning And Storing Your Pastry Brush
Keeping your pastry brush clean helps it last longer. Proper storage stops damage and keeps it ready to use.
Learn simple ways to clean, dry, and store your pastry brush well.
Effective Cleaning Techniques
Wash your pastry brush right after use to stop food from sticking. Use warm water and mild soap to clean the bristles.
Gently rub the bristles to remove oils and dough. Avoid harsh scrubbing that can damage the brush.
- Rinse with warm water immediately
- Use dish soap and gentle scrubbing
- Remove stuck food bits carefully
- Do not soak for too long
Drying Tips
Shake off extra water after washing. Dry the brush bristles downward to stop water from reaching the handle.
Air dry your brush in a clean, open space. Avoid putting it in a drawer while still wet to prevent mold.
- Shake off excess water
- Hang or stand bristles down
- Dry in open air
- Keep away from damp places
Storage Solutions
Store your pastry brush in a dry spot with good air flow. Avoid crushing the bristles by keeping it separate.
Use a container or hang it on a hook. This keeps the brush clean and ready for your next baking task.
- Keep in a dry, ventilated area
- Use a holder or hang on hooks
- Do not press bristles against surfaces
- Store away from dust and dirt

Credit: www.walmart.com
Common Mistakes To Avoid
Using a pastry brush can make baking easier and neater. Yet, many people make mistakes that reduce its usefulness.
Avoiding these errors helps you get better results and keep your tools in good shape.
Using The Wrong Brush
Choosing the wrong pastry brush affects how liquids spread on your dough or pastry. Brushes come with different bristle types and sizes. Using a stiff brush on delicate pastry can tear it. Soft brushes work best for gentle spreading.
- Use natural bristle brushes for egg washes and glazes.
- Use silicone brushes for thicker liquids like melted butter.
- Choose a size that fits your baking pan to cover surfaces evenly.
Neglecting Brush Care
Failing to clean and store your pastry brush properly causes damage and bacteria growth. Dirty brushes can ruin your food’s flavor and texture.
| Care Tip | Why It Matters |
|---|---|
| Clean brush immediately after use | Prevents dried food and stains |
| Use warm, soapy water for cleaning | Removes oils and residue |
| Air dry the brush fully before storing | Prevents mold and bad smells |
| Store in a dry place | Keeps bristles in good shape |
Applying Too Much Liquid
Adding too much liquid with a pastry brush can make your dough soggy. This leads to uneven baking and poor texture.
- Dip the brush lightly into the liquid.
- Tap off extra liquid before brushing.
- Apply thin, even layers instead of thick coats.
- Check the surface often to avoid pooling.
Enhancing Efficiency In The Kitchen
Using a pastry brush well helps save time and effort. It can make your cooking smoother and quicker.
Here are some tips to use your pastry brush better. They focus on saving time and keeping your tools ready.
Organizing Your Tools
Keep your pastry brush with other baking tools. Store it where you can reach it fast. Clean it right after use to avoid stuck dough or sauce.
- Use a container for brushes and small tools
- Hang brushes to dry after washing
- Label storage spots for easy access
- Keep brushes separate from sharp tools
Time-saving Tips
Use these ideas to cut down time with your pastry brush. Prepare brushes and sauces before baking starts.
- Have multiple brushes ready for different tasks
- Use a bowl with a wide rim for dipping the brush
- Brush quickly with broad strokes to cover large areas
- Clean brushes in warm water during breaks
Multi-tasking With Pastry Brushes
Your pastry brush can do more than one job. Use it for glazing, buttering, and cleaning crumbs.
| Task | How to Use the Pastry Brush |
| Glazing | Dip brush in glaze and spread evenly over pastry |
| Buttering | Brush melted butter on pans or dough before baking |
| Cleaning | Brush away crumbs from surfaces before cooking |
| Applying oil | Coat pans or grill racks with oil using the brush |
Credit: www.surlatable.com
Frequently Asked Questions
How Do You Clean A Pastry Brush Effectively?
To clean a pastry brush, rinse it under warm water immediately after use. Use mild soap and gently scrub the bristles. Rinse thoroughly to remove all soap residue. Dry the brush flat to prevent water from dripping into the handle, which could cause damage over time.
Can I Use A Pastry Brush For Oiling Pans?
Yes, a pastry brush is perfect for oiling pans. Dip the brush into your chosen oil and apply it evenly across the pan. This ensures an even coating, preventing food from sticking and promoting even cooking. Clean the brush thoroughly after use to maintain its effectiveness.
What’s The Best Material For Pastry Brush Bristles?
Silicone bristles are highly recommended for pastry brushes. They are heat-resistant, durable, and easy to clean. Unlike natural bristles, silicone doesn’t absorb odors or flavors. This makes them ideal for both baking and cooking tasks. Always choose high-quality silicone for the best performance.
How Can I Prevent Bristles From Shedding?
To prevent bristle shedding, choose high-quality brushes with securely anchored bristles. Avoid using excessive force during use and cleaning. Gently hand wash instead of using a dishwasher. Regular maintenance and proper storage will keep the bristles intact, ensuring your pastry brush lasts longer.
Conclusion
Using a pastry brush well makes baking easier and more fun. Choose the right brush for each task. Clean it gently to keep it in good shape. Apply liquids smoothly for even coverage. Practice often to improve your technique. These small steps help create better baked goods.
Enjoy the process and watch your skills grow. Baking with care shows in every bite. Keep these tips in mind for your next baking session. Simple habits lead to great results.