
Your kitchen exhaust fan works hard every day to keep your cooking space fresh and smoke-free. But when was the last time you gave it a proper clean?
A dirty exhaust fan can slow down airflow, cause unpleasant odors, and even become a fire hazard. If you want your kitchen to stay safe, fresh, and running smoothly, you need to know the right way to clean your exhaust fan.
Keep reading, and you’ll discover simple, effective tips that anyone can follow to keep your kitchen’s air clear and your fan in top shape. Don’t let grime take control—take charge with these easy cleaning tips!
Importance Of Cleaning Kitchen Exhaust Fans
Kitchen exhaust fans remove smoke, grease, and odors from cooking areas. Keeping them clean helps the fan work well.
Dirty exhaust fans can cause safety risks and reduce air quality in your kitchen. Cleaning them is very important.
Prevents Fire Hazards
Grease builds up inside the exhaust fan over time. This grease can catch fire if it gets too hot.
Regular cleaning removes grease and lowers the chance of a kitchen fire. It keeps your home safe.
Improves Air Quality
A clean exhaust fan removes smoke and odors better than a dirty one. This helps your kitchen air feel fresh.
When fans are dirty, they let harmful particles stay in the air. Cleaning stops these particles from spreading.
Increases Fan Efficiency
Dirt and grease block fan parts. This makes the fan work harder and use more energy.
Cleaning the fan keeps it running smoothly. It saves energy and can lower your electricity bills.
Extends Fan Lifespan
Regular cleaning stops damage caused by grease and dirt buildup. This keeps the fan parts in good shape.
A well-maintained fan lasts longer. You avoid spending money on repairs or new fans.
Maintains Kitchen Cleanliness
Dirty exhaust fans spread grease and dust in the kitchen. This makes surfaces sticky and hard to clean.
Cleaning the fan reduces dirt in the kitchen. It helps keep your cooking area neat and healthy.
Tools And Materials Needed
Cleaning your kitchen exhaust fan keeps your kitchen safe and fresh. Using the right tools makes the job easier and more effective.
Gather everything you need before you start. This saves time and helps you clean better.
Basic Cleaning Tools
Simple tools help remove grease and dust from your exhaust fan. Use items that you already have at home.
- Soft cloths or rags
- Old toothbrush or small brush
- Screwdriver to open fan cover
- Bucket or basin for soaking parts
- Protective gloves
Cleaning Solutions
Choose safe and strong cleaners to remove grease. Avoid harsh chemicals that can damage parts or harm you.
- Dish soap or degreaser
- Baking soda for stubborn grease
- White vinegar for natural cleaning
- Warm water to mix solutions
Additional Helpful Items
These extra tools make cleaning easier and protect your kitchen and yourself.
| Item | Purpose |
| Plastic bags | Cover fan parts during cleaning |
| Old newspapers | Protect counter or floor |
| Step stool | Reach high exhaust fans safely |
| Face mask | Prevent inhaling dust or fumes |
Safety Precautions
Cleaning your kitchen exhaust fan helps keep your kitchen safe and clean. It removes grease and dirt that can cause fires. Follow safety steps to protect yourself and your home.
Use the right tools and protect your hands and eyes. Turn off power to avoid accidents. These precautions make cleaning easier and safer.
Turn Off The Power
Always switch off the power before cleaning the exhaust fan. Unplug the fan or turn off the circuit breaker. This stops the fan from running during cleaning and prevents electric shocks.
Wear Protective Gear
- Wear gloves to protect your hands from grease and sharp edges.
- Use safety goggles to keep dust and debris out of your eyes.
- Wear a face mask if you are sensitive to dust or strong cleaning chemicals.
Use Safe Cleaning Products
Choose cleaning products that are safe for home use. Avoid harsh chemicals that produce strong fumes. Read labels to check for warnings and follow instructions carefully.
Handle Parts Carefully
| Part | Safety Tip |
| Fan blades | Clean gently to avoid bending or breaking |
| Filter | Remove carefully to prevent grease spills |
| Electrical wires | Do not touch with wet hands |
| Cover and screws | Keep track to avoid losing parts |
Preparation Steps
Cleaning your kitchen exhaust fan is important for safety and efficiency. Proper preparation makes the job easier and safer.
Before you start, take some time to prepare. This helps avoid accidents and ensures you have everything you need.
Turn Off Power
Always turn off the power to the exhaust fan before cleaning. This stops the fan from turning on by accident.
Find the switch or circuit breaker that controls the fan. Switch it off to cut power completely.
Gather Supplies
Collect all cleaning tools and materials before starting. This saves time and keeps you organized.
- Soft cloths or sponges
- Mild detergent or degreaser
- Warm water
- Bucket or bowl
- Screwdriver (if needed to remove parts)
- Protective gloves
- Step stool or ladder
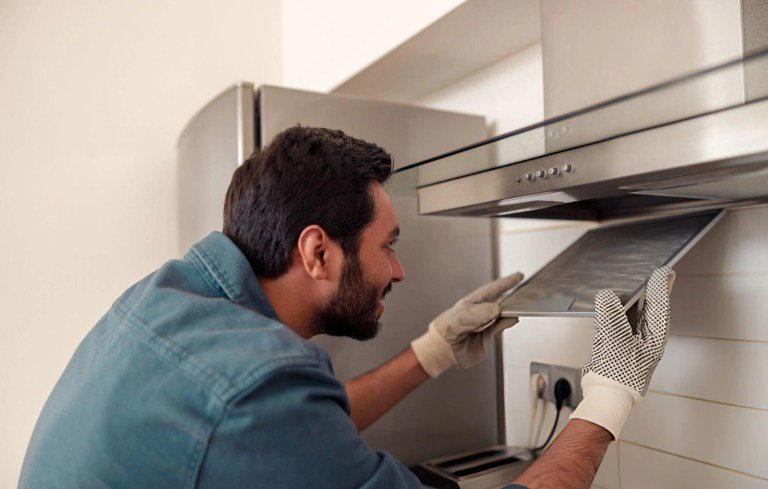
Removing The Exhaust Fan
Cleaning your kitchen exhaust fan is important for safety and efficiency. The first step is removing the fan carefully. This makes cleaning easier and more effective.
Before you start, turn off the power to avoid accidents. Use a sturdy ladder if the fan is high up. Now you can begin detaching the parts.
Detach The Cover
The cover protects the fan and collects grease. Removing it helps you reach the blades and inner parts. Usually, the cover is held by screws or clips.
Use a screwdriver to remove screws carefully. Keep the screws in a safe place to avoid losing them. If clips hold the cover, press or slide them gently to release.
- Turn off the power supply first
- Use a screwdriver for screws
- Press clips gently to unlock
- Keep screws in a safe place
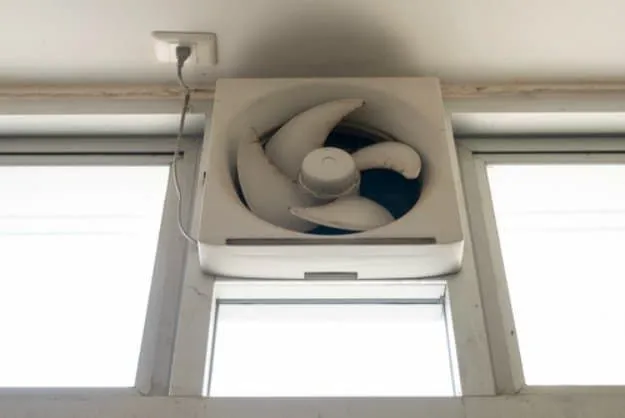
Take Out The Fan Blades
Fan blades collect dust and grease. Removing them allows a deep clean. Look for screws or nuts that hold the blades in place.
Use the right tool to unscrew the blades carefully. Hold the blades firmly while removing. Place the blades on a soft surface to prevent damage.
- Identify screws or nuts holding the blades
- Use a screwdriver or wrench
- Hold blades steady while loosening
- Place blades on a soft cloth

Credit: www.familyhandyman.com
Cleaning The Fan Components
Cleaning the kitchen exhaust fan helps keep your kitchen safe and fresh. Dirt and grease build up on the fan parts over time. Regular cleaning stops bad smells and fire risks.
Focus on three main parts: the cover, fan blades, and motor housing. Each part needs different care to clean well.
Soak And Scrub The Cover
Remove the cover carefully from the exhaust fan. Soak it in warm, soapy water for 15 to 20 minutes. This loosens grease and dirt stuck on the surface.
Use a soft brush or sponge to scrub the cover. Clean all corners and vents well. Rinse with clean water and dry before putting it back.
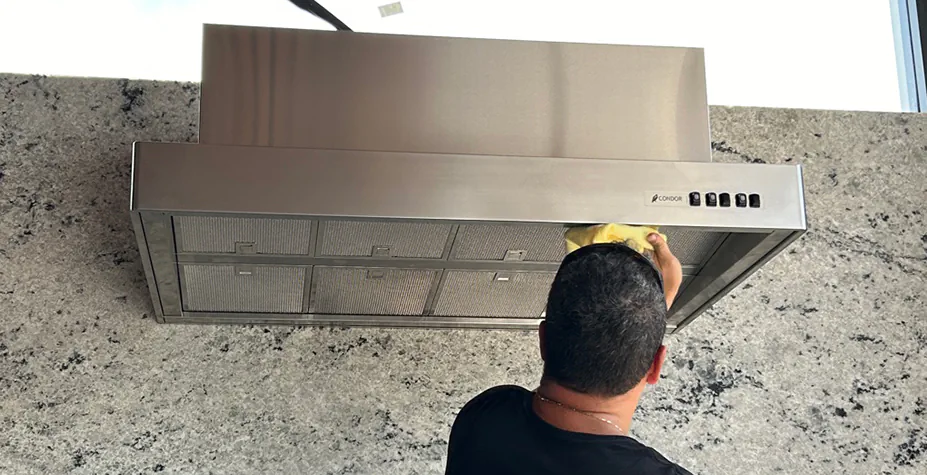
Wipe Down The Fan Blades
Turn off power to the fan before cleaning the blades. Use a damp cloth with mild detergent to wipe each blade. Remove all grease and dust carefully.
Dry the blades with a clean cloth. Avoid bending or damaging the blades as you clean.
Degrease The Motor Housing
Spray a degreaser on the motor housing surface. Let it sit for a few minutes to break down grease. Use a cloth to wipe the housing clean.
Do not spray degreaser directly into motor vents. Protect electrical parts from moisture during cleaning.
Reassembling The Exhaust Fan
After cleaning the kitchen exhaust fan, put it back together carefully. This helps your fan work well and last longer. Follow simple steps to reassemble the parts safely.
Make sure each part fits correctly. Take your time to avoid damage or loose pieces.
Reattach The Blades
Clean fan blades should be reattached firmly to the motor shaft. Check that each blade is free of dirt before fixing it in place.
- Align the blade holes with the motor shaft screws.
- Place each blade carefully to avoid bending.
- Tighten the screws with a screwdriver until secure.
- Spin the blades gently to check for smooth movement.
- Adjust if any blade wobbles or is loose.
Secure The Cover
The cover protects the fan and keeps it safe from dust. Attach the cover only after the blades are fixed properly.
| Cover Part | How to Secure | Check |
|---|---|---|
| Front grill | Snap it into the slots on the fan housing | Ensure it clicks into place |
| Screws | Tighten with a screwdriver to hold the cover | Do not overtighten to avoid cracks |
| Filters (if any) | Place inside the cover before securing | Confirm filters fit well and are clean |
Credit: www.nobroker.in
Maintenance Tips For Long-term Cleanliness
Keeping your kitchen exhaust fan clean helps it work better and last longer. Dirt and grease buildup can slow it down and cause smells.
Follow simple cleaning habits to maintain a fresh and safe kitchen environment. Regular care stops tough grease and grime from forming.
Regular Cleaning Schedule
Set a cleaning routine to keep the exhaust fan in good shape. Clean the fan and filters on time to avoid heavy grease layers.
- Turn off the power before cleaning the fan.
- Remove and soak the filters in warm, soapy water weekly.
- Wipe the fan blades and cover with a damp cloth every two weeks.
- Check the exhaust vent monthly for blockages or dust.
- Deep clean the entire system every three months.
Using Natural Degreasers
Natural degreasers clean grease without harsh chemicals. They are safe for your kitchen and the environment.
| Natural Degreaser | How to Use | Benefits |
|---|---|---|
| White Vinegar | Mix equal parts vinegar and water. Spray on greasy areas, wait 10 minutes, then wipe. | Removes grease and kills bacteria. |
| Baking Soda | Make a paste with water. Apply on stains, scrub gently, then rinse. | Gentle abrasive that lifts grease. |
| Lemon Juice | Apply fresh lemon juice on greasy spots. Let sit for 5 minutes, then wipe clean. | Natural acid breaks down oil and leaves fresh scent. |
Troubleshooting Common Issues
Kitchen exhaust fans help keep your kitchen air clean and fresh. Sometimes, they can face problems that affect their work.
Knowing how to find and fix these problems saves time and keeps your fan running well.
Fan Noise Problems
Loud or strange noises often mean the fan needs cleaning or repair. Dirt and grease can build up on the blades and motor.
- Check for loose screws or parts that may rattle.
- Clean the fan blades carefully to remove grease.
- Lubricate the motor if it sounds squeaky.
- Replace worn-out parts to stop knocking sounds.
Reduced Suction
If the fan is not pulling air well, dirt or blockages might be the cause. Filters or ducts can get clogged and reduce airflow.
| Cause | How to Fix |
| Dirty or clogged filter | Remove and clean or replace the filter |
| Blocked ducts | Check ducts and clear any obstructions |
| Fan blades coated with grease | Clean blades with a degreaser |
| Damaged fan motor | Call a technician for repair or replacement |
Credit: www.sydneyrangehoods.com.au
Frequently Asked Questions
How Often Should I Clean My Kitchen Exhaust Fan?
You should clean your kitchen exhaust fan every 3 to 6 months. Regular cleaning prevents grease buildup, improves air quality, and ensures efficient operation. If you cook frequently or use a lot of oil, clean it more often to avoid fire hazards and maintain performance.
What Tools Are Needed For Cleaning Exhaust Fans?
Common tools include a screwdriver, degreaser, warm water, a soft brush, and a cloth. You may also need gloves and a vacuum cleaner. These tools help safely remove and clean the fan blades, filters, and surrounding areas without damaging the unit.
Can I Clean The Exhaust Fan Without Removing It?
Yes, you can clean the exhaust fan without removal by wiping the exterior and filters. Use a degreaser and a damp cloth to clean accessible parts. However, deep cleaning requires disassembly to remove stubborn grease and dirt effectively.
Is It Safe To Use Chemical Cleaners On Exhaust Fans?
Use mild, non-abrasive chemical cleaners designed for kitchen grease. Avoid harsh chemicals that can damage the fan components. Always follow the product instructions and ensure good ventilation while cleaning to protect yourself and the fan.
Conclusion
Cleaning your kitchen exhaust fan keeps your kitchen safe and fresh. Regular cleaning stops grease buildup and bad smells. It also helps your fan work well and last longer. Use simple tools and safe cleaners for best results. Take time every few weeks to clean it right.
A clean fan means a cleaner kitchen and healthier air. Keep these tips in mind for easy, effective cleaning. Your kitchen will thank you.