
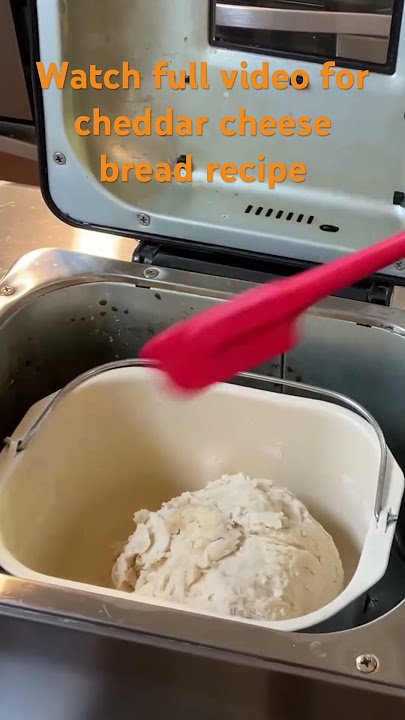
Are you ready to enjoy fresh, homemade bread without the hassle? Using a bread maker can seem tricky at first, but once you know the right steps, it’s simple and rewarding.
Imagine waking up to the smell of warm, soft bread made by your own hands. In this guide, you’ll discover easy tips and tricks to use your bread maker properly, avoid common mistakes, and get perfect results every time. Keep reading, and soon you’ll be baking delicious bread that your whole family will love.
Choosing The Right Ingredients
Using the right ingredients is key to baking good bread with a bread maker. Each component affects the dough and final loaf.
Careful selection helps ensure your bread has the perfect texture and flavor every time you bake.
Selecting Quality Flour
Flour is the main ingredient in bread. Choose flour that suits the type of bread you want to bake. Bread flour has more protein for strong gluten. All-purpose flour works for softer bread.
- Use bread flour for chewy texture
- Choose all-purpose flour for soft bread
- Avoid flour that is old or damp
- Store flour in a cool, dry place
The Importance Of Fresh Yeast
Yeast makes the dough rise. Fresh yeast ensures good fermentation and better bread volume. Old yeast may not work well, causing dense bread.
| Type of Yeast | Storage | Use By |
| Active Dry Yeast | Cool, dry place | Check expiration date |
| Instant Yeast | Cool, dry place | Use within 1 year unopened |
| Fresh Yeast | Refrigerate | Use within 2 weeks |
Adding Liquids And Fats
Liquids like water or milk hydrate the flour and help activate the yeast. Fats like butter or oil add softness and flavor to bread.
Here are tips for adding liquids and fats:
- Use warm liquids to help yeast activate.
- Measure liquids accurately to get correct dough consistency.
- Choose fats like butter for richer taste or oil for lighter texture.
- Do not add too much fat, or bread may not rise well.

Credit: www.yahoo.com
Understanding Bread Maker Functions
A bread maker is a handy kitchen machine that mixes, kneads, and bakes bread. It has different settings to help you make many types of bread at home.
Knowing how each function works helps you get the best results. This guide explains the main features and how to use them well.
Basic Settings Explained
Most bread makers have basic settings for bread types like white, whole wheat, or gluten-free. These settings adjust the time and temperature for each bread kind.
You can also find options for crust color, loaf size, and baking only. These help you customize the bread to your taste.
- Bread type: Choose based on the flour used
- Crust color: Light, medium, or dark crust
- Loaf size: Small, medium, or large loaf
- Bake only: Use if dough is ready to bake
Customizing Kneading And Baking Cycles
You can change how long the bread maker kneads the dough. Longer kneading makes the dough stretchier and helps gluten develop.
Baking time can also be adjusted. Some recipes need shorter or longer baking to get the right texture and color.
- Short kneading: For softer dough and cakes
- Long kneading: For chewy breads with strong gluten
- Short baking: For softer crust
- Long baking: For crispier crust
Utilizing Delay Timers
Delay timers let you set the bread maker to start later. This way, fresh bread is ready when you want it.
Use delay timers for planning bread baking overnight or during work hours. Make sure to add ingredients in the right order and check freshness.
- Set delay time before starting the machine
- Add ingredients in correct order: liquids first, then dry
- Use fresh yeast for best results with delay
- Keep ingredients cool to avoid early fermentation
Preparing The Bread Maker
Using a bread maker starts with good preparation. Getting the machine ready helps bake better bread.
Follow simple steps to prepare your bread maker before adding ingredients. This saves time and prevents problems.
Preheating The Machine
Some bread makers need preheating to work well. Check your manual to see if yours does.
Preheating warms the baking pan and helps the dough rise evenly. It also improves the crust.
- Plug in the machine and turn it on
- Set it to the preheat or warm mode, if available
- Wait 5 to 10 minutes before adding ingredients
- Do not overheat to avoid damage
Proper Placement Of Ingredients
Place ingredients in the bread maker in the right order. This helps the machine mix and bake correctly.
Usually, liquids go first, then dry ingredients. Yeast should be last and kept away from salt and water.
- Pour water or milk into the pan first
- Add sugar and salt on top of liquids
- Put flour next, covering the liquids
- Make a small well in the flour for the yeast
- Add yeast last, without letting it touch liquids
Maintenance And Cleaning Tips
Clean your bread maker after every use. This keeps it working well and stops old smells.
Remove the baking pan and kneading blade for washing. Use warm soapy water and dry them fully.
- Unplug the machine before cleaning
- Wipe the outside with a damp cloth
- Do not soak the main unit in water
- Check and clean the kneading blade carefully
- Store the machine in a dry place
Credit: www.towerhousewares.co.uk
Troubleshooting Common Issues
Using a bread maker can sometimes lead to unexpected problems. Understanding simple fixes helps you bake better bread every time.
This guide covers common issues like dense loaves, bread sticking, and changes caused by altitude or humidity.
Dealing With Dense Loaves
Dense bread often means the dough did not rise properly or the ingredients were off. Check your yeast freshness and measure ingredients carefully.
- Use fresh yeast and check expiration dates.
- Measure flour and liquids with a kitchen scale.
- Make sure the water temperature is between 105°F and 115°F (40°C to 46°C).
- Do not add too much flour; dough should be slightly sticky.
- Allow the bread maker to complete the full cycle.
Preventing Bread From Sticking
Bread sticking to the pan can ruin your loaf. Proper preparation and maintenance prevent this problem.
| Cause | Solution |
|---|---|
| Pan not greased | Lightly grease the pan with oil or butter before adding ingredients. |
| Old or damaged non-stick coating | Replace the bread pan if the coating is scratched or worn out. |
| Dough too wet | Reduce liquid slightly or add a bit more flour. |
| Removing bread too soon | Let the bread cool 10 minutes before removing from the pan. |
Adjusting For Altitude Or Humidity
High altitude or humid weather can affect bread texture and rising times. Adjust ingredients and settings to get good results.
Try these tips:
- At high altitude, reduce yeast slightly and increase liquid by 1-2 tablespoons.
- In humid weather, add a little extra flour to balance moisture.
- Use less sugar and salt at high altitude to improve rise.
- Choose a longer rising cycle if your bread maker allows it.
Enhancing Bread Flavor And Texture
Using a bread maker is easy and fun. You can make bread taste better and feel softer. Small changes can make your bread special.
Adding different ingredients helps improve flavor and texture. Try herbs, nuts, seeds, and sweeteners to make your bread unique.
Incorporating Herbs And Spices
Herbs and spices add fresh and warm flavors to your bread. Use them in small amounts to avoid overpowering the dough.
- Rosemary gives a pine-like aroma and taste.
- Thyme adds a subtle earthy flavor.
- Oregano works well for Italian-style bread.
- Cinnamon adds sweet warmth to sweet breads.
- Garlic powder gives a savory punch.
Using Nuts And Seeds
Nuts and seeds add crunch and richness. They also increase the bread’s nutritional value. Add them at the right time for best results.
| Type | Flavor | Texture |
| Walnuts | Earthy and slightly bitter | Crunchy |
| Sunflower Seeds | Nutty and mild | Crunchy |
| Flaxseeds | Nutty and subtle | Soft to crunchy |
| Poppy Seeds | Mildly nutty | Crunchy |
| Almonds | Sweet and nutty | Crunchy |
Experimenting With Sweeteners
Sweeteners change the bread’s taste and color. Some add moisture, others add crispness to the crust.
Try these sweeteners and their effects:
- Honey:Adds moisture and a floral sweetness.
- Molasses:Gives a deep, rich flavor and dark color.
- Maple Syrup:Adds mild sweetness and a nice aroma.
- Brown Sugar:Creates a soft crumb and caramel notes.
- Agave Nectar:Provides sweetness without strong flavor.
Credit: www.cnn.com
Storing And Serving Bread
Using a bread maker is easy, but storing and serving bread correctly keeps it fresh. Proper care helps you enjoy your bread longer.
Learn the best ways to store, reheat, and serve bread from your bread maker. These tips keep your bread soft and tasty.
Optimal Storage Techniques
Store bread in a cool, dry place to keep it fresh. Avoid the fridge because it makes bread dry faster.
Use airtight containers or bread boxes to keep moisture and air out. Wrap bread in cloth or paper for better breathability.
- Use a bread box or airtight container
- Wrap bread in a clean cloth or paper bag
- Keep bread away from heat and sunlight
- Avoid refrigerating to prevent dryness
Reheating And Refreshing Bread
Reheat bread to bring back its soft texture. Use an oven or toaster for best results.
To refresh stale bread, sprinkle water on the crust and warm it briefly in the oven. This adds moisture and softness.
- Heat bread in a 350°F (175°C) oven for 5–10 minutes
- Use a toaster for sliced bread
- Spray or sprinkle water on stale bread before warming
- Avoid microwaving; it can make bread tough
Creative Serving Ideas
Serve bread with different toppings and spreads for variety. Simple ideas make bread more enjoyable.
Use bread for sandwiches, toast, or as a side for soups and salads. Add herbs, cheese, or fruits for new flavors.
- Top with butter, jam, or honey
- Make grilled cheese or veggie sandwiches
- Serve with soups, stews, or salads
- Add garlic and herbs for flavorful toast
Frequently Asked Questions
How Do I Choose The Right Bread Maker Settings?
Select settings based on your recipe and bread type. Use preset modes for white, whole wheat, or gluten-free bread. Adjust crust color and loaf size as needed for best results. Always refer to your bread maker’s manual for specific guidelines.
What Ingredients Are Essential For Bread Maker Use?
Use fresh flour, yeast, water, salt, and sugar. Avoid expired yeast for proper rising. Measure ingredients accurately for consistent results. Additional ingredients like nuts or seeds can be added according to the recipe.
How To Clean A Bread Maker After Use?
Unplug the machine and let it cool. Remove the bread pan and kneading paddle. Wash them with warm, soapy water and dry thoroughly. Wipe the interior with a damp cloth. Never immerse the bread maker base in water.
Can I Use Homemade Dough In A Bread Maker?
Yes, you can use homemade dough. Place the dough in the bread pan and select the baking cycle. Avoid using the kneading or rising cycles if dough is already prepared. This saves time and still yields fresh bread.
Conclusion
Using a bread maker is simple and fun. Follow the steps carefully for best results. Measure ingredients well and choose the right settings. Clean your machine after each use to keep it working. Practice makes perfect; try different recipes and enjoy fresh bread.
Baking at home saves money and tastes better. Your bread maker can help you eat healthier. Now, you can bake fresh bread anytime with ease. Happy baking!