
Are you ready to make cooking rice easier and smarter? Setting up a smart rice cooker can save you time, improve your meals, and take the guesswork out of cooking.
But if you’re unsure where to start, you’re in the right place. This guide will walk you through every simple step to get your smart rice cooker ready and working perfectly for you. By the end, you’ll be cooking fluffy, delicious rice with just the touch of a button.
Keep reading to unlock the full potential of your smart kitchen helper!

Credit: goosed.ie
Choosing The Right Smart Rice Cooker
Smart rice cookers make cooking rice easier and more precise. Picking the right one helps you cook better rice every time.
Look for features that fit your cooking style and kitchen needs. This guide helps you find the best smart rice cooker.
Consider The Capacity
Rice cookers come in different sizes. Choose a size that matches how much rice you usually cook.
Small cookers are good for one or two people. Larger cookers fit families or gatherings.
- 3 cups or less for 1-2 people
- 4 to 6 cups for small families
- 7 cups or more for large families
Check The Cooking Functions
Smart rice cookers offer many cooking modes. Pick one with functions you will use often.
Some cookers can cook different types of rice or steam vegetables. Others have timers and keep-warm features.
- White, brown, sushi rice settings
- Steaming and slow cooking options
- Delay timer and keep warm mode
Look For Easy-to-use Controls
Choose a cooker with simple buttons and a clear display. This makes cooking easier and faster.
Some models have touchscreens or smartphone apps for remote control. Pick what feels comfortable for you.
- Large, readable display
- Simple buttons or touch control
- Smartphone app compatibility (optional)
Consider The Build Quality
Look for a rice cooker made with sturdy materials. It should last long and be easy to clean.
Non-stick inner pots help prevent rice from sticking. Removable lids make cleaning easier.
- Durable outer shell
- Non-stick inner pot
- Removable and washable lid
Check The Price And Warranty
Set a budget before choosing a smart rice cooker. Prices vary based on features and brand.
Also, check the warranty period. A longer warranty shows the brand’s confidence in their product.
- Compare prices for similar features
- Look for at least one-year warranty
- Consider customer service reputation
Unboxing And Initial Setup
Setting up a smart rice cooker is easy. Begin by carefully unboxing the device and its accessories.
Taking the time to check and clean the parts will help your cooker work well from the start.
Inspecting The Components
After unboxing, look at each component closely. Make sure nothing is missing or damaged.
Common parts include the main cooker, inner pot, power cord, measuring cup, and spatula.
- Main rice cooker unit
- Inner cooking pot
- Power cord
- Measuring cup
- Rice spatula or spoon
- User manual
Cleaning Before First Use
Clean the inner pot and accessories before using the cooker. This removes dust and packaging residue.
Use warm water and mild soap. Rinse and dry all parts well before assembly.
- Wash the inner pot gently with a soft sponge
- Clean the spatula and measuring cup
- Wipe the outer cooker with a dry cloth only
- Do not soak the main unit or power cord
Understanding Key Features
Smart rice cookers come with many useful features. These features make cooking easier and more precise.
Knowing these key features helps you use the cooker well. It also helps you choose the right model for your kitchen.
Wi-fi And Bluetooth Connectivity
Many smart rice cookers connect to Wi-Fi or Bluetooth. This lets you control the cooker from your phone or tablet.
You can start cooking, change settings, or get alerts without being near the cooker.
- Remote control via app
- Receive cooking notifications
- Update cooker software easily
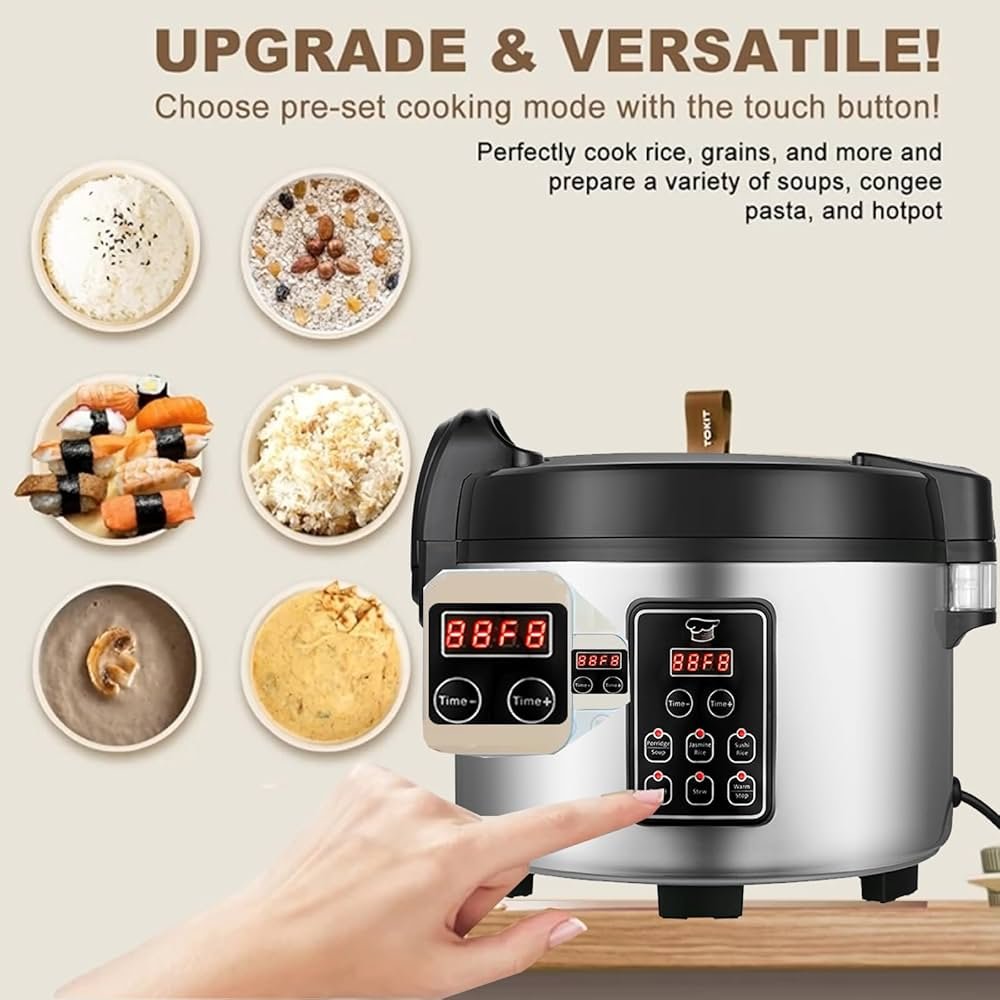
Preset Cooking Modes
Smart rice cookers have preset cooking modes for different rice types. Each mode adjusts time and temperature automatically.
This makes cooking simple and consistent. You do not need to guess the right settings.
- White rice mode
- Brown rice mode
- Sushi rice mode
- Quick cooking mode
- Keep warm function
Voice Control Options
Some smart rice cookers work with voice assistants. You can start or stop cooking with simple voice commands.
This hands-free control is helpful when your hands are busy. It makes cooking more convenient and safe.
- Works with Alexa, Google Assistant
- Control cooking without touching buttons
- Check cooking status by voice
Connecting To A Smart Device
Smart rice cookers make cooking easier by connecting to your phone. You can control settings and monitor cooking remotely.
To get started, you must connect your rice cooker to a smart device. This guide explains how to do that step by step.
Downloading The Required App
Most smart rice cookers need a special app to work with your phone. Find the app in your phone’s app store.
Search the app by the rice cooker brand or model. Download and install it on your smartphone.
- Open Google Play Store or Apple App Store
- Type the rice cooker brand in the search bar
- Select the official app and tap Install
- Wait for the app to download and install
- Open the app after installation
Syncing With Your Smartphone
After installing the app, turn on your rice cooker’s Wi-Fi or Bluetooth. The app will guide you to connect the devices.
Follow the app instructions to pair your phone with the rice cooker. This usually takes a few minutes.
- Open the rice cooker app
- Enable Wi-Fi or Bluetooth on your phone
- Put the rice cooker in pairing mode
- Choose the rice cooker from the app’s device list
- Confirm the connection on both devices
- Test the connection by using the app controls
Configuring Cooking Settings
Smart rice cookers allow you to customize settings for perfect rice every time. Adjusting these settings helps you cook different rice types properly.
Learning how to configure your cooker’s settings can improve the taste and texture of your rice.
Selecting The Right Rice Type
Most smart rice cookers let you choose the rice type before cooking. This setting changes the cooking time and temperature to fit each rice type.
Common rice types include white rice, brown rice, jasmine, and sushi rice. Pick the type that matches your ingredients for best results.
- White rice cooks quickly and needs less water.
- Brown rice takes longer and needs more water.
- Jasmine rice is soft and fragrant, cooked with medium heat.
- Sushi rice requires careful temperature control for stickiness.
Adjusting Cooking Time And Temperature
You can manually change cooking time and temperature on many smart rice cookers. This helps you get the texture you want.
Longer cooking time and higher temperature can make rice softer. Shorter time and lower heat keep it firm and fluffy.
- Increase time for harder rice types like brown rice.
- Lower temperature for delicate rice like jasmine.
- Use preset options if unsure about manual adjustments.
- Test small batches to find your preferred settings.

Credit: www.amazon.com
Setting Up Voice Commands
Smart rice cookers can be controlled by voice commands. This feature makes cooking easier and hands-free.
Setting up voice commands lets you start, stop, or check cooking progress with your voice.
Enabling Smart Assistant Integration
First, connect your rice cooker to a smart assistant like Alexa or Google Assistant. Use the rice cooker’s app to link the devices.
Make sure both devices are on the same Wi-Fi network. This helps them communicate smoothly.
- Open the rice cooker app
- Find the smart assistant settings
- Sign in to your smart assistant account
- Allow permissions to control the rice cooker
- Test by saying a simple command
Creating Custom Commands
You can create custom voice commands for specific cooking tasks. This lets you use words that feel natural.
Use the smart assistant’s app to add or change commands. Name your commands clearly to avoid confusion.
- Open the smart assistant app
- Go to custom commands or routines
- Add a new command for your rice cooker
- Set the command phrase and action
- Save and test the custom command
Troubleshooting Common Issues
Smart rice cookers can make cooking easier. Sometimes, they may not work as expected. Knowing how to fix common problems helps you use your cooker better.
This guide covers two common issues: connectivity problems and error messages. Follow the tips to solve these issues quickly.
Connectivity Problems
Your smart rice cooker connects to Wi-Fi or Bluetooth. If it cannot connect, you may lose app control or updates. Check your network and device settings first.
Try these steps to fix connectivity problems:
- Make sure your phone and cooker are on the same Wi-Fi network.
- Restart your router and rice cooker.
- Turn Bluetooth off and on again on your phone.
- Update the cooker’s app to the latest version.
- Check if the cooker’s firmware needs an update.
- Move closer to the router to improve signal strength.
- Reset the network settings on the cooker if needed.
Error Messages And Solutions
Smart rice cookers show error messages on the display or app. These messages help you find what is wrong. Read the message carefully to fix the issue.
Common error messages and fixes include:
- E1 or Water Level Low:Add water to the inner pot.
- E2 or Lid Not Closed:Close the lid firmly and restart.
- E3 or Temperature Error:Check if the heating plate is clean and dry.
- E4 or Sensor Problem:Turn off the cooker and unplug it for 5 minutes.
- App Connection Error:Restart the app and ensure your phone’s internet works.
Maintenance And Care Tips
Keeping your smart rice cooker clean and safe is important. Good care helps it last longer.
Follow simple steps to maintain your cooker. This keeps it working well every time you cook.
Regular Cleaning Routine
Clean your rice cooker after each use. Remove leftover rice and wipe all parts carefully.
Use warm water and a soft cloth or sponge. Avoid harsh chemicals that can damage the surface.
- Unplug the cooker before cleaning
- Wash the inner pot with mild soap
- Wipe the lid and outer body gently
- Clean the steam vent to prevent blockages
- Dry all parts completely before reassembling
Storing Your Cooker Safely
Store your rice cooker in a dry place. Keep it away from moisture and heat sources.
Make sure all parts are dry before putting the cooker away. This prevents mold and rust.
- Store with the lid slightly open for airflow
- Keep the power cord untangled and safe
- Place the cooker where it will not be knocked over
- Cover it with a cloth to keep dust off
Exploring Advanced Features
Smart rice cookers have many features to make cooking easier. These features help you cook rice perfectly every time.
Learning how to use these advanced functions will save time and improve your meals.
Using Delayed Start Function
The delayed start lets you set a time to begin cooking later. This is great if you want fresh rice ready at mealtime.
You can prepare the ingredients early and choose when the cooker will start. This way, rice is hot and fresh when you want it.
- Choose the delayed start option on the control panel
- Set the time to start cooking
- Make sure rice and water are inside the cooker
- The cooker will start automatically at the set time
Exploring Recipe Suggestions
Many smart rice cookers offer built-in recipe suggestions. These recipes help you cook different meals beyond plain rice.
Recipes guide you on ingredients and cooking settings. You can try dishes like porridge, steamed vegetables, or mixed rice.
- Browse recipes using the cooker’s display screen
- Select a recipe that fits your meal plan
- Follow the instructions for ingredient amounts
- The cooker adjusts temperature and time automatically

Credit: www.youtube.com
Frequently Asked Questions
How Do I Connect A Smart Rice Cooker To Wi-fi?
To connect, turn on the rice cooker and enable its Wi-Fi mode. Use the companion app on your smartphone to find the device, then enter your home Wi-Fi details. Follow the app’s instructions to complete the setup and ensure a stable connection.
Can I Control Smart Rice Cookers With My Phone?
Yes, most smart rice cookers come with an app for remote control. You can start, stop, and monitor cooking from your phone. This feature adds convenience and allows you to manage cooking schedules even when away from home.
What Types Of Rice Can Smart Cookers Handle?
Smart rice cookers can cook various rice types, including white, brown, jasmine, and sushi rice. They adjust cooking time and temperature automatically for perfect results. Always check your model’s specifications for specific rice compatibility.
How Do I Clean A Smart Rice Cooker Safely?
Unplug the cooker and let it cool before cleaning. Remove the inner pot and wash it with mild detergent. Wipe the exterior and control panel gently with a damp cloth. Avoid submerging the main unit in water to prevent damage.
Conclusion
Setting up a smart rice cooker is simple and quick. Follow the steps carefully for the best results. Clean the cooker and add the right amount of rice and water. Use the control panel to select the cooking mode. Wait for the cooker to finish, then enjoy perfectly cooked rice.
Smart rice cookers save time and effort in the kitchen. Try different settings to find what you like best. Cooking rice has never been this easy and convenient. Start using your smart rice cooker today for tasty meals.