
Are you tired of cluttered cabinets and hard-to-reach items? Setting up pull-out storage systems can transform your space, making everything easier to find and use.
Imagine opening a drawer and having all your essentials neatly organized and right at your fingertips. In this guide, you’ll learn simple steps to install pull-out storage that fits your needs perfectly. Keep reading to discover how you can maximize your storage space and enjoy a more organized, stress-free home.

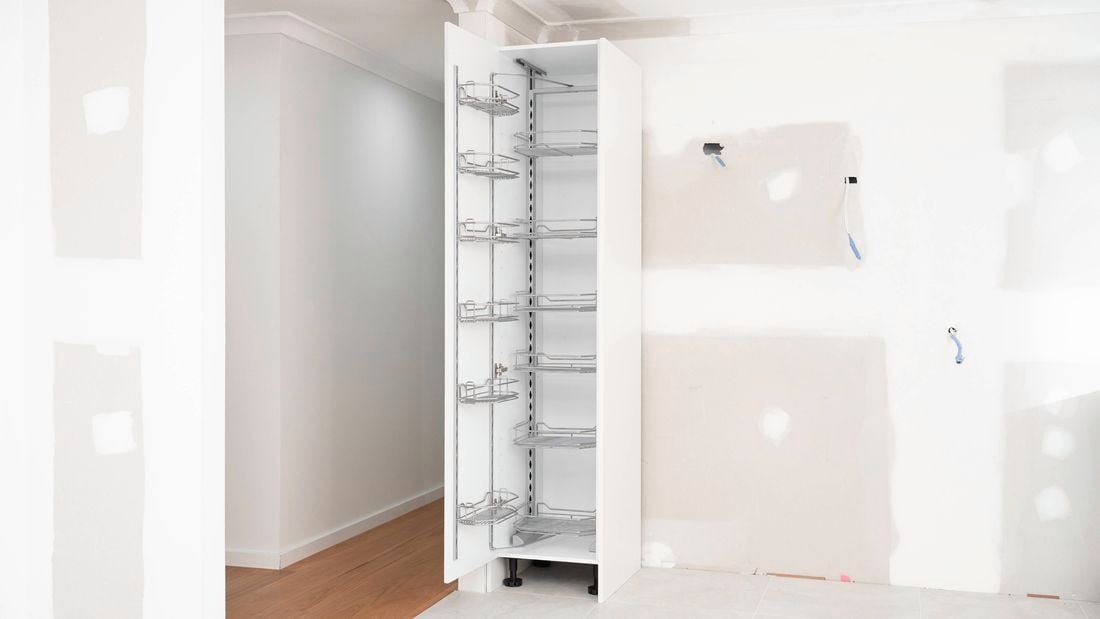
Credit: www.youtube.com
Choosing The Right Pull-out Storage
Pull-out storage systems help organize kitchens, closets, or bathrooms. They save space and make items easy to reach.
Choosing the right system depends on your needs and space. This guide covers key points to help you decide.
Types Of Pull-out Systems
There are many pull-out storage types. Each fits different storage needs and spaces.
- Pull-out shelves: Easy to slide and store boxes or jars
- Pull-out baskets: Wire baskets that hold fruits or clothes
- Pull-out racks: Designed for spices, cans, or bottles
- Pull-out trash bins: Hide garbage in cabinets
- Pull-out pantry units: Tall units for extra food storage
Measuring Your Space
Measure your cabinet or closet space carefully. Accurate measurements help find storage that fits well.
Measure width, height, and depth inside the space. Note any obstacles like pipes or hinges.
- Use a tape measure for exact numbers
- Write down all measurements
- Check for clearance when pull-out is fully extended
- Consider door swing space if needed
Material And Finish Options
Materials affect the look and durability of pull-out storage. Choose materials that match your room style.
Common materials include wood, metal, and plastic. Finishes can be natural, painted, or coated.
- Wood: Warm look, strong, may need more care
- Metal: Durable, modern style, easy to clean
- Plastic: Lightweight, affordable, good for wet areas
- Finish options: Matte, glossy, or textured
Tools And Materials Needed
Setting up pull-out storage systems requires the right tools and materials. This helps the installation go smoothly and safely.
Knowing what to prepare before starting saves time and effort. This guide lists what you need for a good setup.
Essential Tools Checklist
You need some basic tools to install pull-out storage. These help measure, cut, and fix parts properly.
- Measuring tape for exact dimensions
- Pencil to mark spots
- Power drill with drill bits
- Screwdriver set (flathead and Phillips)
- Level to keep storage even
- Hammer for minor adjustments
- Stud finder to locate wall supports
Recommended Hardware
You also need the right hardware to hold the storage securely. Choose parts that fit your cabinet size and weight needs.
- Pull-out drawer slides or runners
- Screws and bolts matching the slides
- Mounting brackets for extra support
- Drawer boxes or baskets
- Soft-close mechanisms (optional)
Safety Gear
Safety gear protects you during installation. Always wear protection to avoid injuries from tools and materials.
- Safety glasses to protect eyes
- Work gloves to protect hands
- Dust mask if drilling or sanding
- Ear protection if using loud power tools
Preparing The Installation Area
Setting up pull-out storage systems can make your space more organized. Before installing, you need to prepare the area properly.
Preparation ensures that your storage system fits well and functions smoothly. Follow these steps to get started.
Clearing And Cleaning
First, remove all items from the installation area. This makes sure you have enough space to work.
After clearing the area, clean it thoroughly. Dust and dirt can interfere with the installation.
- Use a vacuum to remove dust
- Wipe surfaces with a damp cloth
- Ensure the floor is dry before proceeding
Checking For Obstacles
Look for obstacles like pipes or wires in the installation area. Obstacles can prevent proper fitting.
If you find obstacles, make a plan to work around them. This might include changing the location slightly.
- Identify any wires or pipes
- Plan the installation around these obstacles
- Consider consulting a professional if needed
Marking Measurements
Use a measuring tape to mark where the storage system will go. Accurate measurements help in a smooth installation.
Mark the width, height, and depth of the space. Double-check your measurements to avoid mistakes.
- Measure the width, height, and depth
- Mark these measurements with a pencil
- Ensure all lines are straight and visible

Credit: letsfoodie.com
Step-by-step Installation Guide
Setting up a pull-out storage system can save space and keep your area organized. This guide will help you install it correctly.
Follow each step carefully to make sure your storage system works smoothly and lasts a long time.
Assembling The Frame
Start by laying out all frame parts on a flat surface. Check that you have all screws, panels, and brackets needed.
Connect the frame pieces using screws or bolts. Use a screwdriver or drill to tighten them securely. Make sure the frame is square and stable.
- Lay out all frame components
- Use screws or bolts to connect parts
- Check the frame is square and stable
Attaching Slides And Rails
Attach the slides to the sides of the frame. The slides allow the storage unit to move smoothly in and out.
Fix the rails inside the cabinet or space where you will install the unit. Make sure the slides and rails align perfectly to avoid jams.
- Secure slides to the frame sides
- Mount rails inside the cabinet
- Align slides and rails carefully
Securing The Storage Unit
Once the slides and rails are in place, insert the storage unit into the rails. Slide it in and out to test smooth movement.
Use screws or brackets to fix the storage unit securely. Make sure it does not wobble or come loose during use.
- Insert storage unit into rails
- Test sliding movement
- Secure with screws or brackets
Adjusting And Testing The System
After installing your pull-out storage system, you need to adjust and test it. This ensures it works smoothly and holds weight safely.
Proper alignment and testing help avoid damage and make daily use easier. Follow these steps to check and fix your system.
Aligning For Smooth Operation
Check if the pull-out drawers slide in and out without sticking. Misalignment can cause rough movement or damage parts.
Adjust the rails or sliders by loosening screws and shifting parts slightly. Tighten screws once the drawer moves smoothly.
- Open and close the drawer several times.
- Look for any tight spots or noise.
- Loosen screws to adjust alignment.
- Retighten screws after adjusting.
- Repeat until movement is smooth.
Weight Testing
Test the system’s strength by adding weight gradually. This shows if the rails and sliders hold up well.
Start with light items, then add heavier ones. Watch for sagging, noise, or difficulty moving the drawer.
- Place light items inside the drawer.
- Pull out and push in to test movement.
- Add more weight step by step.
- Stop if the drawer sags or jams.
- Check screws and rails if problems occur.
Troubleshooting Common Issues
If the drawer sticks, rattles, or won’t close fully, these problems need fixing. Troubleshooting saves time and prevents damage.
Common causes include loose screws, bent rails, or dirt in sliders. Clean parts and tighten hardware to fix most issues.
- Check for loose or missing screws and tighten them.
- Look for bent or damaged rails and straighten or replace them.
- Clean dirt and debris from sliders and rails.
- Lubricate metal parts with a light oil or silicone spray.
- Ensure the drawer is not overloaded beyond weight limits.
Maximizing Storage Efficiency
Pull-out storage systems help use space better in kitchens and closets. They make it easy to reach items in deep cabinets.
Setting them up right makes your storage more useful and keeps things neat. This guide shows how to organize and keep things accessible.
Organizing Tips
Sort items by how often you use them. Keep daily use items at the front for quick access.
Group similar items together. This keeps your space tidy and easy to manage.
- Place heavy items on lower pull-outs
- Use top pull-outs for small or light items
- Label containers or shelves for easy finding
Using Dividers And Inserts
Dividers keep items from mixing and falling over. Inserts create separate spaces inside pull-outs.
Use adjustable dividers to fit different sizes. Inserts can hold bottles, cans, or utensils neatly.
- Wood or plastic dividers are easy to install
- Use inserts designed for your cabinet size
- Clear inserts help see contents quickly
Maintaining Accessibility
Make sure pull-outs slide smoothly for easy use. Check tracks and wheels often to keep them working well.
Keep the front area clear so you can fully pull out the storage. Avoid overloading to prevent jams.
- Test pull-outs after loading items
- Clean tracks regularly to avoid dirt build-up
- Arrange items so labels face outward
Maintaining Your Pull-out Storage
Pull-out storage systems help keep your space tidy and organized. Regular care keeps them working smoothly.
Simple maintenance tasks can prevent problems and extend the life of your storage system.
Regular Cleaning
Clean your pull-out storage often to avoid dust and dirt buildup. Dust can block the slides and make movement hard.
Use a soft cloth or vacuum to remove dirt inside and outside the storage. Avoid harsh cleaners that can damage surfaces.
Lubricating Moving Parts
Lubricate the sliding parts to keep them moving easily. Use a silicone-based lubricant for smooth operation.
Apply lubricant to the tracks and rollers every few months. Wipe off any excess to avoid attracting dust.
- Spray lubricant on metal tracks
- Move storage in and out to spread lubricant
- Wipe excess with a clean cloth
Inspecting For Wear And Tear
Check your pull-out storage regularly for damage. Look at the slides, screws, and frame for signs of wear.
Tighten loose screws and replace broken parts right away. This helps prevent bigger problems later.
- Check for loose or missing screws
- Look for bent or broken slides
- Replace worn rollers or tracks

Credit: www.cliqstudios.com
Frequently Asked Questions
What Tools Are Needed To Install Pull-out Storage Systems?
You will need a drill, screwdriver, measuring tape, level, and mounting hardware. These tools ensure precise and secure installation of your pull-out storage system.
How Do I Measure For Pull-out Storage Systems?
Measure your cabinet’s width, depth, and height accurately. Ensure enough clearance for smooth sliding and proper fit inside the cabinet.
Can Pull-out Storage Systems Fit In Small Cabinets?
Yes, pull-out storage systems come in various sizes. Choose a compact design to maximize storage in small or narrow cabinets.
What Materials Are Best For Pull-out Storage Systems?
Metal and high-quality wood are durable choices. Metal offers strength, while wood provides aesthetic appeal and sturdy support.
Conclusion
Setting up pull-out storage systems saves space and keeps things tidy. You can organize your kitchen or closet with ease. Choose the right size and materials for your needs. Measure carefully and follow installation steps for best results. Pull-out storage makes items easy to reach and use.
Try it yourself and enjoy a clutter-free home. Simple changes bring big benefits. Start today and see the difference.