

Are you tired of digging through cluttered cabinets to find what you need? Setting up pull-out drawers can transform your storage space, making everything easy to reach and neatly organized.
Imagine opening a drawer that slides out smoothly, revealing all your items at a glance. In this guide, you’ll learn simple, step-by-step instructions to install pull-out drawers yourself, even if you’re not an expert. Keep reading, and you’ll soon enjoy a more efficient and stress-free home.
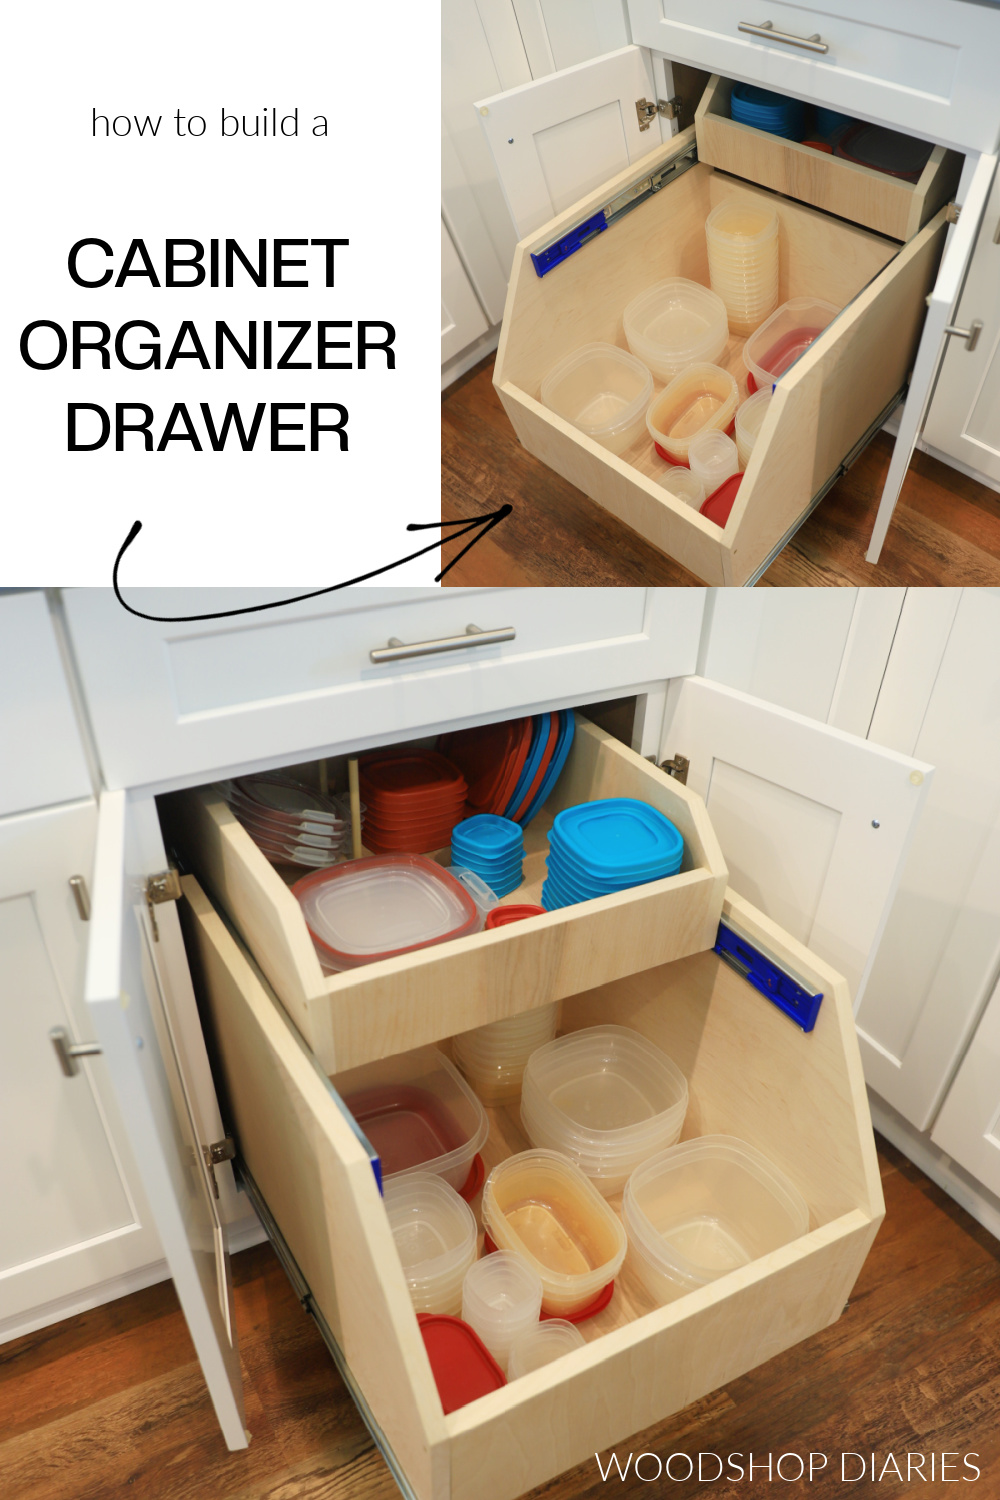
Credit: www.woodshopdiaries.com
Choosing The Right Drawers
Pull-out drawers are great for organizing spaces. They make access to items easy. Choosing the right one needs careful thought.
Think about what you need before buying. Different factors like type, material, and size matter.
Types Of Pull-out Drawers
There are many types of pull-out drawers. Each type has its own use. Choose the one that fits your needs best.
- Wire baskets for light items
- Wooden drawers for heavier items
- Plastic trays for easy cleaning
Materials And Sizes
The material of a drawer affects its durability. Size is also important. It should fit your space and items.
Common materials include wood, metal, and plastic. Measure your space carefully before buying.
- Wood is strong but heavy
- Metal is sturdy and sleek
- Plastic is lightweight and cheap
Weight Capacity Considerations
Weight capacity is how much a drawer can hold. Check this before buying. It ensures safety and functionality.
Overloading drawers can cause damage. Read the specifications carefully.
- Lightweight drawers hold less weight
- Heavy-duty drawers are for heavy items
- Adjustable shelves can offer flexibility

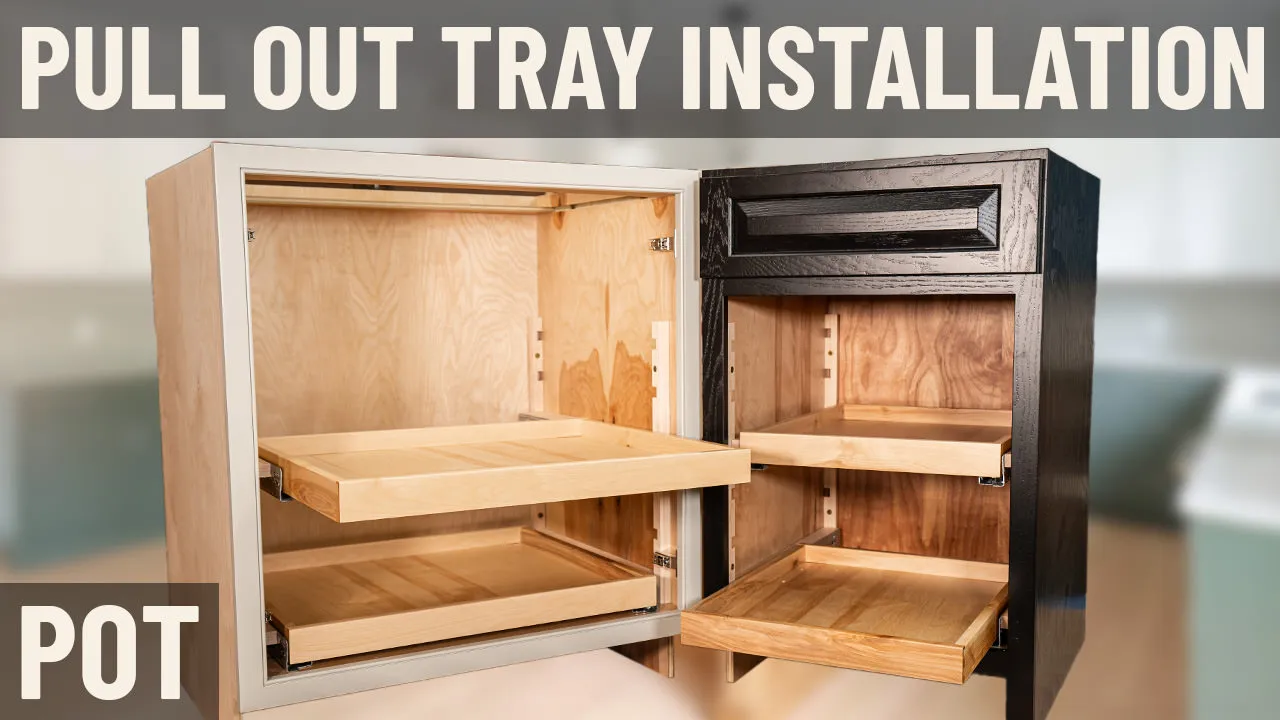
Credit: www.youtube.com
Gathering Tools And Materials
Setting up pull-out drawers is easier with the right tools and materials. Before starting, gather everything you need.
This guide helps you find the tools, hardware, and safety gear required for the job.
Essential Tools
You need some basic tools to install pull-out drawers correctly. These tools help you measure, cut, and fix parts securely.
- Measuring tape for accurate dimensions
- Pencil to mark drill points
- Power drill with drill bits
- Screwdriver or drill driver
- Level to ensure drawers slide evenly
- Hammer for minor adjustments
Required Hardware
Hardware pieces hold your pull-out drawers in place and allow smooth movement. Choose hardware that fits your drawer size.
- Drawer slides or runners
- Screws matching drawer slide specifications
- Mounting brackets if needed
- Drawer handles or pulls
- Wood glue for extra strength (optional)
Safety Gear
Wear safety gear to protect yourself during installation. Safety helps prevent injuries and accidents.
- Safety glasses to protect eyes
- Work gloves to protect hands
- Ear protection if using loud tools
- Dust mask to avoid inhaling dust
Preparing The Cabinet Space
Setting up pull-out drawers starts with preparing the cabinet space. This step ensures your drawers fit well and work smoothly.
Careful preparation saves time and avoids problems during installation. Follow these tips before adding your drawers.
Measuring And Marking
Measure the inside width, depth, and height of the cabinet. Accurate numbers help you pick the right drawer size.
Mark the spots where the drawer slides will go. Use a pencil and a ruler to draw straight lines.
- Measure at the top, middle, and bottom for accuracy
- Mark equal distances on both sides of the cabinet
- Double-check measurements before drilling or screwing
Clearing The Area
Empty the cabinet completely. Remove shelves or old hardware that might block the drawer installation.
Clean the inside space to avoid dust and debris. A clean area helps parts fit well and work smoothly.
- Take out all items from the cabinet
- Remove loose shelves or panels
- Wipe the interior with a damp cloth
Checking For Obstructions
Look for pipes, wires, or nails inside the cabinet. These can block the drawer or cause damage.
Make sure no screws or brackets stick out. Smooth surfaces help the drawer slides move without trouble.
- Inspect the back and sides for hidden pipes or wires
- Remove any nails or screws that are in the way
- Ensure the cabinet walls are flat and even
Credit: www.cabinetjoint.com
Installing Drawer Slides
Pull-out drawers need smooth slides to open and close easily. Installing drawer slides correctly makes your drawers work well.
This guide explains how to install drawer slides step-by-step. Follow these tips to get a perfect fit.
Mounting Slide Rails
First, attach the slide rails to the drawer and cabinet. The rails hold the drawer and allow it to move.
Make sure to pick the right side for each rail. Usually, one rail goes on the drawer side and the other on the cabinet side.
- Clean the surfaces before mounting
- Place rails at the same height on both sides
- Use clamps to hold rails if needed
Aligning And Leveling
Check that the rails are straight and level. Misaligned slides cause the drawer to stick or fall out.
Use a level tool to keep rails even. Adjust the position before fixing them tightly.
- Measure twice to confirm alignment
- Keep equal space on both sides
- Adjust rails if the drawer does not slide smoothly
Securing With Screws
After aligning, fasten the rails with screws. Use the screws that come with the slides for best fit.
Drive screws straight to avoid bending the rails. Tighten screws enough to hold rails firmly but not too tight.
- Pre-drill holes if wood is hard
- Use a screwdriver for better control
- Check screws regularly and tighten if loose
Attaching The Drawer Box
Attaching the drawer box to the slides is an important step for pull-out drawers. It ensures the drawer moves smoothly and fits well inside the cabinet.
This guide explains how to fit the drawer, adjust the slides, and test the movement for the best results.
Fitting The Drawer
Place the drawer box on the installed slides carefully. Align the sides of the drawer with the slides. Make sure the drawer fits evenly on both sides.
Use screws to attach the drawer box to the slide brackets. Tighten the screws but do not over-tighten. This keeps the drawer secure without damaging the wood.
- Align drawer sides with slides
- Use the right screws for your slides
- Tighten screws evenly on both sides
- Check for a snug but not tight fit
Adjusting For Smooth Movement
After fitting the drawer, adjust the slides for smooth movement. Loosen screws slightly if the drawer sticks or feels tight. Move the drawer in and out while adjusting.
Make small changes to the slide position until the drawer slides easily. Check that the drawer stays level and does not tilt when open.
- Loosen screws if drawer is tight
- Slide drawer back and forth to test
- Adjust screws slowly and evenly
- Keep drawer level and stable
Testing Slide Operation
Test the drawer by opening and closing it several times. The drawer should move smoothly without sticking or wobbling. Check both sides for even movement.
If the drawer binds or feels loose, adjust the slides again. Proper testing ensures the drawer works well over time and holds weight safely.
- Open and close the drawer fully
- Listen for unusual noises
- Check for wobble or tilt
- Readjust if needed for smooth action
Finishing Touches
After installing pull-out drawers, focus on the final details. These touches improve function and style.
Small adjustments make your drawers easier to use and keep things neat inside.
Adding Handles Or Pulls
Handles or pulls help you open drawers quickly. Choose styles that fit your room’s look.
Measure where to place handles before fixing them. This keeps them even and comfortable to use.
- Pick handles that match your drawer material
- Use a ruler and pencil to mark handle spots
- Drill holes carefully and screw handles firmly
- Try different shapes like knobs or bar pulls
Organizing Drawer Contents
Keep drawer items tidy to find them fast. Use dividers or small boxes for better order.
Group similar items together. This saves space and makes your drawer look neat.
- Use small containers for tools or utensils
- Label sections for easier access
- Place heavy items at the back
- Keep frequently used items near the front
Maintenance Tips
Keep your pull-out drawers working well by checking them regularly. Clean and fix small problems fast.
Lubricate sliding parts and tighten screws to avoid issues. This keeps your drawers smooth and strong.
- Clean drawer tracks with a dry cloth
- Apply lubricant to metal slides if needed
- Tighten loose screws on handles and slides
- Check for cracks or damage and repair quickly
Frequently Asked Questions
What Tools Are Needed To Install Pull-out Drawers?
You need a drill, screwdriver, measuring tape, level, and mounting hardware. These tools help ensure precise and secure installation.
How Do I Measure For Pull-out Drawer Installation?
Measure the drawer width, depth, and cabinet interior. Accurate measurements ensure the drawer fits and slides smoothly.
Can Pull-out Drawers Be Installed In Any Cabinet Type?
Yes, pull-out drawers fit most cabinets, including kitchen, bathroom, and office units. Check cabinet dimensions before installation.
How Do I Maintain Pull-out Drawers For Smooth Operation?
Regularly clean the tracks and lubricate them. This prevents sticking and extends the drawer’s lifespan.
Conclusion
Setting up pull-out drawers can improve your storage space easily. Follow each step carefully for the best results. Measure your space well before you start the installation. Use the right tools to keep everything steady and safe. Pull-out drawers help keep items organized and easy to reach.
Take your time, and don’t rush the process. Soon, you will enjoy a tidier and more functional space. Simple changes like this make daily tasks smoother and faster. Try it, and see the difference in your home.