
Are you tired of struggling to reach the back of your corner cabinets? You’re not alone.
Those deep, awkward spaces often become a black hole for pots, pans, and kitchen tools. But what if you could turn that chaos into order with just a few simple steps? Setting up corner cabinet organizers can transform your kitchen, making everything easy to find and use.
Keep reading, and you’ll discover how to unlock the full potential of your cabinets—and enjoy a clutter-free kitchen every day.

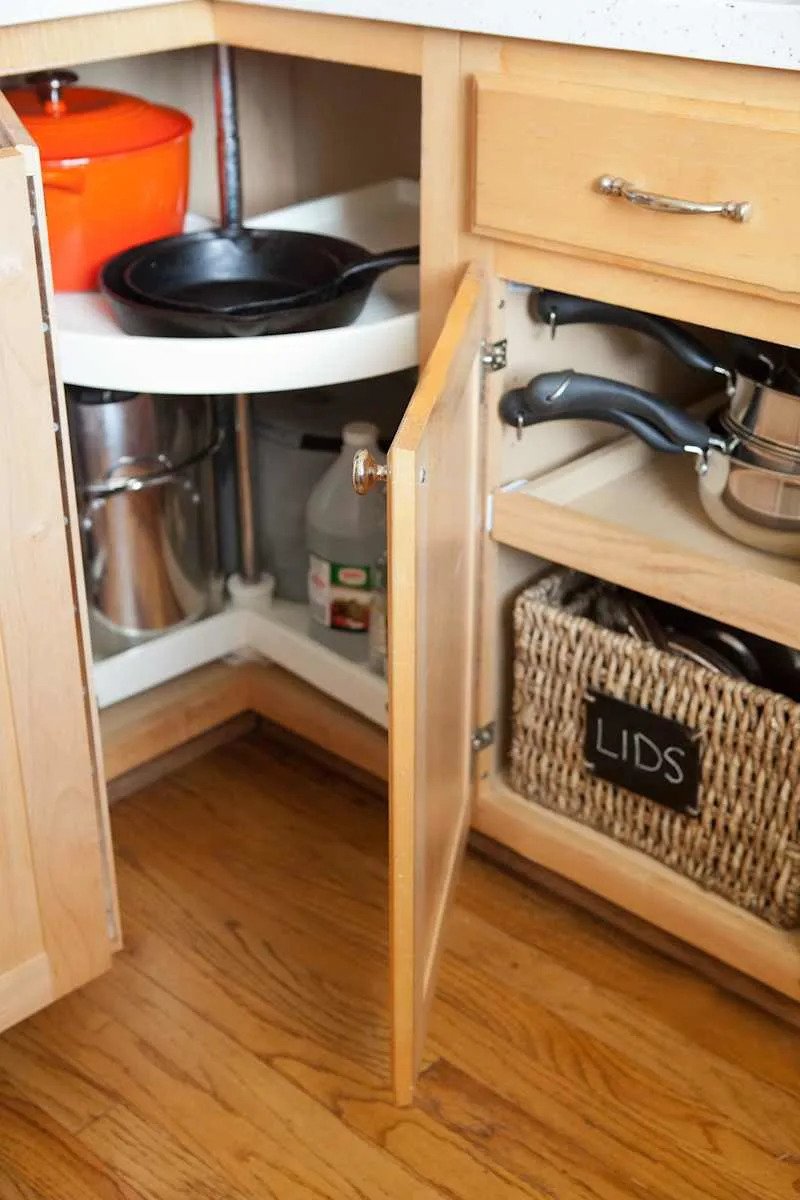
Credit: ca.style.yahoo.com
Choosing The Right Organizer
Corner cabinet organizers help you use space better in your kitchen. Picking the right one can make your cooking area more organized and easy to use.
Consider the size and shape of your cabinet. The right organizer will fit well and hold your items securely.
Types Of Corner Organizers
Different types of organizers offer unique benefits. They can make accessing items in the corner easy.
- Lazy Susans spin around for easy access.
- Pull-out shelves slide out to reach items.
- Tiered shelves allow for stacked storage.
Material And Durability
The material of the organizer affects its strength and look. Choose materials that match your kitchen style.
Wood and metal are sturdy. Plastic is lightweight and easy to clean.
Measuring Your Cabinet Space
Accurate measurements ensure the organizer fits well. Measure both the width and height of your cabinet.
Consider any hinges or obstructions inside the cabinet. This helps in choosing the right size.
| Width | Height |
| Measure from side to side | Measure from top to bottom |
Preparing Your Cabinet
Before installing corner cabinet organizers, you must prepare the space well. Proper preparation makes the installation easier and more effective.
Preparing your cabinet includes emptying and cleaning, removing old fixtures, and checking for damage. Each step helps create a good base for your new organizer.
Emptying And Cleaning
Start by taking everything out of the corner cabinet. Remove all items so you have full access inside. This helps you see the space clearly.
Clean the inside of the cabinet well. Use a mild cleaner to remove dust, grease, and dirt. Dry the cabinet completely before moving on.
Removing Old Fixtures
Take out any old shelves, lazy susans, or other fixtures inside the cabinet. These can block the new organizer from fitting properly.
Use basic tools like a screwdriver or pliers to remove screws and nails. Keep the tools handy for any adjustments later.
Checking For Damage
Look closely at the cabinet walls and floor. Check for cracks, water damage, or loose panels that might cause problems.
Fix any damage before installing the organizer. Repair weak spots with wood glue or filler. Make sure the cabinet is strong and stable.
Installation Tools And Materials
Setting up corner cabinet organizers helps use space better. You need the right tools and materials to install them well.
This guide covers the basic tools, extra supplies, and safety tips for installation.
Basic Tools Needed
Gather these tools before starting to make the job easier and faster. Most of these tools are common in home toolkits.
- Drill with drill bits
- Screwdriver (Phillips and flathead)
- Measuring tape
- Level tool
- Pencil for marking
- Stud finder
- Hammer
Additional Supplies
Besides tools, you may need extra materials depending on your cabinet and organizer type. Check your product instructions for specifics.
- Screws or mounting brackets (usually included)
- Wall anchors for drywall
- Wood glue for extra support
- Cleaning cloth to wipe surfaces
- Protective tape to avoid scratches
- Sandpaper to smooth rough edges
Safety Precautions
Safety is important when installing cabinet organizers. Follow these tips to avoid injuries and damage.
- Wear safety goggles to protect eyes
- Use gloves to prevent cuts
- Keep tools away from children
- Check for electrical wires before drilling
- Work in a well-lit area
- Follow manufacturer instructions carefully
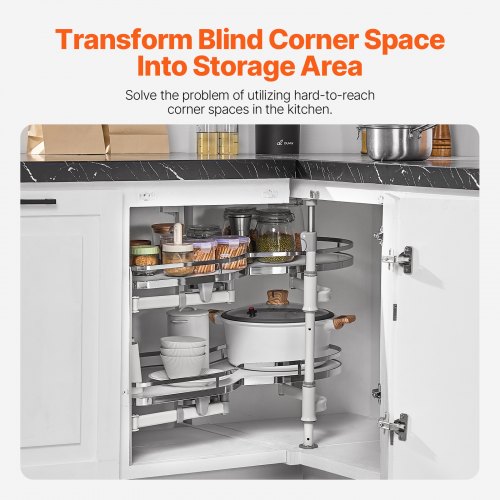
Credit: www.vevor.ca
Step-by-step Installation
Installing a corner cabinet organizer helps you use space better. This guide shows how to set it up easily.
Follow each step carefully to make sure the organizer fits and works well.
Marking Placement
Open your corner cabinet and clean the inside surface. Remove any items to have a clear workspace.
Place the organizer inside the cabinet where you want it. Use a pencil to mark spots for screws or brackets.
- Check that the organizer spins or slides freely.
- Mark screw holes on the cabinet walls clearly.
- Double-check measurements for even spacing.
Attaching The Organizer
Drill small pilot holes where you made your marks. This makes screwing easier and prevents wood from splitting.
Use screws provided with the organizer to attach it firmly. Tighten screws but avoid over-tightening to prevent damage.
- Start with one screw to hold the organizer.
- Check alignment before adding more screws.
- Secure all screws evenly for stability.
Adjusting And Testing
After attaching, move the organizer to check for smooth operation. Adjust screws if it feels loose or tight.
Test by placing some items on the organizer. Make sure it holds weight and spins or slides without issues.
- Tighten any loose screws.
- Loosen screws slightly if the organizer does not move well.
- Confirm all parts are secure before use.
Maximizing Space Usage
Corner cabinets often have awkward shapes that waste storage space. Using organizers can help you use every inch well. Setting them up right makes your kitchen neater and easier to work in.
Good organization in corner cabinets helps keep items visible and accessible. You can avoid clutter and save time finding what you need.
Organizing Tips
Start by sorting items you want to store in the corner cabinet. Group similar things together to keep the space tidy. Use bins or baskets to hold small items so they don’t get lost.
- Place heavy items on the bottom shelves
- Keep frequently used items near the front
- Label containers for quick identification
- Use pull-out trays to reach deep corners
Using Vertical Space
Corner cabinets often have tall empty space that goes unused. Adding shelves or stacking racks helps you use the height better. This creates more storage without taking more floor space.
- Install adjustable shelves to fit different items
- Use tiered organizers for cans or jars
- Hang hooks inside the door for utensils
- Stack baskets to separate different categories
Combining With Other Storage Solutions
Corner organizers work best when paired with other storage ideas. Use drawer dividers, lazy Susans, or pull-out racks in nearby cabinets. This helps keep your whole kitchen organized and efficient.
- Lazy Susans spin to give easy access to items
- Pull-out racks slide out for better reach
- Drawer dividers separate utensils and tools
- Wall-mounted racks free up cabinet space

Credit: ca.style.yahoo.com
Maintenance And Upkeep
Keeping your corner cabinet organizers in good shape helps them last longer. Proper care makes sure they work smoothly every day.
Regular maintenance prevents damage and keeps your kitchen neat. Let’s look at simple ways to care for your organizers.
Regular Cleaning
Clean your corner cabinet organizers often to avoid dust and grime buildup. Use a soft cloth and mild soap to wipe surfaces.
Avoid harsh chemicals that can damage the finish. Dry the parts well after cleaning to stop rust or mold.
- Remove all items before cleaning
- Use a damp cloth with mild soap
- Dry thoroughly to prevent moisture
- Clean shelves, rails, and hinges
Checking For Wear
Look at your organizers often to find any signs of damage. Check parts like hinges, slides, and shelves for cracks or rust.
Early detection helps you fix small problems before they get worse. This keeps your organizers safe and functional.
- Inspect hinges and screws for looseness
- Look for cracks or broken parts
- Check metal parts for rust
- Ensure shelves are stable and secure
Making Adjustments
Tighten loose screws and bolts to keep the organizer steady. Adjust slides or hinges if parts do not move smoothly.
Follow the manufacturer’s instructions for adjustments. Proper tweaks help your organizer work like new again.
- Use a screwdriver to tighten screws
- Lubricate moving parts if needed
- Adjust sliding tracks for smooth movement
- Replace worn parts if necessary
Frequently Asked Questions
What Tools Do I Need For Corner Cabinet Organizers?
You need a drill, measuring tape, screwdriver, level, and mounting hardware. These tools help ensure accurate installation and secure fitting of organizers.
How Do I Measure My Corner Cabinet For Organizers?
Measure the cabinet’s width, height, and depth carefully. Accurate measurements help select the right organizer size for a perfect fit and maximum storage.
Which Corner Cabinet Organizer Types Are Best?
Lazy Susans, pull-out shelves, and swing-out racks are popular. Choose based on cabinet size, accessibility, and storage needs for optimal efficiency.
Can I Install Corner Cabinet Organizers Myself?
Yes, with basic tools and careful steps, DIY installation is possible. Follow instructions precisely to avoid damage and ensure proper functionality.
Conclusion
Setting up corner cabinet organizers can save space and reduce clutter. Choose the right type for your needs and measure carefully. Install slowly, following each step to avoid mistakes. Organize your items by size and frequency of use. A neat corner cabinet makes your kitchen more functional and pleasant.
Small changes bring big improvements. Try it today and enjoy the difference.