
Mold on your silicone seals isn’t just ugly—it can also damage your home and affect your health. If you’ve noticed those stubborn black or green spots creeping along your bathroom or kitchen seals, you’re probably wondering how to get rid of them quickly and safely.
You don’t need expensive products or professional help to fix this. You’ll learn simple, effective steps to remove mold from silicone seals and keep them looking fresh. Keep reading, and you’ll discover easy tips that save you time and protect your home.
Causes Of Mold On Silicone Seals
Mold often grows on silicone seals found in bathrooms and kitchens. These areas stay damp for a long time. Mold likes dark, wet places to grow.
Understanding why mold appears helps keep silicone seals clean. Some common causes make mold more likely.
Moisture And Poor Ventilation
Silicone seals stay wet after showers or cooking. If air does not move well, moisture stays longer. Mold grows quickly in these damp spots.
Bathrooms without fans or windows trap humidity. This creates a perfect home for mold on silicone seals.
Soap And Dirt Buildup
Soap scum and dirt collect on silicone seals. These substances hold moisture and feed mold spores. Over time, this helps mold spread.
- Soap residue keeps surfaces wet
- Dirt provides nutrients for mold
- Cleaning often prevents buildup
Damaged Or Old Silicone Seals
Old silicone seals may crack or peel. These breaks trap water inside. Mold grows well in these hidden wet spots.
Replacing damaged seals stops mold from growing in these weak areas.
Lack Of Regular Cleaning
Mold grows faster if silicone seals are not cleaned often. Dirt and moisture build up over days. This creates a good place for mold spores.
Regular cleaning removes spores and keeps seals dry to stop mold growth.
Tools And Materials Needed
Removing mold from silicone seals is simple with the right tools and materials. Using proper items helps clean mold safely and effectively.
This guide lists essential tools and materials to prepare before you start cleaning mold from silicone seals.
Protective Gloves
Wear protective gloves to keep your hands safe from mold and cleaning chemicals. Gloves prevent skin irritation and contamination.
Choose gloves made of rubber or latex that fit well for better control while cleaning.
Cleaning Cloths Or Sponges
Use soft cloths or sponges to scrub the silicone seals gently. Avoid rough materials that can damage the silicone.
- Microfiber cloths work well for wiping
- Non-abrasive sponges help remove mold
Mild Detergent Or Soap
A mild detergent or soap helps break down dirt and mold on silicone seals. It is gentle and safe for silicone material.
Mix the detergent with warm water to create a cleaning solution before applying it to the mold.
White Vinegar Or Baking Soda
White vinegar and baking soda are natural mold removers. They kill mold and remove stains without harsh chemicals.
- Use white vinegar directly or diluted with water
- Make a paste using baking soda and water for scrubbing
Soft-bristled Brush
A soft-bristled brush helps clean mold from hard-to-reach areas in silicone seals. It removes mold without scratching.
Use a toothbrush or a small cleaning brush to reach corners and crevices.
Spray Bottle
A spray bottle makes it easier to apply cleaning solutions evenly on silicone seals. It helps cover moldy areas quickly.
Fill the bottle with vinegar or your preferred cleaning mix for easy use.
Paper Towels Or Dry Cloths
Use paper towels or dry cloths to wipe away mold and excess moisture after cleaning. This helps the area dry faster.
Drying the silicone seals prevents mold from returning quickly.
Safety Precautions
Removing mold from silicone seals needs care to keep you safe. Mold can cause health problems if not handled properly.
Using the right protection and tools helps stop harm and keeps the cleaning safe.
Wear Protective Gloves
Always wear gloves to protect your skin from mold and cleaning chemicals. Mold can irritate or cause allergic reactions.
Use rubber or latex gloves that cover your hands completely. Dispose of gloves after cleaning to avoid spreading mold spores.
Use A Face Mask
Wear a face mask to stop breathing in mold spores. Masks help protect your lungs during cleaning.
- Choose masks with N95 or higher rating
- Make sure the mask fits tightly on your face
- Replace the mask if it gets wet or dirty
Ventilate The Area
Open windows and doors to let fresh air in. Good airflow reduces mold spores in the air and fumes from cleaners.
Turn on fans if possible to increase ventilation while cleaning.
Avoid Mixing Cleaning Products
Do not mix bleach with ammonia or other chemicals. Mixing can create dangerous gases that harm your health.
Use one cleaning product at a time and follow the instructions on the label carefully.
Protect Surrounding Surfaces
Cover nearby areas with cloth or plastic to avoid damage from cleaning agents. Some cleaners can discolor or harm surfaces.
- Use old towels or rags to cover surfaces
- Keep cleaning liquids away from wood or fabric
- Clean spills immediately to prevent damage
Preparation Steps
Removing mold from silicone seals needs good preparation. Getting ready makes the cleaning safe and effective.
Start by clearing the area and ventilating the space. These steps help protect you and stop mold spores from spreading.
Clearing The Area
Remove items near the silicone seals. This gives you space to work and stops damage to your belongings.
Clear away towels, bottles, and other objects. Use a plastic sheet or old cloth to cover the floor. This helps catch any drips or mold bits.
- Take out all movable items around the seals
- Cover floors and nearby surfaces with plastic or cloth
- Wear gloves to protect your hands
- Keep cleaning tools ready nearby
Ventilating The Space
Open windows and doors to let fresh air in. Good airflow helps remove mold spores from the air.
Use a fan to push air outside. Avoid letting air blow mold spores inside your home.
- Open all nearby windows and doors
- Place a fan near a window to blow air outside
- Avoid using central air conditioning during cleaning
- Wear a mask to avoid breathing mold spores
Natural Cleaning Solutions
Mold on silicone seals can cause bad smells and damage. You can clean it safely using natural ingredients. These solutions are easy and gentle on surfaces.
Two common natural cleaners are vinegar and baking soda paste. Both remove mold without harsh chemicals.
Using Vinegar
White vinegar kills mold spores and stops growth. It is acidic and cleans well without damage.
- Pour white vinegar into a spray bottle.
- Spray the moldy silicone seal thoroughly.
- Let it sit for at least one hour.
- Use a soft brush or cloth to scrub the area.
- Rinse with warm water and dry with a cloth.
Baking Soda Paste
Baking soda removes mold and absorbs odors. It works well as a gentle scrub.
| Ingredient | Amount |
| Baking soda | 2 tablespoons |
| Water | 1 tablespoon |
Mix these to make a paste. Apply it on moldy silicone, scrub gently, and rinse well.
Credit: restorationmasterfinder.com
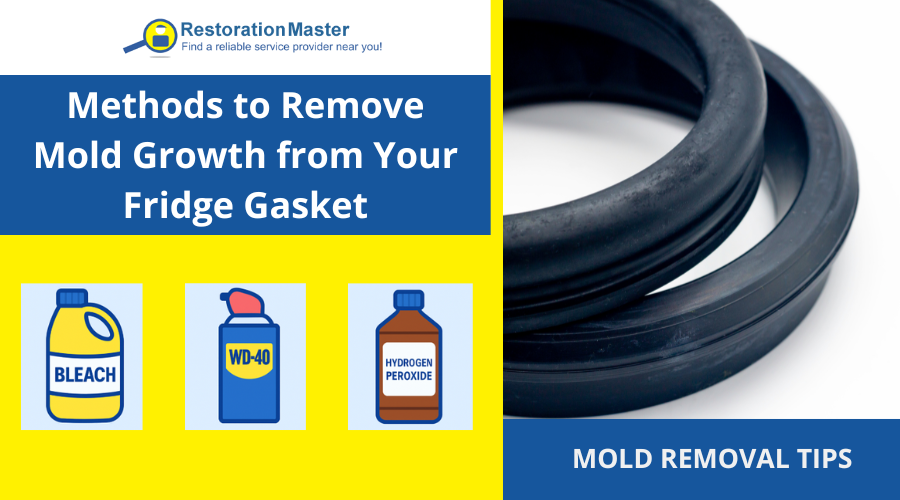
Chemical Cleaners
Mold on silicone seals can cause stains and odors. Using chemical cleaners helps remove mold effectively. These cleaners kill mold spores and prevent regrowth.
Always use chemical cleaners with care. Follow safety instructions and wear gloves to protect your skin.
Bleach Solution
Bleach is a strong cleaner that kills mold on silicone seals. It removes mold stains and disinfects the area. Use a diluted bleach solution for safety.
- Mix one cup of bleach with one gallon of water in a bucket.
- Apply the solution to the silicone seals with a sponge or cloth.
- Let it sit for 10 to 15 minutes to kill the mold.
- Scrub gently with a soft brush to remove mold stains.
- Rinse the area well with clean water and dry with a cloth.
Commercial Mold Removers
Commercial mold removers are ready-made products made to clean mold from silicone seals. They often contain special chemicals that break down mold quickly.
| Product Type | Key Ingredient | Usage |
| Mold Spray | Quaternary ammonium | Spray and wipe after 10 minutes |
| Mold Gel | Hydrogen peroxide | Apply gel, wait 15 minutes, then scrub |
| Mold Foam | Sodium hypochlorite | Foam on seals, wait 10 minutes, rinse |
Scrubbing Techniques
Removing mold from silicone seals takes careful scrubbing. Using the right tools helps protect the seal and cleans effectively.
Choose gentle methods to avoid damaging the silicone while still removing mold and mildew.
Using A Soft Brush
A soft brush cleans mold without harming the silicone surface. Soft bristles reach into crevices and lift mold safely.
- Use a toothbrush or a small soft cleaning brush.
- Dip the brush in mild soap or vinegar solution.
- Gently scrub the silicone seal in small circles.
- Rinse the area with warm water after scrubbing.
- Dry the seal fully to prevent mold return.
Avoiding Abrasive Tools
Avoid harsh scrubbers like steel wool or hard brushes. These tools can scratch or tear silicone seals.
| Tool Type | Effect on Silicone |
| Steel Wool | Scratches and damages surface |
| Hard Bristle Brush | Can tear or wear down silicone |
| Soft Brush | Safe and effective for cleaning |
| Sponges (non-abrasive) | Good for gentle wiping |

Credit: www.angi.com
Rinsing And Drying
Removing mold from silicone seals requires careful rinsing and drying. This step helps stop mold from growing back. You must clean the seal well and dry it completely.
Proper rinsing removes cleaning agents and dirt. Drying keeps moisture away, which mold needs to grow. Follow these tips to keep your silicone seals clean and mold-free.
Rinsing The Silicone Seals
Use clean, warm water to rinse the silicone seals. Make sure to remove all the cleaning solution and any loose mold or dirt. Rinsing well prevents mold from returning quickly.
- Use a soft cloth or sponge with warm water
- Gently wipe all areas of the silicone seal
- Repeat rinsing until no soap or cleaner remains
- Pay close attention to corners and crevices
Drying The Silicone Seals
Drying is very important after rinsing. Moisture helps mold grow back. Use a dry cloth to remove water from the seal. Let the seal air dry fully before closing or using the appliance.
| Drying Method | Details |
|---|---|
| Use a Dry Cloth | Wipe all wet areas gently and thoroughly |
| Air Dry | Leave the seal open to dry for several hours |
| Use a Fan | Speed up drying with gentle air flow |
| Avoid Heat | Do not use heaters or direct sunlight to dry |
Preventative Measures
Mold often grows on silicone seals because of moisture and dirt. You can stop mold by keeping seals clean and dry.
Preventing mold is easier than removing it. Use simple habits to keep your seals mold-free.
Regular Cleaning Routine
Clean silicone seals often to remove dirt and moisture. This lowers the chance of mold growth.
Use mild soap and warm water. Wipe seals gently with a soft cloth or sponge.
- Clean seals at least once a week
- Dry seals completely after cleaning
- Avoid harsh chemicals that can damage silicone
- Check seals for mold spots and clean immediately
Improving Ventilation
Good airflow helps dry silicone seals faster. This stops mold from growing in damp places.
Open windows or use fans in rooms with silicone seals. This reduces moisture buildup.
- Keep windows open during and after showers
- Use exhaust fans in kitchens and bathrooms
- Place a dehumidifier in humid rooms
- Make sure vents are clean and working properly
When To Seek Professional Help
Mold on silicone seals can sometimes be cleaned at home. But certain situations need expert attention.
Knowing when to call a professional helps prevent health risks and further damage.
Extensive Mold Growth
If mold covers a large area of the silicone seals, cleaning might be difficult. Professionals have tools to handle big mold problems safely.
Health Issues Appear
Mold can cause allergies or breathing problems. If you or your family feel sick after mold exposure, get help from a specialist.
Repeated Mold Returns
When mold keeps coming back despite cleaning, a professional can find hidden moisture or damage causing it.
- Check for leaks or water damage around seals
- Inspect ventilation in the affected area
- Assess seal condition for cracks or wear
- Recommend repairs or replacements
Damaged Or Old Silicone Seals
Old or cracked seals may not clean well. Experts can replace seals to stop mold growth and keep areas dry.
Use Of Strong Chemicals Needed
Some mold requires powerful cleaners. Professionals know how to apply these safely without harming surfaces or health.
| Signs You Need a Professional | Why |
|---|---|
| Large mold patches | Hard to clean without special equipment |
| Health symptoms | Risk of allergy or illness |
| Mold returns often | Hidden moisture or damage |
| Seal damage | Replacement needed to stop mold |
| Strong chemicals required | Expert handling ensures safety |
Credit: restorationmasterfinder.com
Frequently Asked Questions
How Can I Safely Remove Mold From Silicone Seals?
Use a mixture of white vinegar and water to clean the seals. Apply with a soft brush, scrub gently, and rinse thoroughly. Avoid harsh chemicals to prevent damage to the silicone.
What Household Items Effectively Kill Mold On Silicone Seals?
White vinegar, baking soda, and hydrogen peroxide are effective. These items kill mold spores and remove stains without harming silicone seals.
How Often Should Silicone Seals Be Cleaned To Prevent Mold?
Clean silicone seals every 1-2 weeks in humid areas. Regular cleaning prevents mold buildup and keeps seals hygienic and intact.
Can Bleach Be Used To Clean Mold From Silicone Seals?
Bleach can remove mold but may degrade silicone over time. Use diluted bleach carefully and rinse thoroughly to avoid damage.
Conclusion
Removing mold from silicone seals is simple with the right steps. Clean regularly to stop mold from coming back. Use mild cleaners and avoid harsh chemicals to protect the seals. Dry the area well after cleaning to keep it mold-free.
Small efforts prevent big problems later. Keep your home fresh and healthy by caring for silicone seals. Stay consistent, and mold will not stand a chance. Easy to do, worth the time.