
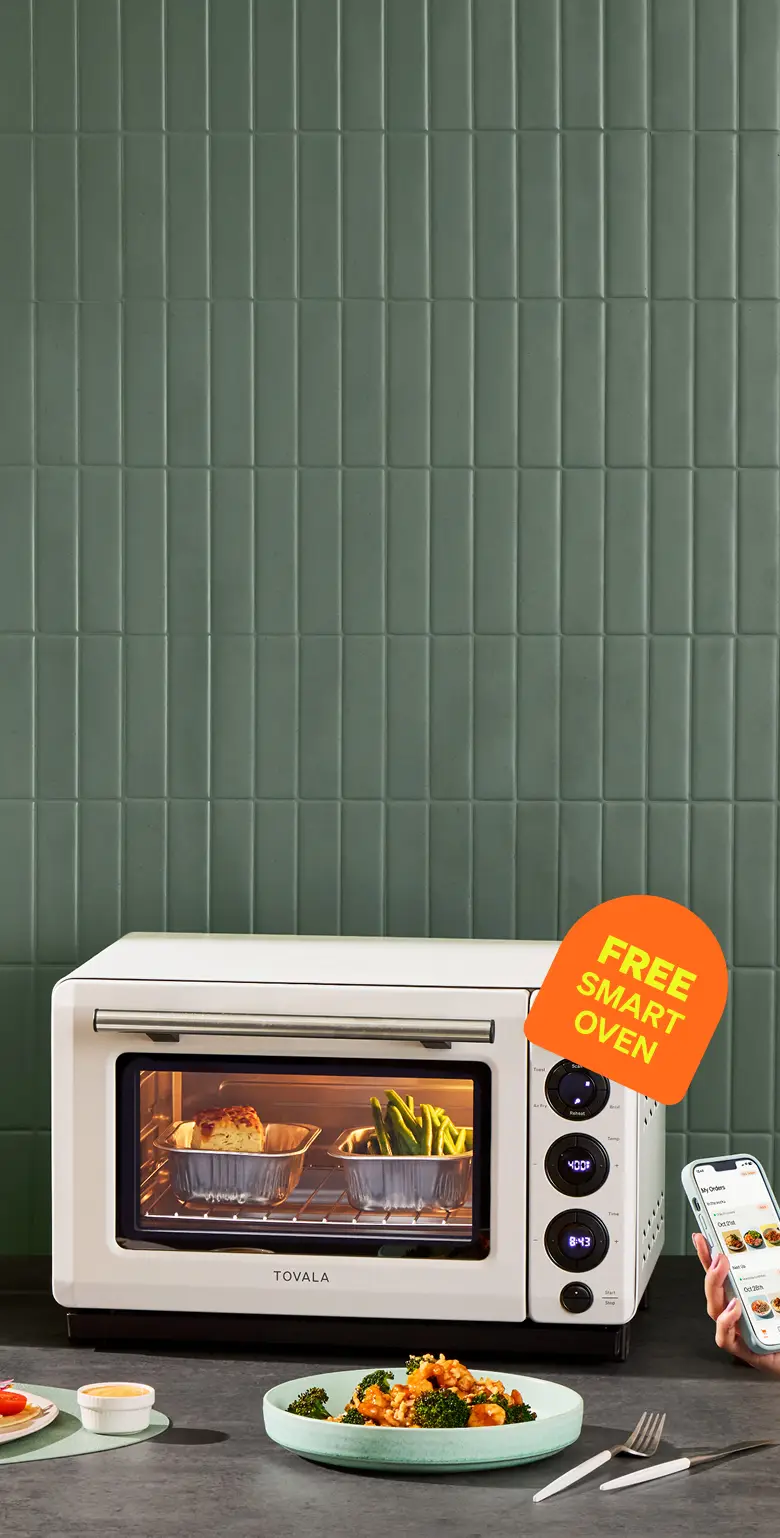
Imagine coming home to a perfectly cooked meal without lifting a finger. With smart ovens, this is not just a dream—it’s your new reality.
Learning how to program your smart oven can save you time, reduce stress, and make meal prep easier than ever. You’ll discover simple steps to master your smart oven’s settings and unlock its full potential. Ready to transform the way you cook?
Keep reading, and you’ll soon be enjoying delicious meals made effortless.
Choosing The Right Smart Oven
Smart ovens can make meal prep easier. Choosing the right one is important for your needs.
Consider features, compatibility with apps, and size when picking a smart oven.
Key Features To Look For
A good smart oven should have features that suit your cooking style. Look for these features when shopping.
- Wi-Fi connectivity for remote control
- Preset cooking programs for different dishes
- Energy efficiency to save on power
- User-friendly touch screen interface
Compatibility With Meal Prep Apps
Some smart ovens work with meal prep apps. These apps can help plan meals and control cooking times.
Check if the oven connects with popular apps for easy meal planning.
- Check the app store for compatible apps
- Look for apps that offer recipe suggestions
- Ensure the oven supports app updates
Size And Capacity Considerations
The size of the smart oven affects where you can place it. Capacity determines how much food you can cook.
Think about your kitchen space and how much food you usually prepare.
- Measure your kitchen counter space
- Consider how many people you cook for
- Choose a size that fits your cooking needs
Credit: www.wsj.com
Setting Up Your Smart Oven
Setting up your smart oven is the first step to easy meal prep. This guide will help you connect, calibrate, and update your oven for best use.
Following these steps ensures your smart oven works well and cooks food correctly. Let’s start with connecting your device.
Connecting To Wi-fi And Apps
Connect your smart oven to Wi-Fi to control it from your phone. Use the oven’s app for easy access to settings and recipes.
Make sure your phone and oven use the same Wi-Fi network. Open the app and follow the instructions to link the oven.
- Turn on the oven and enable Wi-Fi mode
- Open the app on your phone
- Search for your oven in the app
- Enter your Wi-Fi password if asked
- Confirm the connection on both devices
Calibrating Temperature And Timers
Check your smart oven’s temperature accuracy before cooking. Use an oven thermometer to compare actual heat with the display.
Adjust the temperature settings in the oven’s menu if needed. Set timers based on recipes or your cooking habits.
- Place an oven thermometer inside
- Set the oven to 350°F (175°C)
- Wait 15 minutes and check the thermometer
- Adjust temperature in settings if it is off
- Set timers using the control panel or app
Updating Firmware For Optimal Performance
Keep your smart oven’s software up to date. Updates fix bugs and add new features for better performance.
Check for updates regularly in the oven’s app or settings menu. Download and install updates when available.
- Open the oven’s app or control panel
- Find the “Firmware Update” section
- Check if a new update is available
- Download and install the update
- Restart the oven after update completes
Programming Basic Cooking Modes
Smart ovens offer simple ways to cook your meals. You can set them to cook food just right every time.
This guide will explain how to use basic cooking modes on your smart oven. You will learn how to use presets, adjust temperatures, and set cooking times.
Using Preset Functions
Most smart ovens come with preset cooking modes for common foods. These presets set the temperature and time automatically.
Using presets is quick and easy. Just select the food type and start the oven. The oven will cook your meal perfectly based on the preset.
- Choose the food category on the oven menu
- Select the preset for your dish
- Press start to begin cooking
Customizing Temperature Settings
You can adjust the oven temperature if you want more control. This helps when cooking special recipes or personal preferences.
To change the temperature, use the temperature control buttons or touchscreen. Set the temperature in degrees Fahrenheit or Celsius.
- Press the temperature setting option
- Increase or decrease the temperature using controls
- Confirm the setting before cooking
Adjusting Cooking Times
Adjusting cooking time helps you get your meal done just right. You can make food softer or crunchier by changing the time.
Use the timer controls to set how long the oven cooks. Some ovens show the remaining time on the display.
- Find the cooking time option on the control panel
- Set the desired minutes and seconds
- Start the oven and check progress if needed
Credit: wetried.it
Creating Custom Meal Prep Programs
Smart ovens make meal prep easier by letting you create custom cooking programs. These programs save time and improve meal consistency.
Programming your smart oven allows you to set cooking times, temperatures, and steps that fit your favorite recipes.
Saving Favorite Recipes
Save your favorite recipes in the smart oven’s memory for quick access later. This feature helps you avoid setting up the oven each time.
Once saved, you can start cooking your favorite meals with one touch. This saves effort and keeps your meals consistent.
- Enter cooking time and temperature
- Choose cooking mode (bake, roast, etc.)
- Save the settings with a recipe name
- Access saved recipes from the main menu
Scheduling Cooking Sessions
Smart ovens let you schedule cooking times in advance. This feature is useful for meal prep planning and busy days.
You can set the oven to start cooking at a specific time. Your meal will be ready when you want it.
- Pick the recipe or cooking program
- Select the desired start time
- Confirm the schedule
- Oven will automatically start cooking
Multi-stage Cooking Techniques
Multi-stage cooking lets you set different cooking steps in one program. This helps prepare meals that need changing temperatures or modes.
For example, you can start with baking, then switch to broiling to finish. This technique improves meal taste and texture.
- Define each cooking stage with time and temperature
- Choose the cooking mode for each stage
- Set the order of stages
- Save and run the multi-stage program
Tips For Efficient Meal Prep
Smart ovens help make meal prep faster and easier. Programming them well saves time and energy.
Using smart features lets you cook many meals at once. This keeps your week organized and stress-free.
Batch Cooking Strategies
Batch cooking means making large portions to use later. Smart ovens keep food warm or cook it all together.
Plan meals that share cooking times and temperatures. This way, you can cook multiple dishes at once.
- Choose recipes with similar cooking settings
- Use oven racks to cook several trays
- Prepare ingredients in advance for quick loading
- Store cooked food in airtight containers
Utilizing Smart Oven Sensors
Smart ovens have sensors that adjust heat and time. These sensors help cook food perfectly without guesswork.
Use sensor features to avoid overcooking or undercooking meals. This saves energy and keeps food tasty.
- Check sensor settings before starting your meal
- Allow sensors to monitor food temperature
- Use alerts to know when food is ready
- Clean sensors regularly for best results
Combining Cooking With Other Devices
Use your smart oven with other kitchen devices to speed up meal prep. This helps cook meals faster.
For example, use a slow cooker for some parts and the oven for others. This uses your time well.
- Start soups or stews in a slow cooker
- Finish baking or roasting in the smart oven
- Use a microwave to reheat before serving
- Set timers on all devices to manage cooking times
Troubleshooting Common Issues
Smart ovens help make meal prep easier. Sometimes, they face problems that stop them from working well.
Knowing how to fix these common issues will save time and avoid frustration.
Connectivity Problems
Smart ovens need a good Wi-Fi connection to work properly. Sometimes they lose connection or fail to connect.
Check if your Wi-Fi is working and the oven is in range. Restart the oven and router if needed.
- Make sure Wi-Fi password is correct
- Keep the oven near the router
- Restart your oven and router
- Update the oven’s software
- Remove and re-add the oven in the app
Inaccurate Temperature Readings
Your smart oven may show wrong temperatures. This can affect cooking results and food safety.
Clean the oven’s sensor and avoid opening the door too often. Calibrate the oven if your model allows it.
- Check if the sensor is dirty or blocked
- Do not open the door while cooking
- Use the oven’s calibration feature
- Update the oven’s software
- Contact support if problem continues
Error Codes And Their Fixes
Smart ovens display error codes to show what is wrong. Knowing these codes helps fix problems fast.
Refer to the manual for code meanings. Some common codes include sensor errors, door issues, or overheating warnings.
| Error Code | Meaning | Fix |
|---|---|---|
| E01 | Temperature sensor failure | Clean or replace sensor |
| E02 | Door not closed properly | Close door firmly |
| E03 | Oven overheating | Turn off oven and cool down |
| E04 | Wi-Fi connection lost | Check network and reset oven |
Maximizing Smart Oven Benefits
Smart ovens help you cook meals with less effort. You can set timers and temperatures using your phone or voice commands.
Learning how to program your smart oven saves time and energy. It also makes meal prep easier and more efficient.
Energy Saving Tips
Smart ovens use sensors to adjust cooking power. Use these features to save electricity and reduce waste.
Keep the oven door closed during cooking. Opening the door lets heat escape and wastes energy.
- Preheat only when needed
- Cook multiple dishes at once
- Use the timer to avoid overcooking
- Choose energy-efficient cooking modes
Maintaining Your Oven For Longevity
Regular cleaning keeps your oven working well. Wipe spills quickly to avoid buildup and odors.
Check and update your oven’s software. Updates improve performance and fix bugs for better cooking.
- Clean the interior after each use
- Inspect door seals for damage
- Use only recommended cleaning products
- Schedule professional servicing if needed
Exploring Advanced Features
Smart ovens offer features like voice control and recipe guides. Use these to simplify cooking steps.
Some ovens have cameras inside. You can check your food without opening the door.
- Use preset cooking programs for common meals
- Try voice commands to start or stop cooking
- Monitor cooking progress with app notifications
- Explore combination cooking modes like steam and bake
Credit: www.wsj.com
Frequently Asked Questions
How Do I Set Cooking Time On A Smart Oven?
To set cooking time, use the oven’s touchscreen or app. Select the recipe or manual mode, then input the desired time. Confirm settings to start cooking. Smart ovens often have presets to simplify this process.
Can I Program Multiple Meals At Once?
Yes, many smart ovens allow multi-stage programming. You can schedule different cooking steps and times for various meals. This helps with efficient meal prep and ensures each dish cooks perfectly.
How Do Smart Ovens Improve Meal Prep Efficiency?
Smart ovens automate cooking with precise temperature and timing control. They reduce guesswork and save time by using presets and remote monitoring features. This leads to consistent, perfectly cooked meals with less effort.
Are Smart Ovens Compatible With Recipe Apps?
Most smart ovens sync with popular recipe apps. This lets you download cooking programs directly to the oven. It simplifies meal prep by automatically adjusting settings for each recipe.
Conclusion
Programming smart ovens for meal prep saves time and effort daily. Follow simple steps to set the temperature and cooking time right. Use presets for common meals to make cooking easier. Check your food while cooking to avoid overcooking. Practice helps you get better and faster with your smart oven.
Enjoy tasty, healthy meals without stress or guesswork. Smart ovens bring convenience to your kitchen routine. Try different settings to find what works best for you. Cooking at home becomes more fun and less tiring.