
Your stove top burners get dirty fast, and that grease and grime can be tough to remove. If you’ve tried cleaning them before but didn’t get the results you wanted, you’re not alone.
Imagine how much better your kitchen will look and smell when your burners are spotless and working perfectly. You’ll discover simple, effective steps to clean your stove top burners thoroughly. Stick with me, and you’ll learn easy tricks that save you time and effort while making your stove shine like new.
Ready to get started? Let’s dive in!
Types Of Stove Top Burners
Stove top burners come in different types. Each type needs a special way to clean it well.
Knowing the type of burner helps keep it working and looking good for a long time.
Gas Burners
Gas burners use flames to cook food. They have metal grates and burner caps that get dirty fast.
Cleaning gas burners means removing the grates and caps. Soak them in warm, soapy water. Use a brush to scrub off food and grease.
- Remove burner caps and grates carefully
- Soak parts in hot, soapy water for 20 minutes
- Use a soft brush to clean holes and edges
- Wipe the surface with a damp cloth
- Dry all parts before putting them back
Electric Coil Burners
Electric coil burners have metal coils that heat up. They are easy to spot and clean.
Turn off the stove and unplug the coils before cleaning. Remove the coils gently. Clean the drip pans underneath with soap and water.
- Unplug and cool down the coils
- Lift coils from the stove carefully
- Wash drip pans with warm, soapy water
- Use a cloth to clean under the coils
- Dry all parts before reassembling
Glass Or Ceramic Burners
Glass or ceramic burners have a smooth surface. They look modern but need gentle cleaning.
Use a soft cloth and special cleaner for glass surfaces. Avoid abrasive tools that can scratch the surface.
- Let the stove cool completely
- Use a soft sponge or cloth
- Apply glass stove cleaner or mild soap
- Wipe gently in circles to remove stains
- Dry with a clean, soft cloth to shine
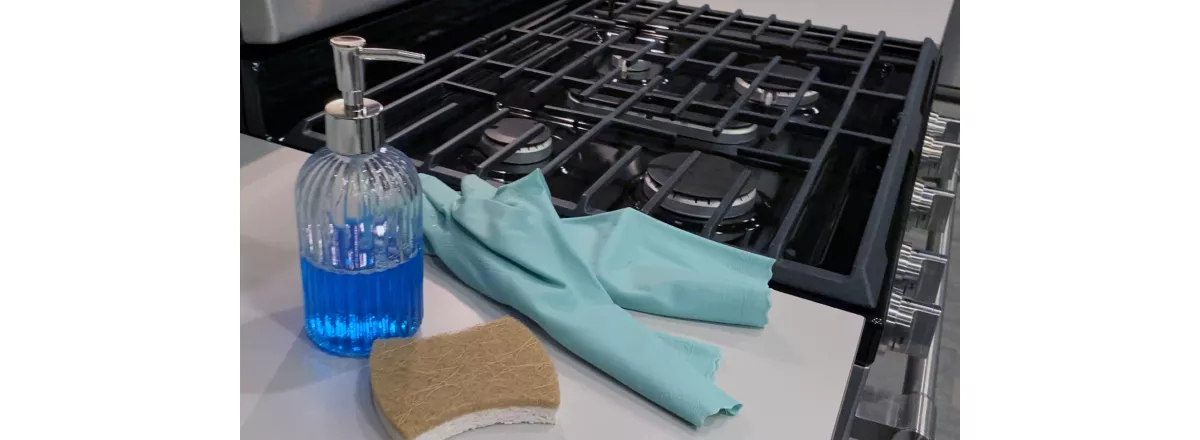
Essential Cleaning Supplies
Cleaning stove top burners needs the right supplies. Using good cleaners and tools makes the job easier.
Choose supplies that remove grease and grime well. Some cleaners are natural, while others are store-bought.
Natural Cleaners
Natural cleaners are safe and easy to find. They work well on light stains and grease.
Common natural cleaners include vinegar, baking soda, and lemon juice. These help break down dirt.
- White vinegar: Cuts grease and disinfects
- Baking soda: Scrubs off tough stains
- Lemon juice: Adds fresh scent and cleans
Commercial Products
Commercial products are made for heavy-duty cleaning. They remove burnt food and thick grease easily.
Look for stove top cleaners or degreasers. Always follow the instructions to avoid damage.
- Stove top cleaner sprays
- Degreasing wipes or liquids
- Oven and grill cleaners (use carefully)
Cleaning Tools
The right tools help scrub and wipe burners well. Soft and hard tools suit different parts.
Use gentle tools on delicate parts and strong tools on tough spots.
- Soft sponges for general cleaning
- Scrub brushes for stuck-on food
- Microfiber cloths to wipe and dry
- Old toothbrushes for small areas
- Plastic scrapers to avoid scratching
Preparing The Stove For Cleaning
Cleaning stove top burners keeps your kitchen safe and tidy. Proper preparation makes the job easier.
Start by getting the stove ready. Follow simple steps to prepare it well for cleaning.
Safety Precautions
Turn off all burner knobs before cleaning. Make sure the stove is completely cool.
Unplug electric stoves or switch off the gas supply for gas stoves. This prevents accidents.
- Wear gloves to protect your hands.
- Work in a well-ventilated area.
- Keep cleaning products away from children and pets.
Removing Burner Grates And Caps
Lift off the burner grates carefully and place them aside. These parts usually come off easily.
Next, remove the burner caps. Check if they need to be cleaned separately or soaked.
- Handle grates and caps gently to avoid damage.
- Keep all parts together to avoid losing pieces.
- Use warm water to loosen stuck parts if needed.
Detaching Burner Components
Some stoves allow you to remove more parts like the burner heads. Check your stove manual if unsure.
Use a screwdriver if screws hold parts in place. Keep screws safe for reassembly later.
- Remove burner heads gently to avoid bending parts.
- Do not force parts off to prevent damage.
- Lay parts on a clean towel to keep them safe.
Cleaning Gas Burners
Gas stove burners need regular cleaning to work well and stay safe.
Cleaning them carefully removes grease and food bits that block flames.
Soaking And Scrubbing
Take off the burner parts and soak them in warm, soapy water.
Soaking loosens stuck-on food and grease for easier cleaning.
- Use a soft brush or sponge to scrub the burners gently.
- Avoid hard brushes that can damage the surface.
- Clean all sides, including the bottom and edges.
- Rinse well to remove soap and dirt.
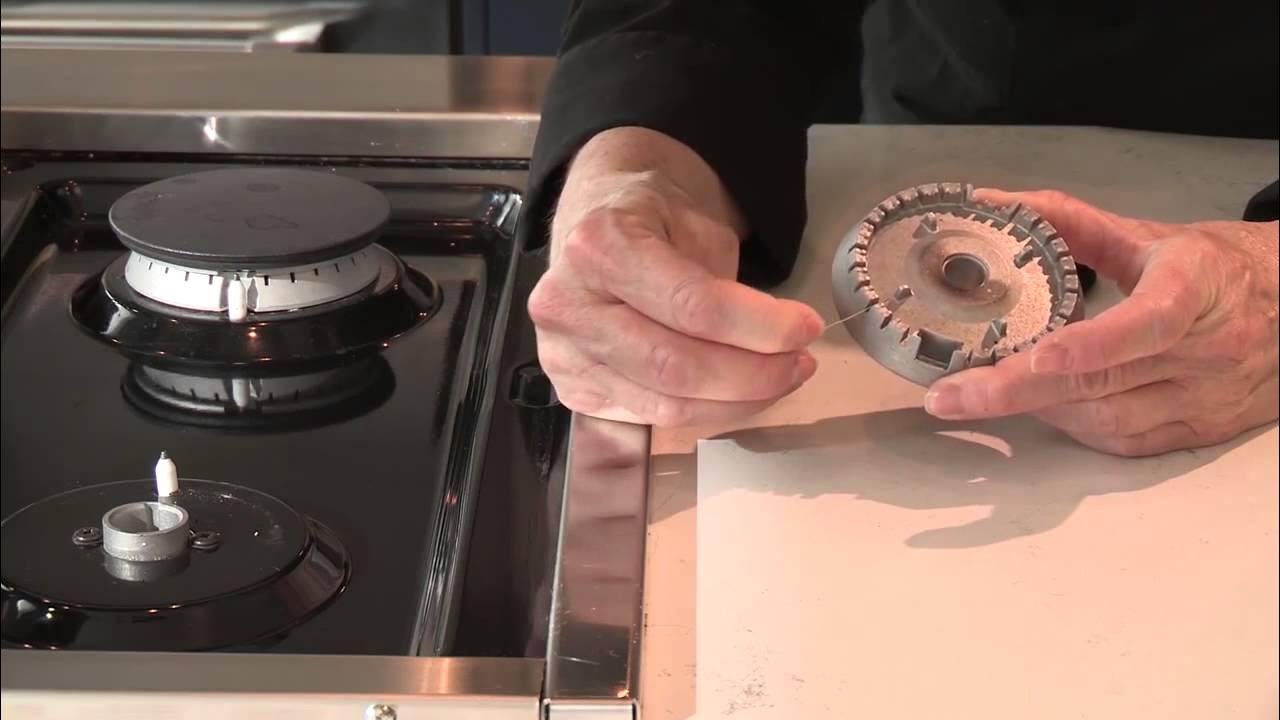
Clearing Clogged Burner Holes
Burner holes can get clogged with food or grease. This stops the flame.
| Tool | Use |
|---|---|
| Needle or Pin | Unclog small burner holes carefully |
| Toothpick | Remove debris without scratching |
| Compressed Air | Blow out loose dirt |
Work gently to avoid widening or damaging the holes.
Rinsing And Drying
After cleaning, rinse all burner parts under warm water to remove soap.
Dry each piece fully with a soft cloth or let air dry before reassembling.
- Make sure no moisture remains to prevent rust.
- Check that burner holes are clear and dry.
- Put parts back carefully on the stove.
Cleaning Electric Coil Burners
Cleaning electric coil burners keeps your stove working well and looking good. Dirt and spills can build up and cause problems.
Regular cleaning makes cooking safer and easier. It also helps your stove last longer.
Lifting And Inspecting Coils
First, make sure the stove is off and cool. Gently lift the electric coil burner from its socket. Some coils lift up and pull out easily.
Check the coil and the socket for damage or buildup. Look for cracks, burn marks, or loose connections. This helps you know if the burner needs repair.
Wiping And Removing Debris
Use a damp cloth or sponge to wipe the coil burner carefully. Avoid soaking the coil. Clean the surface and underside to remove food crumbs and grease.
If there is stuck-on dirt, use a soft brush or baking soda paste. Gently scrub and then wipe clean. Do not use harsh chemicals or metal scrubbers.
- Use mild soap and water for cleaning
- Dry coils completely before reattaching
- Clean the drip pans and stove surface too
Reattaching Burners
Once dry, carefully place the coil back into the socket. Make sure it fits snugly and is level. The burner should not wobble or move.
Plug in the burner by pushing it gently but firmly. Test the burner by turning it on briefly to check if it heats properly.

Credit: m.economictimes.com
Cleaning Glass Or Ceramic Burners
Glass and ceramic stove top burners look sleek but need care when cleaning. Dirt and spills can build up and make the surface dull.
Cleaning them carefully keeps the burners shiny and working well. Use gentle methods to avoid damage.
Gentle Scraping Techniques
Use a plastic scraper or a soft spatula to remove stuck food. Avoid metal tools that can scratch the surface.
- Let the burner cool before scraping.
- Hold the scraper at a low angle to the surface.
- Apply light pressure to lift debris without scratching.
- Work slowly around tough spots.
- Wipe away loosened dirt with a soft cloth.
Polishing For Shine
Polishing keeps glass and ceramic burners bright and clear. Use gentle cleaners made for glass surfaces.
| Polishing Material | How to Use | Tip |
| Glass cleaner | Spray and wipe with a microfiber cloth. | Use a clean cloth for a streak-free finish. |
| Baking soda paste | Make paste with water, apply, then rinse. | Good for removing dull spots gently. |
| Vinegar solution | Mix vinegar and water, spray, and wipe. | Helps cut grease and adds shine. |
Avoiding Scratches
Scratches harm the burner’s look and can make cleaning harder. Follow these tips to protect the surface.
- Do not use steel wool or rough scrubbers.
- Avoid abrasive powders or cleaners.
- Clean spills quickly before they harden.
- Use soft cloths or sponges only.
- Lift heavy pots instead of dragging them.
Reassembling And Testing Burners
After cleaning stove top burners, put them back carefully. Proper reassembly ensures safety and good performance.
Testing the burners after reassembly helps check if they work right. Follow these steps to finish the process well.
Reinstalling Burner Components
Place each burner part in its correct spot. Make sure the burner caps sit evenly on the base.
- Align the burner head with the gas outlet
- Set the burner cap firmly on top
- Replace the burner grate carefully
- Check that all parts are stable and secure
Testing For Functionality
Turn on each burner to see if it lights properly. The flame should be steady and blue.
| Test | What to Look For |
| Ignition | Quick and smooth lighting |
| Flame Color | Blue with no yellow tips |
| Flame Size | Even and stable |
| Gas Smell | No strong gas odor |
Final Inspection
Look over the burners one last time. Make sure no parts are loose or damaged.
Check these points before using the stove fully:
- Burner caps fit snugly
- Grates sit evenly without wobbling
- No leftover dirt or debris
- Igniters click and spark properly

Credit: shiningoven.ie
Maintaining Clean Burners
Keeping stove top burners clean is important for safety and cooking quality. Dirt and grease can block flames and cause uneven heat.
Regular care helps your stove work well and last longer. It also makes your kitchen look tidy and fresh.
Regular Cleaning Routine
Clean your burners after each use to stop grease build-up. Remove burner caps and wipe them with a damp cloth.
For deeper cleaning, soak burner parts in warm soapy water once a week. Use a soft brush to scrub off stuck food.
- Turn off the stove and let burners cool
- Remove burner caps and grates carefully
- Wipe surface with a soft cloth and mild cleaner
- Soak parts in warm water with dish soap
- Scrub gently with a brush or sponge
- Dry completely before placing parts back
Tips For Preventing Build-up
Stop spills and crumbs from piling up by wiping the stove after cooking. Use a splatter guard to keep grease off burners.
Check burners often for clogs and clean small spills quickly. Avoid using too much oil or butter while cooking.
- Clean spills right after the stove cools
- Use a splatter screen during frying
- Keep burner holes clear of food bits
- Avoid heavy oil use to reduce grease
- Check burners weekly for dirt or blockages
Choosing The Right Cleaners
Use gentle cleaners to protect burner parts. Avoid harsh chemicals that can damage metal or paint.
Soap and water work well for regular cleaning. For tough stains, try baking soda paste or vinegar solutions.
- Mild dish soap and warm water for daily use
- Baking soda mixed with water for scrubbing
- White vinegar to dissolve grease and stains
- Soft brushes or cloths to avoid scratches
- Avoid bleach or abrasive cleaners
Credit: www.maytag.ca
Frequently Asked Questions
How Do I Remove Grease From Stove Top Burners?
Use warm, soapy water and a soft sponge to clean grease. For tough stains, apply baking soda paste and scrub gently. Avoid harsh chemicals to protect burner surfaces and ensure safety.
What Is The Best Way To Clean Burner Grates?
Soak grates in hot, soapy water for 20-30 minutes. Scrub with a non-abrasive brush or sponge. Rinse thoroughly and dry before placing them back on the stove.
Can I Use Vinegar To Clean Stove Top Burners?
Yes, vinegar is effective for removing grease and grime. Spray white vinegar on burners and wipe with a clean cloth. It also helps eliminate odors without damaging surfaces.
How Often Should I Clean Stove Top Burners?
Clean burners after every use or at least once a week. Regular cleaning prevents buildup, improves stove efficiency, and extends the life of burners.
Conclusion
Cleaning stove top burners does not have to be hard. Use simple tools and common cleaners. Clean regularly to avoid tough stains and build-up. Take your time and be gentle with parts. A clean stove works better and looks nice.
Keep these steps in mind for safe cooking. Enjoy a fresh and tidy kitchen every day. Your stove will thank you with better performance. Try these tips and see the difference yourself.