
Is your refrigerator’s ice maker not working as well as it used to? Over time, ice makers can build up dirt, mold, and mineral deposits that affect the quality and taste of your ice.
Cleaning your ice maker might seem tricky, but it’s easier than you think—and it can save you from wasting money on bad ice or repairs. You’ll discover simple, step-by-step tips to clean your ice maker quickly and safely. Keep reading to make sure every cube you enjoy is fresh, clean, and perfect for your drinks.
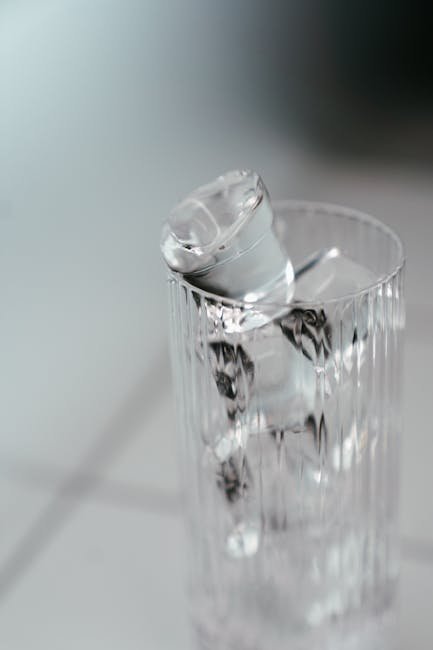
Credit: www.homeserve.com
Preparing For Cleaning
Cleaning your refrigerator ice maker keeps it working well and makes ice taste fresh. Before you start, prepare the area and tools you need. This helps make the process easy and safe.
Take time to get everything ready. This prevents mistakes and saves time during cleaning.
Gather Necessary Supplies
- Soft cloth or sponge
- Mild dish soap
- Warm water
- White vinegar or baking soda
- Small brush or toothbrush
- Towel for drying
- Gloves (optional)
Having these supplies ready helps you clean every part of the ice maker well. Use gentle cleaners to avoid damage.
Turn Off The Ice Maker
Switch off the ice maker to stop ice production. This prevents new ice from falling while you clean. Check your fridge manual for the exact switch or button.
Turning off the ice maker:
- Locate the ice maker switch or control panel.
- Press the off button or switch to the off position.
- Wait a few minutes to ensure the machine stops making ice.
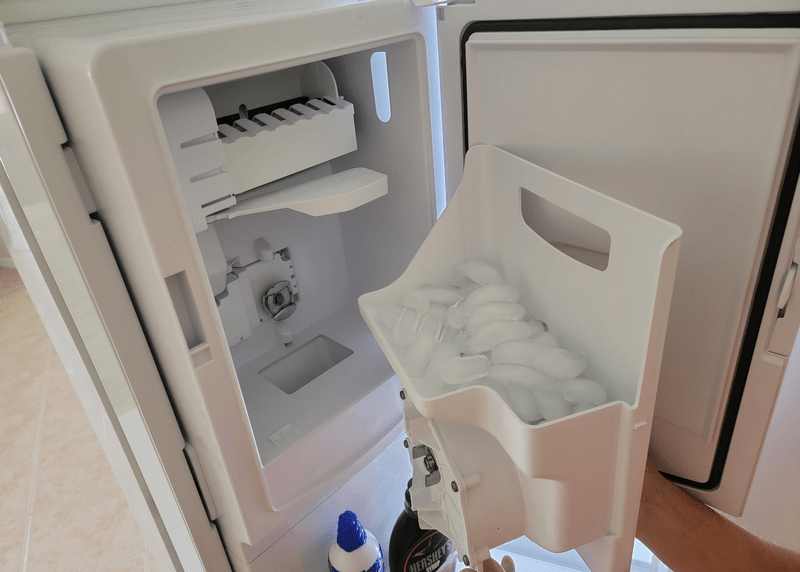
Empty The Ice Bin
Remove all ice cubes from the ice bin. Emptying the bin allows you to clean it thoroughly. Dispose of old or melted ice properly.
| Ice Bin Care | Reason |
|---|---|
| Remove ice cubes | To clean the bin fully |
| Dry the bin | Prevents ice from sticking |
| Check for cracks | Ensures no leaks or damage |

Credit: www.aol.com
Disassembling The Ice Maker
Cleaning your refrigerator ice maker starts with taking it apart carefully. This helps you reach all dirty areas.
Follow each step to remove parts safely and keep your ice maker working well.
Remove The Ice Bin
First, pull out the ice bin from the freezer compartment. This holds the ice cubes made by the machine.
Empty the ice bin completely. Then lift it straight out to avoid breaking any parts.
- Open the freezer door fully
- Locate the ice bin under the ice maker
- Pull the bin slowly towards you
- Empty any ice cubes inside
- Lift the bin out carefully
Detach Removable Parts
Next, find parts of the ice maker that come off easily. These parts need cleaning too.
Look for screws, clips, or tabs that hold pieces in place. Use a screwdriver if needed.
- Unplug the refrigerator for safety
- Remove any screws or fasteners
- Gently pull off the ice mold and cover
- Take out the water arm or dispenser parts
- Place all parts on a clean cloth
Cleaning The Ice Bin
Cleaning the ice bin keeps your ice fresh and your refrigerator healthy. Dirt and bacteria can build up over time in the bin.
Regular cleaning helps stop bad smells and prevents ice from sticking together.
Wash With Warm Soapy Water
Remove the ice bin from the freezer carefully. Use warm water and mild dish soap to wash all surfaces of the bin.
- Wear gloves to protect your hands.
- Use a soft cloth or sponge to avoid scratches.
- Clean corners and crevices thoroughly.
- Do not use harsh chemicals or bleach.
Rinse And Dry Thoroughly
Rinse the ice bin well under clean running water to remove soap residue. Dry it completely before placing it back.
| Drying Tips | Why It Matters |
| Use a clean towel to wipe the bin | Prevents water spots and mold growth |
| Let air dry for 10-15 minutes | Ensures all moisture evaporates |
| Place bin in a warm area if possible | Speeds up drying process |

Credit: www.housework.com
Cleaning The Ice Maker Components
Keeping your refrigerator’s ice maker clean helps it work well. Cleaning stops bad smells and keeps ice fresh.
Regular cleaning removes dirt and prevents ice from sticking. Focus on the main parts for best results.
Clean With Vinegar Solution
Use a vinegar solution to clean the ice maker parts. Vinegar kills germs and removes mineral buildup.
Mix equal parts white vinegar and warm water. Soak removable parts like the ice bin and trays in this solution.
Scrub Stubborn Residue
Some ice maker parts may have hard-to-remove residue. Use a soft brush or sponge to scrub these areas gently.
Avoid using harsh tools that can damage the surface. Scrub until all buildup and stains are gone.
Rinse Components
Rinse all parts thoroughly with clean water. This removes any vinegar taste and leftover dirt.
Dry the components well before putting them back into the ice maker. This helps keep the ice fresh and clean.
Reassembling The Ice Maker
After cleaning the ice maker, you need to put it back together. This step is important to make sure it works well.
Take your time to reassemble each part carefully. Check that everything fits and moves correctly.
Reattach Components
Start by reattaching the main parts you removed. These parts include the motor, ice mold, and sensors.
Make sure each component clicks or screws back into place. Loose parts can cause the ice maker to fail.
- Align the motor with its mounting points
- Snap the ice mold securely into the frame
- Reconnect any wiring or sensors carefully
- Tighten screws without overtightening
Insert The Ice Bin
After the components are secure, slide the ice bin back into the freezer. It collects the ice cubes as they fall.
Push the bin in until it stops. This ensures it is in the right place to catch ice properly.
- Check the bin for any cracks or damage
- Place it on the designated rails or guides
- Push gently but firmly to avoid misalignment
- Test by turning on the ice maker once reassembled
Restarting The Ice Maker
Restarting your refrigerator’s ice maker helps it work better after cleaning. It resets the system and clears any small issues.
Follow these simple steps to turn the ice maker back on and check if it works properly.
Turn The Ice Maker Back On
Look for the ice maker’s power switch or button inside the freezer. It may be a small lever or a switch on the unit.
Flip the switch or push the button to the “on” position. This restarts the ice maker and allows it to begin making ice again.
- Find the control switch or lever inside the freezer
- Move the switch to the “on” position
- Listen for sounds that show the ice maker is working
Check For Proper Operation
After turning it on, watch the ice maker for a few minutes. It should start to fill with water and make ice cubes.
Check the ice bin after a few hours. Make sure ice cubes are forming and dropping into the tray as expected.
- Listen for water filling sounds
- Look for ice cubes forming in the tray
- Ensure ice falls into the storage bin
Maintenance Tips
Keeping your refrigerator ice maker clean helps it work well. Dirt and mold can build up inside it.
Regular care prevents bad smells and keeps ice fresh and safe to eat.
Regular Cleaning Schedule
Clean the ice maker every three to six months. This stops mold and bacteria from growing.
Wipe the ice bin and remove any old ice before cleaning. Use warm water and mild soap.
- Turn off the ice maker before cleaning
- Remove the ice bin and discard old ice
- Clean surfaces with soapy water
- Rinse well and dry before putting back
- Turn the ice maker back on
Inspect For Issues
Check the ice maker often for cracks or leaks. Look for signs of mold or bad smells.
Listen for strange noises. These can mean a part is broken or clogged.
- Check water lines for leaks
- Look inside for mold or slime
- Make sure ice cubes form properly
- Listen for unusual sounds
- Replace damaged parts promptly
Use Filtered Water
Filtered water keeps your ice clean and tastes better. It also protects the ice maker from buildup.
Unfiltered water can cause mineral deposits that block the machine and affect ice quality.
- Use a water filter on your fridge or water line
- Replace filters as the manufacturer suggests
- Filtered water reduces scale and rust
- Better ice taste with filtered water
Frequently Asked Questions
How Often Should I Clean My Refrigerator Ice Maker?
Clean your ice maker every 3 to 6 months to prevent mold and mineral buildup. Regular cleaning ensures fresh, safe ice and extends the appliance’s lifespan.
What Materials Are Needed To Clean An Ice Maker?
You need warm water, mild dish soap, a soft cloth, a toothbrush, and white vinegar. These materials effectively remove dirt and disinfect the ice maker without damage.
Can I Use Bleach To Clean The Ice Maker?
Avoid bleach as it can damage parts and leave harmful residues. Instead, use a vinegar solution to sanitize safely and naturally without affecting ice taste.
How Do I Prevent Ice Maker Odors?
Regular cleaning and replacing the water filter help prevent odors. Also, discard old ice often and keep the ice bin clean and dry.
Conclusion
Cleaning your refrigerator ice maker keeps ice fresh and safe to use. Regular care helps avoid bad tastes and clogs. Use simple steps and gentle cleaners for best results. Set a cleaning routine to save time and effort. A clean ice maker works better and lasts longer.
Small actions prevent big problems. Start today to enjoy clear, fresh ice every day.