
Your refrigerator drip pan might be one of the dirtiest spots in your kitchen, yet it often goes unnoticed. If you’ve ever noticed a strange smell or puddles of water under your fridge, your drip pan might be the culprit.
Cleaning it thoroughly isn’t just about hygiene—it helps your fridge run better and lasts longer. In this guide, you’ll discover simple, effective steps to get that drip pan spotless and fresh. Ready to tackle this hidden task and keep your kitchen cleaner?
Let’s dive in!
Why Clean The Drip Pan?
The drip pan catches water from your refrigerator. Over time, it can fill with dirt and mold.
Cleaning the drip pan keeps your fridge working well and your home fresh.
Prevent Mold And Bacteria Growth
Water in the drip pan can cause mold and bacteria to grow. This can create bad smells.
Cleaning stops germs from spreading inside your fridge and kitchen.
Avoid Water Damage
A dirty drip pan may clog and overflow. This can cause water damage to your floor.
Regular cleaning keeps water flowing and prevents leaks.
Improve Refrigerator Efficiency
When the drip pan is clean, the fridge works better. It cools more evenly and saves energy.
Cleaning helps your fridge last longer without problems.
Keep Your Kitchen Smelling Fresh
Stale water and food particles in the drip pan cause bad odors. Cleaning removes the source of smells.
A clean drip pan helps your kitchen smell clean and fresh.
Tools And Materials Needed
Cleaning the refrigerator drip pan keeps your fridge working well. It stops bad smells and mold from growing.
Gather these tools and materials before you start. They make the cleaning process easy and safe.
Basic Cleaning Tools
You need simple tools to reach and clean the drip pan. These help remove dirt and water safely.
- Screwdriver (to remove the drip pan if needed)
- Soft cloth or sponge
- Old toothbrush (for scrubbing corners)
- Bucket or basin
Cleaning Solutions
Use gentle cleaners that remove grime without damage. Avoid harsh chemicals that harm the fridge parts.
| Cleaning Solution | Purpose |
| Mild dish soap | Removes grease and dirt |
| White vinegar | Kills germs and deodorizes |
| Baking soda | Clears stains and odors |
| Warm water | Used to rinse and dilute cleaners |
Safety Equipment
Protect yourself during cleaning. Gloves and proper ventilation keep you safe.
- Rubber gloves (to protect hands)
- Face mask (optional, for strong odors)
- Good ventilation or open windows
Locating The Drip Pan
The drip pan in your refrigerator collects water from condensation. It helps keep your floor dry.
Finding the drip pan is important for cleaning and preventing odors or mold.
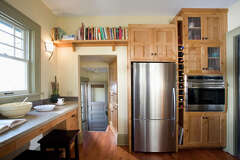
Check The Bottom Front Of The Refrigerator
Most drip pans are located at the bottom front of the refrigerator. Look under the grill or kick plate.
Remove the grill by pulling it gently or unscrewing it. The drip pan sits behind this panel.
Look At The Back Bottom Area
In some models, the drip pan is at the back bottom of the unit. You may need to pull the fridge away from the wall.
Check for a shallow plastic or metal pan. It usually sits below the compressor or coils.
Consult The Refrigerator Manual
Each refrigerator model is different. The user manual shows where the drip pan is located.
If you do not have a paper copy, check the manufacturer’s website for the manual.

Credit: www.aol.com
Removing The Drip Pan
The drip pan in your refrigerator collects water from condensation. Cleaning it regularly keeps your fridge fresh and prevents odors. Removing the drip pan is the first step to clean it thoroughly.
This guide explains how to safely and easily remove the drip pan from different types of refrigerators.
Locate The Drip Pan
Find the drip pan at the bottom of your refrigerator. It is usually under the fridge or behind the front grille. Look for a shallow tray that collects water.
Prepare Your Tools
Gather simple tools to remove the drip pan without damage. You may need gloves, a screwdriver, and a towel.
- Rubber gloves to protect your hands
- Flathead or Phillips screwdriver
- Soft cloth or towel to catch drips
- Flashlight to see under the fridge
Remove The Front Grille Or Cover
Some refrigerators have a front grille or cover that hides the drip pan. Use the screwdriver to remove screws or gently pull off the cover. Set screws aside safely.
Slide Out The Drip Pan
Carefully slide the drip pan out from its place. It may have water or debris, so hold it level. Use the towel underneath to catch any spills.
| Tip | Details |
|---|---|
| Check for Clips | Some drip pans are held by clips. Press or lift clips to release the pan. |
| Be Gentle | Avoid bending or cracking the drip pan while removing it. |
| Use Flashlight | Shine light under the fridge to see screws or clips clearly. |
Cleaning The Drip Pan
The drip pan in your refrigerator collects water and debris. It can get dirty and smelly over time. Cleaning it helps keep your fridge fresh and working well.
Removing and cleaning the drip pan is easy with the right tools. You only need some common household items and a bit of time.
Using Baking Soda And Vinegar
Baking soda and vinegar work well to clean the drip pan. Baking soda removes dirt, and vinegar kills bacteria. Together, they break down grime and odors.
Mix baking soda with water to form a paste. Spray or pour vinegar on the pan, then apply the paste. Let it sit for 10 minutes before scrubbing.
- Use 2 tablespoons of baking soda
- Add 1 cup of vinegar
- Let the mixture sit to loosen dirt
Scrubbing Stubborn Stains
Some stains may not come off with just baking soda and vinegar. Use a soft brush or sponge to scrub the pan gently. Avoid metal brushes that can scratch the surface.
For tough spots, apply more baking soda paste and scrub again. Be patient and repeat if needed. This helps remove stuck-on food and mold.
- Use a soft-bristle brush or sponge
- Scrub in circular motions
- Apply more paste for tough stains
Rinsing And Drying
After scrubbing, rinse the drip pan with warm water. Make sure all baking soda and vinegar are washed away. Leftover residue can cause odors or damage.
Dry the pan completely before putting it back. Use a clean towel or let it air dry. A dry pan prevents mold and keeps your fridge clean.
Credit: www.weekand.com
Reinstalling The Drip Pan
After cleaning the drip pan, you need to put it back correctly. Proper reinstallation keeps your refrigerator working well.
Follow simple steps to avoid leaks and ensure the drip pan fits tightly. This helps prevent water damage and bad smells.
Locate The Drip Pan Slot
Find the slot or space under your refrigerator where the drip pan fits. It is usually at the back or bottom.
Check the user manual if you are unsure about the pan’s exact place. This avoids damage during reinstallation.
Position The Drip Pan Properly
Place the drip pan flat in its slot. Make sure it sits evenly without tilting or wobbling.
The pan should align with the refrigerator’s drainage hole. This allows water to flow into the pan correctly.
Secure The Drip Pan In Place
Some drip pans have clips or screws to hold them. Attach these parts firmly to keep the pan from moving.
If your drip pan slides in, push it gently but firmly until it stops. Avoid forcing it to prevent damage.
Check For Proper Fit And Stability
After installing, test if the drip pan stays in place. Slightly shake it to check stability.
If it moves or feels loose, reposition or secure it better. A stable drip pan prevents spills and noise.
Final Inspection And Cleaning
Look under the refrigerator to see if the drip pan is visible and clean. Wipe off any spills around it.
Regularly check the drip pan to keep your fridge dry and fresh. This helps stop mold and bad odors.
Maintaining A Clean Drip Pan
The drip pan in your refrigerator collects water that melts from frost. Keeping it clean stops bad smells and mold growth. A clean drip pan also helps your fridge work better.
Regular care of the drip pan is easy. It only takes a few minutes and can prevent bigger problems later. Here is how you can keep your drip pan clean and check it for leaks.
Regular Cleaning Schedule
Clean the drip pan at least once every three months. If you notice odors or spills, clean it sooner. Use warm water and mild soap to wash the pan. Rinse it well and dry it before putting it back.
- Unplug the refrigerator before cleaning.
- Locate and remove the drip pan carefully.
- Use a cloth or sponge with soap and warm water.
- Scrub away any dirt or slime inside the pan.
- Rinse the pan with clean water.
- Dry the pan completely before reinstalling.
- Plug the refrigerator back in after cleaning.
Checking For Leaks
Leaks can cause water to pool under the fridge. Check the drip pan for cracks or holes. Also, inspect the drain tube for blockages or damage. Fix any issues to avoid water damage.
| Part | What to Check | Action if Damaged |
| Drip Pan | Cracks, holes, dirt build-up | Replace or clean thoroughly |
| Drain Tube | Blockages, cracks | Clear blockages or replace tube |
| Fridge Base | Water pooling or rust | Clean and dry area, repair leaks |

Credit: www.delish.com
Frequently Asked Questions
How Often Should I Clean The Refrigerator Drip Pan?
Clean the drip pan every 3 to 6 months to prevent mold and odors. Regular cleaning helps maintain hygiene and fridge efficiency.
What Materials Do I Need To Clean A Drip Pan?
You need warm water, mild detergent, a sponge or cloth, and a towel. Avoid harsh chemicals to protect the pan’s surface.
Can I Clean The Drip Pan Without Removing It?
Yes, wipe the drip pan carefully with a damp cloth if removal is difficult. However, removing it allows for a deeper, thorough cleaning.
How Do I Prevent Mold In The Refrigerator Drip Pan?
Keep the drip pan dry and clean regularly. Ensure proper fridge drainage and avoid spills to reduce mold growth.
Conclusion
Cleaning your refrigerator drip pan keeps your fridge fresh and healthy. Regular cleaning stops bad smells and mold from growing. Use warm water and mild soap for best results. Don’t forget to dry the pan well before placing it back.
Small steps like this help your fridge work better longer. A clean drip pan means a cleaner kitchen overall. Keep this task in your routine. It’s simple and worth the effort.