
Your kitchen faucet is one of the most used spots in your home, but it often gets overlooked when it comes to cleaning. Over time, grime, water spots, and even bacteria can build up, making your faucet look dull and unhygienic.
If you want your kitchen to feel fresh and sparkling, learning how to clean your kitchen faucet thoroughly is a game-changer. You’ll discover simple, effective steps to restore the shine and keep your faucet spotless. Keep reading—you’ll be amazed at how easy it is to achieve a cleaner, healthier kitchen!

Credit: www.yahoo.com
Gather Necessary Supplies
Cleaning kitchen faucets needs the right supplies to do a good job. Preparing these items before you start saves time and effort.
Using the correct tools and cleaners protects your faucet’s finish and keeps it shiny longer.
Cleaning Cloths And Sponges
Soft cloths and sponges are important to avoid scratches on your faucet. Microfiber cloths work best for wiping and polishing.
Cleaning Solutions
Choose gentle cleaning solutions that remove grime but do not harm the faucet finish. Mild dish soap or vinegar mixed with water are common choices.
Tools For Hard-to-reach Areas
- Old toothbrush for scrubbing small crevices
- Soft-bristle brush for delicate areas
- Toothpicks or cotton swabs to clean tiny gaps
Protective Items
| Item | Purpose |
| Rubber gloves | Protect your hands from chemicals |
| Old towel | Catch drips and protect surfaces |
| Plastic bag | Soak faucet parts if needed |
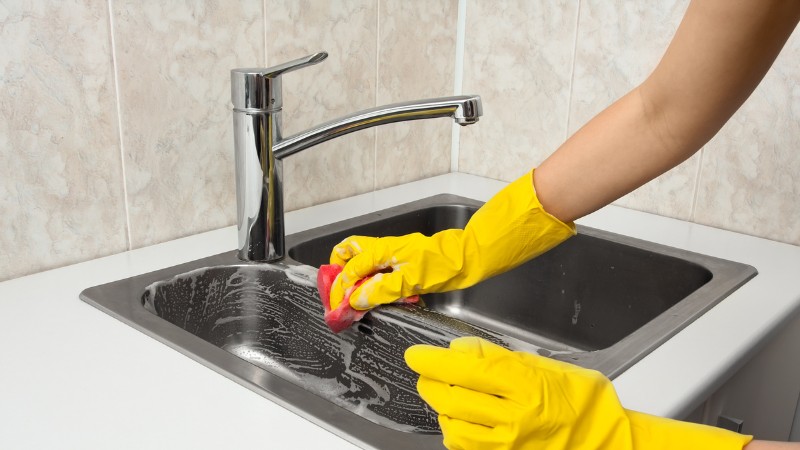
Remove Surface Debris
Cleaning kitchen faucets starts with removing surface debris. Dirt, dust, and food particles can build up on the faucet.
Removing this debris makes the faucet look cleaner and prevents damage over time.
Wipe With A Damp Cloth
Use a soft, damp cloth to wipe away loose dirt and grime. Avoid harsh scrubbing that can scratch the finish.
Wiping daily keeps debris from building up and makes deep cleaning easier.
Use Mild Soap Solution
Mix a few drops of mild dish soap with warm water. Dip your cloth in the solution and wipe the faucet surface.
This helps remove grease and sticky residues that a dry cloth can miss.
Clean Around The Base
Debris often collects where the faucet meets the sink. Use a soft brush or old toothbrush to clean this area.
Scrubbing gently helps remove grime that builds up in tight spaces.
Rinse And Dry The Faucet
After cleaning, rinse the faucet with clean water to remove soap residue. Use a dry cloth to wipe it dry.
Drying prevents water spots and keeps the faucet shiny.
Tackle Hard Water Stains
Hard water stains on kitchen faucets look dull and dirty. These stains come from minerals in the water.
Cleaning these stains well keeps your faucet shiny and working properly.
Use Vinegar To Break Down Stains
White vinegar is a natural cleaner. It helps dissolve mineral buildup on faucets.
Soak a cloth in vinegar and wrap it around the faucet. Let it sit for 15 to 30 minutes.
- Use a soft cloth to avoid scratching
- Rinse faucet with water after soaking
- Dry with a clean towel to prevent water spots
Scrub Gently With Baking Soda Paste
Mix baking soda with water to make a paste. Apply it to the stained areas.
Use a soft toothbrush to scrub gently. Baking soda removes stains without damage.
- Apply paste only on stained spots
- Scrub in small circles
- Rinse well and dry after scrubbing
Clean Hard-to-reach Spots
Use an old toothbrush or cotton swabs to clean tight spaces. Hard water stains often hide there.
Dip the brush or swab in vinegar or baking soda paste for better cleaning power.
- Focus around faucet base and handles
- Clean inside crevices carefully
- Wipe away loosened stains with a damp cloth
Prevent Future Hard Water Stains
Wipe your faucet dry after each use. This stops minerals from building up.
Try using a water softener if hard water is common in your area.
- Use a dry towel or cloth after washing dishes
- Install a water softener system if needed
- Clean faucets regularly to avoid heavy buildup
Clean Faucet Handles
Faucet handles get dirty from daily use. Cleaning them keeps your kitchen looking neat.
Cleaning handles well helps remove germs and buildup. It also keeps the faucet working smoothly.
Disassemble Handles
Start by turning off the water supply. This prevents leaks while cleaning.
Use a screwdriver or Allen wrench to remove the handle screws. Gently pull off the handles.
- Locate the screw under a cap or on the side
- Use the correct tool to avoid damage
- Keep screws in a safe place
- Remove handles carefully to avoid breaking parts
Clean With Soap Solution
Mix warm water with mild dish soap in a bowl. This solution cleans dirt and grease well.
Soak the handles in the soap solution for 10 minutes. Use a soft brush to scrub away grime.
- Rinse the handles with clean water
- Dry with a soft cloth to avoid water spots
- Check for any damage or buildup
- Reassemble handles only when fully dry
Focus On The Faucet Spout
Cleaning the faucet spout keeps your kitchen looking fresh and prevents buildup. Dirt and minerals can clog the spout over time. Regular cleaning helps water flow smoothly.
Focus on the spout’s surface and inside parts. Use simple tools and natural cleaners for best results.
Use Vinegar Soak
Vinegar removes hard water stains and mineral deposits inside the spout. It dissolves buildup gently without harsh chemicals.
- Fill a small plastic bag with white vinegar.
- Place the bag over the faucet spout so the tip is submerged in vinegar.
- Secure the bag with a rubber band or string.
- Let the vinegar soak for at least 30 minutes.
- Remove the bag and wipe the spout with a soft cloth.
Scrub With A Brush
After soaking, use a brush to remove loosened dirt and deposits. A toothbrush works well to reach small areas.
| Brush Type | Best Use |
| Soft toothbrush | Cleaning inside the spout and aerator |
| Small scrub brush | Removing tough stains on the spout surface |
| Pipe cleaner | Reaching inside narrow spout openings |
Credit: modern-maids.com
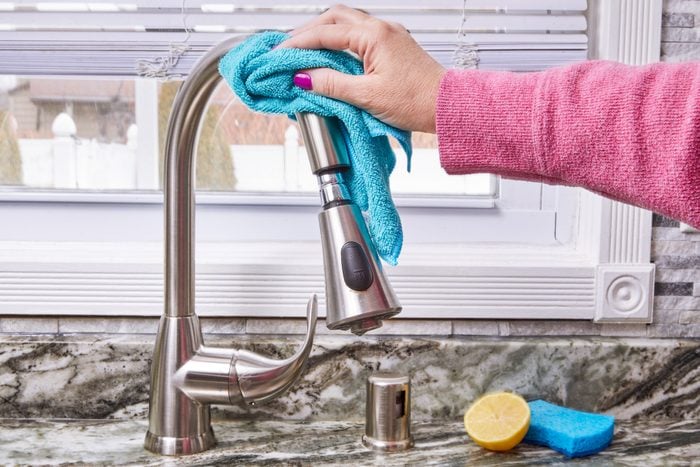
Polish For Extra Shine
Polishing your kitchen faucets adds a bright, clean look. It also helps protect the finish. Use the right polish to get the best results.
Regular cleaning removes dirt, but polishing makes the faucet shine like new. This guide shows how to polish faucets safely and effectively.
Select The Right Polish
Choose a polish made for your faucet’s material. Common materials include chrome, brass, and stainless steel. Using the wrong polish can damage the surface.
- For chrome, use a chrome-specific polish or mild metal polish.
- For brass, use a polish designed for brass finishes.
- For stainless steel, select a polish that removes fingerprints and water spots.
Prepare The Faucet Surface
Before polishing, clean the faucet thoroughly. Remove soap scum and dirt with warm water and mild soap. Dry the faucet completely to avoid water spots.
Apply The Polish Correctly
Use a soft cloth to apply polish. Rub gently in small circles. Avoid harsh scrubbing to prevent scratches. Follow the polish instructions for best results.
| Polish Type | Application Method | Drying Time |
| Chrome Polish | Apply with soft cloth, rub gently | 2-3 minutes |
| Brass Polish | Use a microfiber cloth, apply evenly | 5 minutes |
| Stainless Steel Polish | Spray polish, wipe with dry cloth | 1-2 minutes |
Buff For A Lasting Shine
After polish dries, buff the faucet with a clean cloth. This step removes excess polish and boosts shine. Use light pressure and circular motions.
Tip:Use a soft microfiber cloth for buffing to avoid scratches.
Prevent Future Build-up
Keeping your kitchen faucet clean is important for hygiene and appearance. Regular care stops grime and mineral deposits from building up. This guide shares easy tips to prevent future build-up on your faucet.
By following simple habits, you can keep your faucet shiny and working well for a long time. These methods save time and effort in the long run.
Dry The Faucet After Use
Water left on the faucet can cause mineral deposits and spots. Wipe the faucet dry after each use with a soft cloth. This simple habit reduces water stains and slows down build-up.
Use A Water Softener
Hard water has minerals that cause white spots and crusty build-up. Installing a water softener helps reduce these minerals. This protects your faucet and other plumbing fixtures from damage.
Clean Regularly With Mild Products
Regular cleaning stops dirt from settling and turning into tough stains. Use mild soaps or vinegar solutions. Avoid harsh chemicals that can damage the faucet finish.
- Clean the faucet once a week
- Use a soft cloth or sponge
- Rinse well and dry after cleaning
Fix Leaks Quickly
Leaking faucets cause constant moisture, which encourages build-up and mold. Repair leaks as soon as you notice them. This stops water waste and keeps the faucet dry.
Protect Faucet With A Sealant
Applying a protective sealant creates a barrier against water and dirt. This makes cleaning easier and slows down mineral deposits.
| Sealant Type | Benefits | Application Frequency |
|---|---|---|
| Silicone-based | Waterproof and flexible | Every 6 months |
| Wax-based | Adds shine and protection | Every 3 months |
| Polyurethane | Durable and hard coating | Once a year |
Regular Maintenance Tips
Keeping your kitchen faucets clean is important for hygiene and looks. Regular care helps avoid buildup and damage.
Follow simple maintenance tips to keep your faucet working smoothly and looking shiny every day.
Daily Wiping
Use a soft cloth to wipe the faucet after each use. This removes water spots and prevents mineral buildup.
Weekly Cleaning
Clean the faucet weekly using mild soap and warm water. Avoid abrasive cleaners that can scratch the surface.
- Mix mild dish soap with warm water
- Use a soft sponge or cloth to clean all faucet parts
- Rinse well with clean water
- Dry with a soft towel to prevent water spots
Monthly Deep Cleaning
Remove mineral deposits and buildup monthly using vinegar or a gentle descaling solution.
Here is how to deep clean your faucet monthly:
- Soak a cloth in white vinegar
- Wrap the cloth around the faucet and leave for 30 minutes
- Use a soft brush to scrub away loosened deposits
- Rinse the faucet thoroughly with water
- Wipe dry with a soft cloth
Check And Maintain Aerators
Clean faucet aerators regularly to keep water flow smooth and clean.
| Maintenance Task | Frequency |
| Remove aerator | Every 3 months |
| Soak in vinegar for 20 minutes | During removal |
| Rinse and scrub gently | After soaking |
| Reinstall aerator | Immediately after cleaning |
Credit: www.rd.com
Frequently Asked Questions
How Often Should I Clean Kitchen Faucets?
Clean kitchen faucets weekly to prevent buildup of grime and bacteria. Regular cleaning keeps faucets shiny and functioning well.
What Is The Best Cleaner For Kitchen Faucets?
Use a mild soap and warm water for regular cleaning. For tough stains, vinegar or a baking soda paste works effectively.
Can Vinegar Damage Faucet Finishes?
Vinegar is safe for most finishes but avoid prolonged contact. Test on a small area first to prevent damage or discoloration.
How Do I Remove Hard Water Stains On Faucets?
Soak a cloth in vinegar and wrap it around the faucet. Leave for 15 minutes, then scrub gently with a soft brush.
Conclusion
Cleaning kitchen faucets keeps them shiny and working well. Use gentle cleaners and soft cloths to avoid damage. Regular cleaning stops buildup and germs from growing. Pay attention to hard-to-reach spots for the best results. Small efforts often make a big difference in kitchen hygiene.
Keep your faucet looking fresh with simple, steady care. Clean faucets make your kitchen feel more inviting and neat. Try these easy steps regularly for a cleaner, healthier home.