
Your kitchen exhaust filters work hard to keep your cooking space fresh and smoke-free. But when they get clogged with grease and grime, they stop doing their job well—and that can lead to unpleasant odors, poor air quality, and even fire hazards.
You might think cleaning these filters is a tough, messy job, but it doesn’t have to be. You’ll discover simple, effective steps to clean your kitchen exhaust filters quickly and safely. By following these tips, you’ll extend the life of your filters and keep your kitchen running smoothly.
Keep reading to find out how easy it can be!
Importance Of Clean Exhaust Filters
Kitchen exhaust filters catch grease and dirt from cooking. They help keep the air clean and the kitchen safe.
Cleaning these filters often stops fires and improves air flow. It also helps your kitchen work better and last longer.
Prevent Fire Hazards
Grease builds up on exhaust filters over time. This grease can catch fire if not cleaned regularly.
Cleaning filters lowers the risk of kitchen fires. It keeps your cooking area safer for everyone.
Improve Air Quality
Dirty filters block air flow and trap smoke. This can make your kitchen smell bad and fill with smoke.
Clean filters help fresh air flow out. This keeps the kitchen air fresh and healthy to breathe.
Increase Efficiency Of Exhaust System
Grease and dirt slow down the exhaust fan. The fan works harder to move air through dirty filters.
Cleaning filters helps the fan use less energy. This makes the exhaust system work better and saves money.
Extend Equipment Life
Grease damage can shorten the life of your exhaust system. Dirt can cause parts to wear out fast.
Regular cleaning keeps the system in good shape. This helps avoid costly repairs and replacements.
Meet Health And Safety Regulations
Clean exhaust filters are required by many health rules. They help keep your kitchen safe and legal.
Regular cleaning helps pass inspections. It shows that you care about safety and cleanliness.
Credit: www.coles.com.au
Signs Your Filters Need Cleaning
Kitchen exhaust filters trap grease and dirt from cooking fumes. Over time, they get clogged and dirty.
Cleaning filters keeps your kitchen safe and helps the exhaust work well. Look for these signs to know when to clean.
Grease Build-up On Filter Surface
If you see thick grease or oily residue on your filters, it means they need cleaning. Grease blocks airflow.
Dirty filters can cause smoke and odors to linger in the kitchen.
Reduced Airflow And Ventilation
When filters get clogged, the kitchen hood pulls less air. You may notice weaker ventilation.
Slow airflow makes cooking fumes stay longer and can cause heat to build up.
Strange Odors In The Kitchen
Filters that are dirty trap smells and grease. This can cause bad odors to stay in the kitchen.
Cleaning the filters removes these smells and keeps your kitchen fresh.
Visible Smoke Or Steam Escape
When filters are blocked, smoke and steam do not get removed properly. You may see them escaping.
This can make the kitchen uncomfortable and less safe for cooking.
Longer Cooking Times Or Overheating
Blocked filters reduce exhaust power. This can cause heat to stay near the stove.
The kitchen may feel hotter, and cooking may take longer than usual.
Gathering Necessary Supplies
Cleaning kitchen exhaust filters needs the right supplies. This makes the job easier and safer.
Before starting, gather all items you need. This will save time and help you clean well.
Cleaning Solutions
Choose cleaning solutions that remove grease and dirt. Use ones that are safe for metal filters.
Common cleaning solutions include degreasers and dish soap. Strong degreasers work best for heavy grease.
- Commercial kitchen degreaser
- Dish soap with grease-cutting power
- Baking soda for natural cleaning
- Hot water to activate cleaning agents
Tools And Equipment
Use proper tools to clean exhaust filters safely and fully. Tools help reach all filter parts.
Gather brushes, gloves, and containers for soaking filters. These make cleaning easier and protect you.
- Rubber gloves to protect your hands
- Scrub brush with stiff bristles
- Plastic basin or large sink for soaking
- Old towels or rags for drying
- Protective goggles to shield your eyes
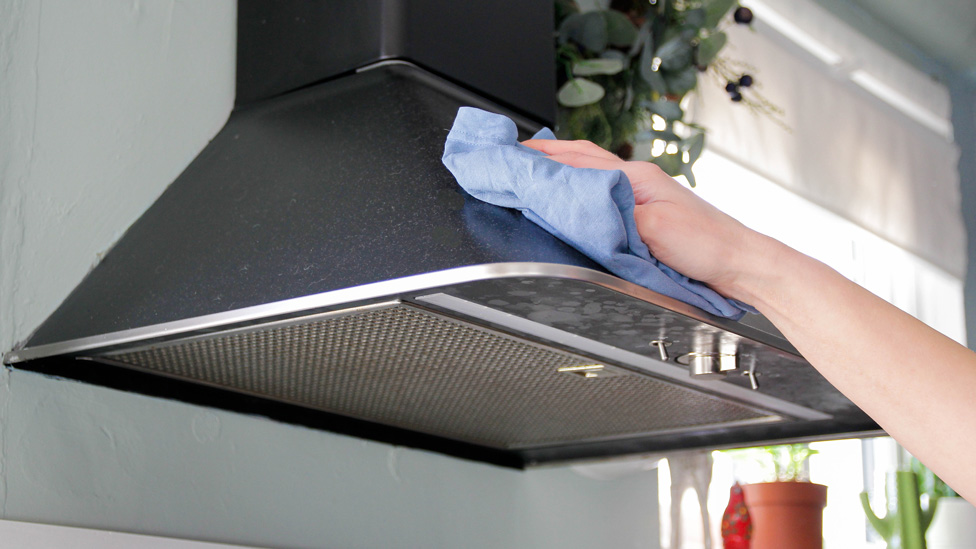
Credit: endofleasesydney.com.au
Safety Precautions
Cleaning kitchen exhaust filters requires careful attention to safety. These filters collect grease and dirt that can cause fires if not handled properly.
Always prepare your workspace and use protective gear to avoid accidents and injuries during cleaning.
Turn Off Power And Ventilation
Before removing the exhaust filters, make sure to switch off the power to the exhaust fan. This prevents electric shocks and accidental fan operation.
Wear Protective Gear
Grease and cleaning chemicals can irritate your skin and eyes. Wear gloves, goggles, and a mask to protect yourself.
- Use chemical-resistant gloves
- Wear safety goggles to protect eyes
- Use a mask to avoid inhaling fumes
- Wear old clothes or an apron
Handle Cleaning Chemicals Safely
Always read labels on cleaning products. Use only recommended amounts and avoid mixing chemicals, as this can create dangerous fumes.
Ensure Proper Ventilation
Clean kitchen exhaust filters in a well-ventilated area. Open windows or use fans to reduce buildup of cleaning fumes.
Quick Safety Checklist
- Turn off power to the exhaust system
- Wear gloves, goggles, and a mask
- Use cleaning chemicals as directed
- Work in a ventilated area
- Keep fire extinguisher nearby
Removing The Filters
Cleaning kitchen exhaust filters starts with taking them out safely. Removing filters properly helps keep your kitchen clean and safe.
Filters catch grease and dirt from cooking fumes. Removing them carefully prevents damage and makes cleaning easier.
Turn Off The Exhaust Fan
Always switch off the exhaust fan before removing filters. This stops any accidents and keeps you safe.
Turning off the fan also prevents dust and grease from spreading in the kitchen.
Locate The Filter Handles Or Clips
Most filters have handles or clips to hold them in place. Look carefully to find these parts before you start.
Handles make it easy to pull the filter out. Clips may need a little pressure to release.
Remove The Filters Gently
Grip the filter firmly but gently. Pull it straight out to avoid bending or breaking the frame.
If the filter feels stuck, check for extra clips or screws. Do not force it to avoid damage.
Place Filters In A Safe Spot
Put the removed filters on a flat surface to keep them safe. Avoid placing them near the stove or sink.
This prevents filters from falling or getting dirty before cleaning.
Soaking The Filters
Soaking kitchen exhaust filters helps loosen grease and dirt. This step makes cleaning easier and more effective.
Using the right soaking solution and time improves the cleaning results. Let’s look at how to soak the filters properly.
Prepare A Soaking Solution
Fill a large container with hot water. Add a degreasing cleaner or dish soap to the water. Mix well to create a strong soaking solution.
Use enough solution to cover the entire filter. This helps break down grease and grime during soaking.
- Use water above 120°F (49°C) for best results
- Add about 1/4 cup of degreaser or dish soap per gallon of water
- Mix solution until it forms suds
Soak The Filters
Place the filters fully into the soaking solution. Make sure no part is left dry or exposed.
Let the filters soak for at least 15 to 30 minutes. This time allows grease to soften and lift from the filter surface.
- Use a container large enough to hold the filters flat
- Soak longer for very greasy filters
- Do not soak filters with electrical parts
Check And Agitate The Filters
Check the filters during soaking to see if grease is loosening. Gently move or shake the filters in the solution.
This helps the cleaner reach all areas and removes stuck grease. Agitate filters every 10 minutes for better cleaning.
- Use gloves to protect hands
- Move filters slowly to avoid damage
- Repeat agitation if filters are very dirty
Scrubbing And Rinsing
Cleaning kitchen exhaust filters is important to keep your kitchen safe and fresh. Scrubbing and rinsing remove grease and dirt from the filters.
Using the right scrubbing and rinsing methods helps your filters last longer and work better.
Effective Scrubbing Techniques
Start scrubbing by soaking the filter in hot, soapy water. This softens the grease and dirt.
Use a non-abrasive brush or sponge to scrub the filter gently. Focus on corners and crevices where grease builds up.
- Use warm water with dish soap or degreaser
- Choose a soft-bristle brush for scrubbing
- Scrub both sides of the filter carefully
- Work on stubborn spots with extra scrubbing
Proper Rinsing Methods
Rinse the filter well with warm water after scrubbing. This removes all soap and loosened grease.
Make sure no soap or residue remains. Leftover soap can catch more dirt and clog the filter.
- Use a strong stream of warm water
- Rinse from different angles to clean all sides
- Shake off excess water before drying
- Let the filter dry completely before reinstalling
Drying The Filters
After cleaning kitchen exhaust filters, drying them is very important. Wet filters can cause rust and bad smells.
Proper drying keeps filters safe and ready to use again. It also helps keep the kitchen air clean.
Shake Off Excess Water
After rinsing, gently shake the filters to remove extra water. This helps speed up drying time.
Be careful not to bend or damage the filters while shaking them.
Air Dry In A Well-ventilated Area
Place filters upright in a dry spot with good airflow. Avoid humid or closed spaces.
Fresh air helps remove moisture faster and stops mold growth.
Use A Clean Towel For Faster Drying
Pat the filter surfaces with a clean, dry towel. This removes water from small corners and holes.
Change towels if they become too wet to avoid spreading moisture.
Avoid Direct Heat Sources
Do not dry filters near heaters or open flames. Heat can damage the filter material.
Let filters dry naturally for safety and to keep their shape.
Reinstalling The Filters
After cleaning your kitchen exhaust filters, it is important to reinstall them correctly. Proper reinstallation helps the filters work well and keeps your kitchen safe.
Follow the steps below to put the filters back in place without damaging them or the exhaust system.
Check The Filter Condition
Before reinstalling, inspect the filters for any damage or leftover grease. Make sure they are dry and clean to avoid mold or odors.
If you find cracks or dents, consider replacing the filters to keep your kitchen safe.
Align Filters Correctly
Place the filters so they fit the slots or brackets in the exhaust hood. Proper alignment ensures they stay secure and filter air well.
- Look for hooks or tabs on the filter edges
- Match them with the slots on the exhaust hood
- Insert the filter gently without forcing it
Secure The Filters Firmly
After placing the filters, lock them in place if your exhaust hood has clips or screws. This prevents filters from falling during cooking.
Double-check each filter to make sure it is stable and will not move when the exhaust fan runs.
Test The Exhaust System
Turn on the exhaust fan after reinstalling the filters. Listen for unusual sounds that show poor fit or loose filters.
- If filters vibrate, turn off the fan and adjust their position
- Make sure air flows freely through the filters
- Clean filters regularly to keep the system effective
Maintaining Clean Filters
Keeping kitchen exhaust filters clean is important for safety and efficiency. Grease buildup can cause fires and reduce airflow.
Regular cleaning helps your kitchen stay safe and keeps the exhaust system working well.
Regular Cleaning Schedule
Set a cleaning schedule based on how often you use your kitchen. Busy kitchens need cleaning more often than home kitchens.
Cleaning filters weekly or biweekly is a good practice for most kitchens. This stops grease from building up too much.
- Remove filters carefully before cleaning.
- Soak filters in hot, soapy water for 10-15 minutes.
- Use a soft brush to scrub away grease.
- Rinse filters well with clean water.
- Let filters dry completely before reinstalling.
Tips For Longevity
Handle filters gently to avoid damage. Damaged filters do not clean air well and need replacement sooner.
Use the right cleaning products. Harsh chemicals can weaken the filter material over time.
- Wear gloves to protect your hands from grease and soap.
- Do not use metal brushes or sharp tools on filters.
- Dry filters in a safe place away from direct heat.
- Inspect filters regularly for holes or tears.
- Replace filters if they are damaged or very old.

Credit: www.realtor.com
Frequently Asked Questions
How Often Should Kitchen Exhaust Filters Be Cleaned?
Kitchen exhaust filters should be cleaned every 1 to 3 months. Frequent cleaning prevents grease buildup and maintains airflow efficiency. High-use kitchens may require more frequent cleaning to avoid fire hazards and ensure proper ventilation.
What Is The Best Method To Clean Exhaust Filters?
Soak filters in hot water with degreasing detergent for 15-30 minutes. Then scrub gently with a brush and rinse thoroughly. Air dry before reinstalling to prevent moisture damage and maintain filter performance.
Can I Use A Dishwasher To Clean Exhaust Filters?
Yes, most metal exhaust filters are dishwasher safe. Use a heavy-duty cycle with a strong detergent. Avoid plastic or coated filters in the dishwasher as they may get damaged or warped.
What Common Mistakes To Avoid When Cleaning Filters?
Avoid using harsh chemicals or abrasive tools that damage filters. Do not reinstall wet filters, as moisture can cause mold growth. Skip cleaning for too long, which leads to clogged filters and fire risks.
Conclusion
Cleaning kitchen exhaust filters keeps your kitchen safe and fresh. Regular cleaning stops grease buildup and fire risks. It also helps your exhaust system work well. Use simple steps and common tools for best results. Make cleaning a part of your kitchen routine.
This way, your kitchen stays clean and healthy for everyone. Don’t wait until filters get very dirty. Start cleaning now to save time and effort later. A clean kitchen exhaust filter means better air and less smell. Keep your kitchen safe, clean, and comfortable every day.