

Is your fridge’s ice maker not working as smoothly as it used to? Maybe the ice tastes funny or the machine is making strange noises.
These are signs that your ice maker needs a good cleaning. Cleaning your fridge ice maker might seem tricky, but it’s easier than you think—and doing it can make a big difference. In this guide, you’ll discover simple steps to clean your ice maker quickly and safely.
Keep reading, and you’ll soon enjoy fresh, clean ice every time.
Gathering Necessary Supplies
Cleaning your fridge ice maker keeps it working well and makes ice taste better. You need some supplies before starting. Getting the right tools saves time and effort.
Below are the main supplies you will need to clean your ice maker safely and effectively. Make sure to have them ready before you begin.
Cleaning Solution
Use a gentle cleaning solution safe for appliances. You can buy a special ice maker cleaner or make your own with vinegar and water. Avoid harsh chemicals that can damage parts.
Soft Cloths And Brushes
Soft cloths help wipe surfaces without scratching. Use a small brush to reach tight spots and remove dirt. Avoid metal brushes that can harm the ice maker.
Bucket Or Container
A bucket or container collects melted ice and cleaning water. This keeps your area dry and clean during the process.
Protective Gloves
Wear gloves to protect your hands from cleaning solutions and cold water. Gloves also keep your hands clean and dry.
Supplies Checklist
- Gentle cleaning solution (vinegar or commercial cleaner)
- Soft cloths for wiping
- Small soft brush for tight spots
- Bucket or container for water
- Protective gloves

Credit: www.aol.com
Turning Off The Ice Maker
Turning off the ice maker is the first step to clean it safely. This stops ice production and water flow.
It is important to follow the right steps to avoid leaks or damage to your fridge.
Locate The Ice Maker Switch
Most ice makers have a switch or lever to turn off the machine. This switch is usually inside the freezer or on the control panel.
Look for a button labeled “Ice Maker” or a small arm that can be moved up or down.
Turn Off The Ice Maker Using The Switch
Press the button or move the arm to the off position. This will stop ice from forming.
- Open the freezer door.
- Find the ice maker switch or lever.
- Press the button or push the lever up to stop ice production.
- Wait a few minutes to ensure the ice maker stops working.
Unplug The Refrigerator For Extra Safety
Unplugging the fridge stops all electrical parts. This is a safe way to clean the ice maker.
Use The Fridge Control Panel To Turn Off Ice Maker
Some modern fridges let you turn off the ice maker using a digital control panel.
| Control Panel Option | Action |
| Ice Maker Button | Press to toggle off |
| Settings Menu | Select “Ice Maker Off” |
| Touch Screen | Use app or screen to disable ice maker |
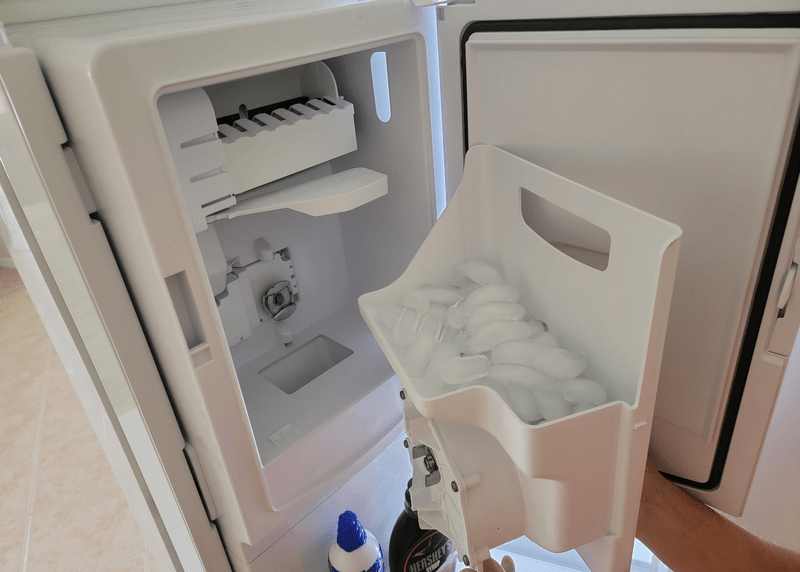
Emptying The Ice Bin
Cleaning your fridge ice maker starts with emptying the ice bin. This step helps remove old ice and any debris inside the bin.
Emptying the ice bin regularly keeps your ice fresh and your machine working well.
Prepare To Remove The Ice Bin
First, check your fridge manual to find the ice bin location. Usually, it is inside the freezer compartment.
Clear the area around the ice bin to avoid spills when you take it out.
Remove And Empty The Ice Bin
Hold the ice bin firmly and pull it straight out. Avoid tilting it to prevent ice from falling.
- Carry the bin to the sink or trash can.
- Pour out all the ice cubes gently.
- Check for any stuck ice or debris and remove it.
Clean The Ice Bin Before Replacing
Use a soft cloth or sponge with warm soapy water to clean the bin. Avoid harsh cleaners or abrasive materials.
Rinse the bin well with clean water and dry it completely with a towel before placing it back.
Tips For Maintaining Your Ice Bin
- Empty the ice bin every two weeks.
- Wipe the bin dry after cleaning to prevent ice clumps.
- Check for cracks or damage regularly.
| Action | Frequency |
| Empty ice bin | Every 2 weeks |
| Clean ice bin | Monthly |
| Inspect for damage | Monthly |
Removing Ice Maker Parts
Cleaning the ice maker keeps your fridge fresh and working well. Removing parts is the first step. This guide shows how to take out the ice tray and water filter safely.
Handle each part gently to avoid damage. Follow simple steps to remove parts easily.
Detaching The Ice Tray
The ice tray holds the ice cubes and needs cleaning often. To detach it, first open the freezer door fully. Locate the ice tray inside the ice maker.
- Gently push the tray forward to release it from its slot.
- Lift the tray upwards to free it from the holder.
- Place the tray on a flat surface for cleaning.
Be careful not to force the tray. If it feels stuck, check for any clips or locks holding it in place.
Unfastening The Water Filter
The water filter cleans the water before ice is made. Removing it helps clean or replace the filter. Find the filter inside or near the fridge’s water supply area.
| Action | Details |
| Turn off water supply | Prevent leaks before removal. |
| Locate filter | Usually inside fridge or at base. |
| Turn filter counterclockwise | Loosen and remove gently. |
| Clean or replace filter | Follow manufacturer’s instructions. |
| Reinstall filter | Turn clockwise until tight. |
Cleaning The Ice Tray
Cleaning the ice tray in your fridge ice maker is important for fresh, clear ice. Dirt and residue can build up over time. Regular cleaning keeps your ice tasting good and prevents odors.
This guide covers simple ways to clean the ice tray safely and effectively. Follow these easy steps to keep your ice maker in top shape.
Soaking In Warm Water
Start by removing the ice tray from the fridge. Fill a basin with warm water that is not too hot. Soak the tray to loosen ice and dirt.
- Use water between 90°F and 110°F (32°C – 43°C)
- Soak the tray for 10 to 15 minutes
- Avoid using boiling water to prevent damage
- Make sure all parts of the tray are submerged
Scrubbing With Mild Detergent
After soaking, scrub the tray gently with a soft cloth or sponge. Use a mild detergent that is safe for kitchen use. Avoid harsh chemicals or abrasive tools.
| Cleaning Material | Purpose |
| Mild detergent | Remove grease and residue |
| Soft cloth or sponge | Clean without scratching |
| Warm water rinse | Wash away soap and loosened dirt |
Sanitizing The Water Filter
Cleaning the fridge ice maker includes sanitizing the water filter. This helps keep the ice fresh and safe to eat.
Regular cleaning stops germs and bad smells from building up in the filter.
Using Vinegar Solution
Vinegar is a natural cleaner that kills bacteria in the water filter. Use it to remove dirt and germs safely.
Mix equal parts of white vinegar and warm water to make the cleaning solution.
- Remove the water filter from the fridge.
- Soak the filter in the vinegar solution for 15 minutes.
- Use a soft brush to scrub the filter gently.
- Rinse the filter before putting it back.
Rinsing Thoroughly
Rinsing the water filter well is very important. It removes all vinegar and dirt residues.
Use clean, cold water and let it run through the filter until it is clear and fresh.
- Hold the filter under running water for at least 1 minute.
- Shake the filter gently to remove trapped liquid.
- Check that no vinegar smell remains before reinstalling.
Wiping Down Interior Components
Cleaning your fridge ice maker keeps it working well and tasting fresh. Wiping down its inside parts is a key step.
Use gentle methods to avoid damage while removing dirt and buildup. This helps keep your ice clean and safe.
Using A Soft Cloth
Choose a soft cloth to wipe the ice maker’s inside parts. A soft cloth cleans without scratching surfaces.
- Use a clean microfiber or cotton cloth
- Moisten the cloth with warm water for better cleaning
- Gently wipe all visible parts, including the ice chute and tray
- Dry the parts with a dry soft cloth after wiping
Avoiding Harsh Chemicals
Harsh chemicals can harm the ice maker’s materials and leave bad tastes in ice. Use mild cleaners only.
| Safe Cleaners | Unsafe Cleaners |
| Warm water | Bleach |
| Mild dish soap | Ammonia |
| White vinegar (diluted) | Abrasive powders |
Credit: www.homeserve.com
Reassembling The Ice Maker
After cleaning your fridge ice maker, you need to put it back together carefully. This process helps the ice maker work well again.
Follow the steps below to secure the ice tray and reattach the water filter properly.
Securing The Ice Tray
Place the ice tray back in its slot gently. Make sure it fits snugly without forcing it. A loose tray can cause ice to spill or block the mechanism.
- Align the tray with the guides inside the ice maker.
- Push the tray straight in until it stops.
- Check that the tray is level and stable.
- Close the ice maker cover securely.
Reattaching The Water Filter
After securing the ice tray, reattach the water filter to ensure clean water supply. Follow the instructions below to install the filter correctly.
| Action | Details |
| Locate Filter Slot | Find the filter housing inside the fridge. |
| Insert Filter | Push the filter firmly into the slot until it clicks. |
| Turn Filter | Rotate the filter clockwise to lock it in place. |
| Flush System | Run water for a few minutes to clear air and debris. |
Restarting And Testing
After cleaning your fridge ice maker, you need to restart it properly. Testing ensures it works well and makes clean ice.
This guide helps you turn on the ice maker and check if it functions correctly.
Turning On The Ice Maker
Locate the ice maker switch inside the freezer. This switch controls the ice maker’s power.
- Make sure the freezer temperature is below 10°F (-12°C).
- Flip the ice maker switch to the “On” position.
- Listen for the sound of the motor starting.
- Check that the ice tray arm is down to allow ice production.
Checking For Proper Functioning
After turning on the ice maker, observe it for signs of normal operation. Use this table to track key checks.
| Check | What to Look For | Action if Problem |
|---|---|---|
| Motor Sound | Soft humming noise | Ensure power is connected |
| Ice Tray Movement | Tray rotates to fill ice | Reset the ice maker switch |
| Ice Production | New ice cubes appear in 2-4 hours | Clean the water line or call technician |
| Ice Quality | Clear and odor-free ice | Repeat cleaning process |
Maintaining A Clean Ice Maker
Keeping your fridge ice maker clean helps make fresh and safe ice. Dirt and mold can build up if you do not clean it often. A clean ice maker works better and lasts longer.
Follow simple cleaning steps and prevention tips to keep your ice maker in top shape. Regular care saves you time and keeps ice tasting fresh.
Regular Cleaning Schedule
Cleaning your ice maker often stops germs and bad smells. Clean it every one to three months, depending on use. Follow these steps to clean safely:
- Turn off the ice maker and unplug the fridge.
- Remove all ice and discard old cubes.
- Take out the ice bin and wash it with warm, soapy water.
- Wipe inside the ice maker with a soft cloth and mild cleaner.
- Rinse all parts well and dry before reassembling.
- Plug in the fridge and turn the ice maker back on.
Tips For Prevention Of Build-up
Preventing ice maker build-up reduces cleaning frequency. Try these tips to keep it clean longer:
- Use filtered water to reduce minerals and scale.
- Empty the ice bin weekly to avoid old ice.
- Keep the freezer door closed to stop moisture.
- Check the water line for leaks or clogs regularly.
- Defrost the freezer if frost builds up around the ice maker.
| Tip | Reason |
| Use filtered water | Reduces minerals that cause scale |
| Empty ice bin weekly | Stops stale ice and odors |
| Keep freezer door closed | Prevents moisture and frost build-up |
| Check water line | Ensures clean water flow |
| Defrost freezer | Removes excess frost around ice maker |

Credit: www.reddit.com
Frequently Asked Questions
How Often Should I Clean My Fridge Ice Maker?
Clean your fridge ice maker every 3 to 6 months. Regular cleaning prevents mold, bacteria, and bad odors. It also ensures ice tastes fresh and the machine works efficiently. Frequent cleaning improves ice quality and extends the ice maker’s lifespan.
What Materials Do I Need To Clean An Ice Maker?
You need a soft cloth, warm water, mild dish soap, and a toothbrush. Avoid harsh chemicals to prevent damage. You may also use a mixture of vinegar and water to remove mineral buildup. Ensure all parts are dry before reassembling.
Can I Clean The Ice Maker Without Removing It?
Yes, you can clean most ice makers without removal. Wipe the interior surfaces and ice tray gently. Use a soft brush for hard-to-reach areas. Always unplug the fridge before cleaning to ensure safety and prevent damage.
How Do I Remove Ice Buildup In The Ice Maker?
Turn off the ice maker and let ice melt naturally or use warm water. Avoid sharp objects to prevent damage. Clean the ice tray and surrounding areas afterward. Regular cleaning reduces frequent ice buildup issues.
Conclusion
Cleaning your fridge ice maker keeps ice fresh and safe to use. Regular cleaning stops bad smells and clogs. Use gentle cleaners and soft cloths for best results. Take time to clean every few months. A clean ice maker works better and lasts longer.
Simple steps make a big difference in ice quality. Keep your fridge and ice maker healthy with easy care. Good habits protect your family’s health and save money. Clean ice tastes better. Worth the effort, right?