
Your stand mixer is one of your kitchen’s best helpers, whipping up everything from dough to frosting with ease. But when was the last time you gave it a proper clean?
If you want your mixer to work smoothly and last longer, knowing how to clean it the right way is a must. In this guide, you’ll discover simple, effective steps to get your stand mixer spotless without any hassle. Keep reading—you’ll be amazed at how easy it is to keep your favorite kitchen companion in top shape.
Credit: cleanzen.com
Gather Your Supplies
Cleaning a stand mixer is easier when you have the right supplies ready. Gather all needed items before you start to save time.
Having your cleaning tools at hand helps you clean every part properly and keeps your mixer working well.
Cleaning Cloths And Sponges
Soft cloths and sponges are important for wiping down the mixer and removing stuck-on food. Avoid abrasive materials that can scratch the surface.
Mild Dish Soap
Use a gentle dish soap to clean your mixer parts. Harsh chemicals can damage the finish or leave harmful residues.
Warm Water
Warm water helps dissolve grease and food particles. Use it with soap to get parts clean without much effort.
Brush Or Toothbrush
A small brush or old toothbrush can reach into tight spaces. This helps clean crevices where dirt often hides.
Drying Tools
Use a clean, dry towel or air dry parts after washing. This prevents water spots and rust on metal pieces.
Supplies Checklist
- Soft cleaning cloths
- Non-abrasive sponges
- Mild dish soap
- Warm water
- Small brush or toothbrush
- Dry towels or air drying rack

Credit: cleanzen.com
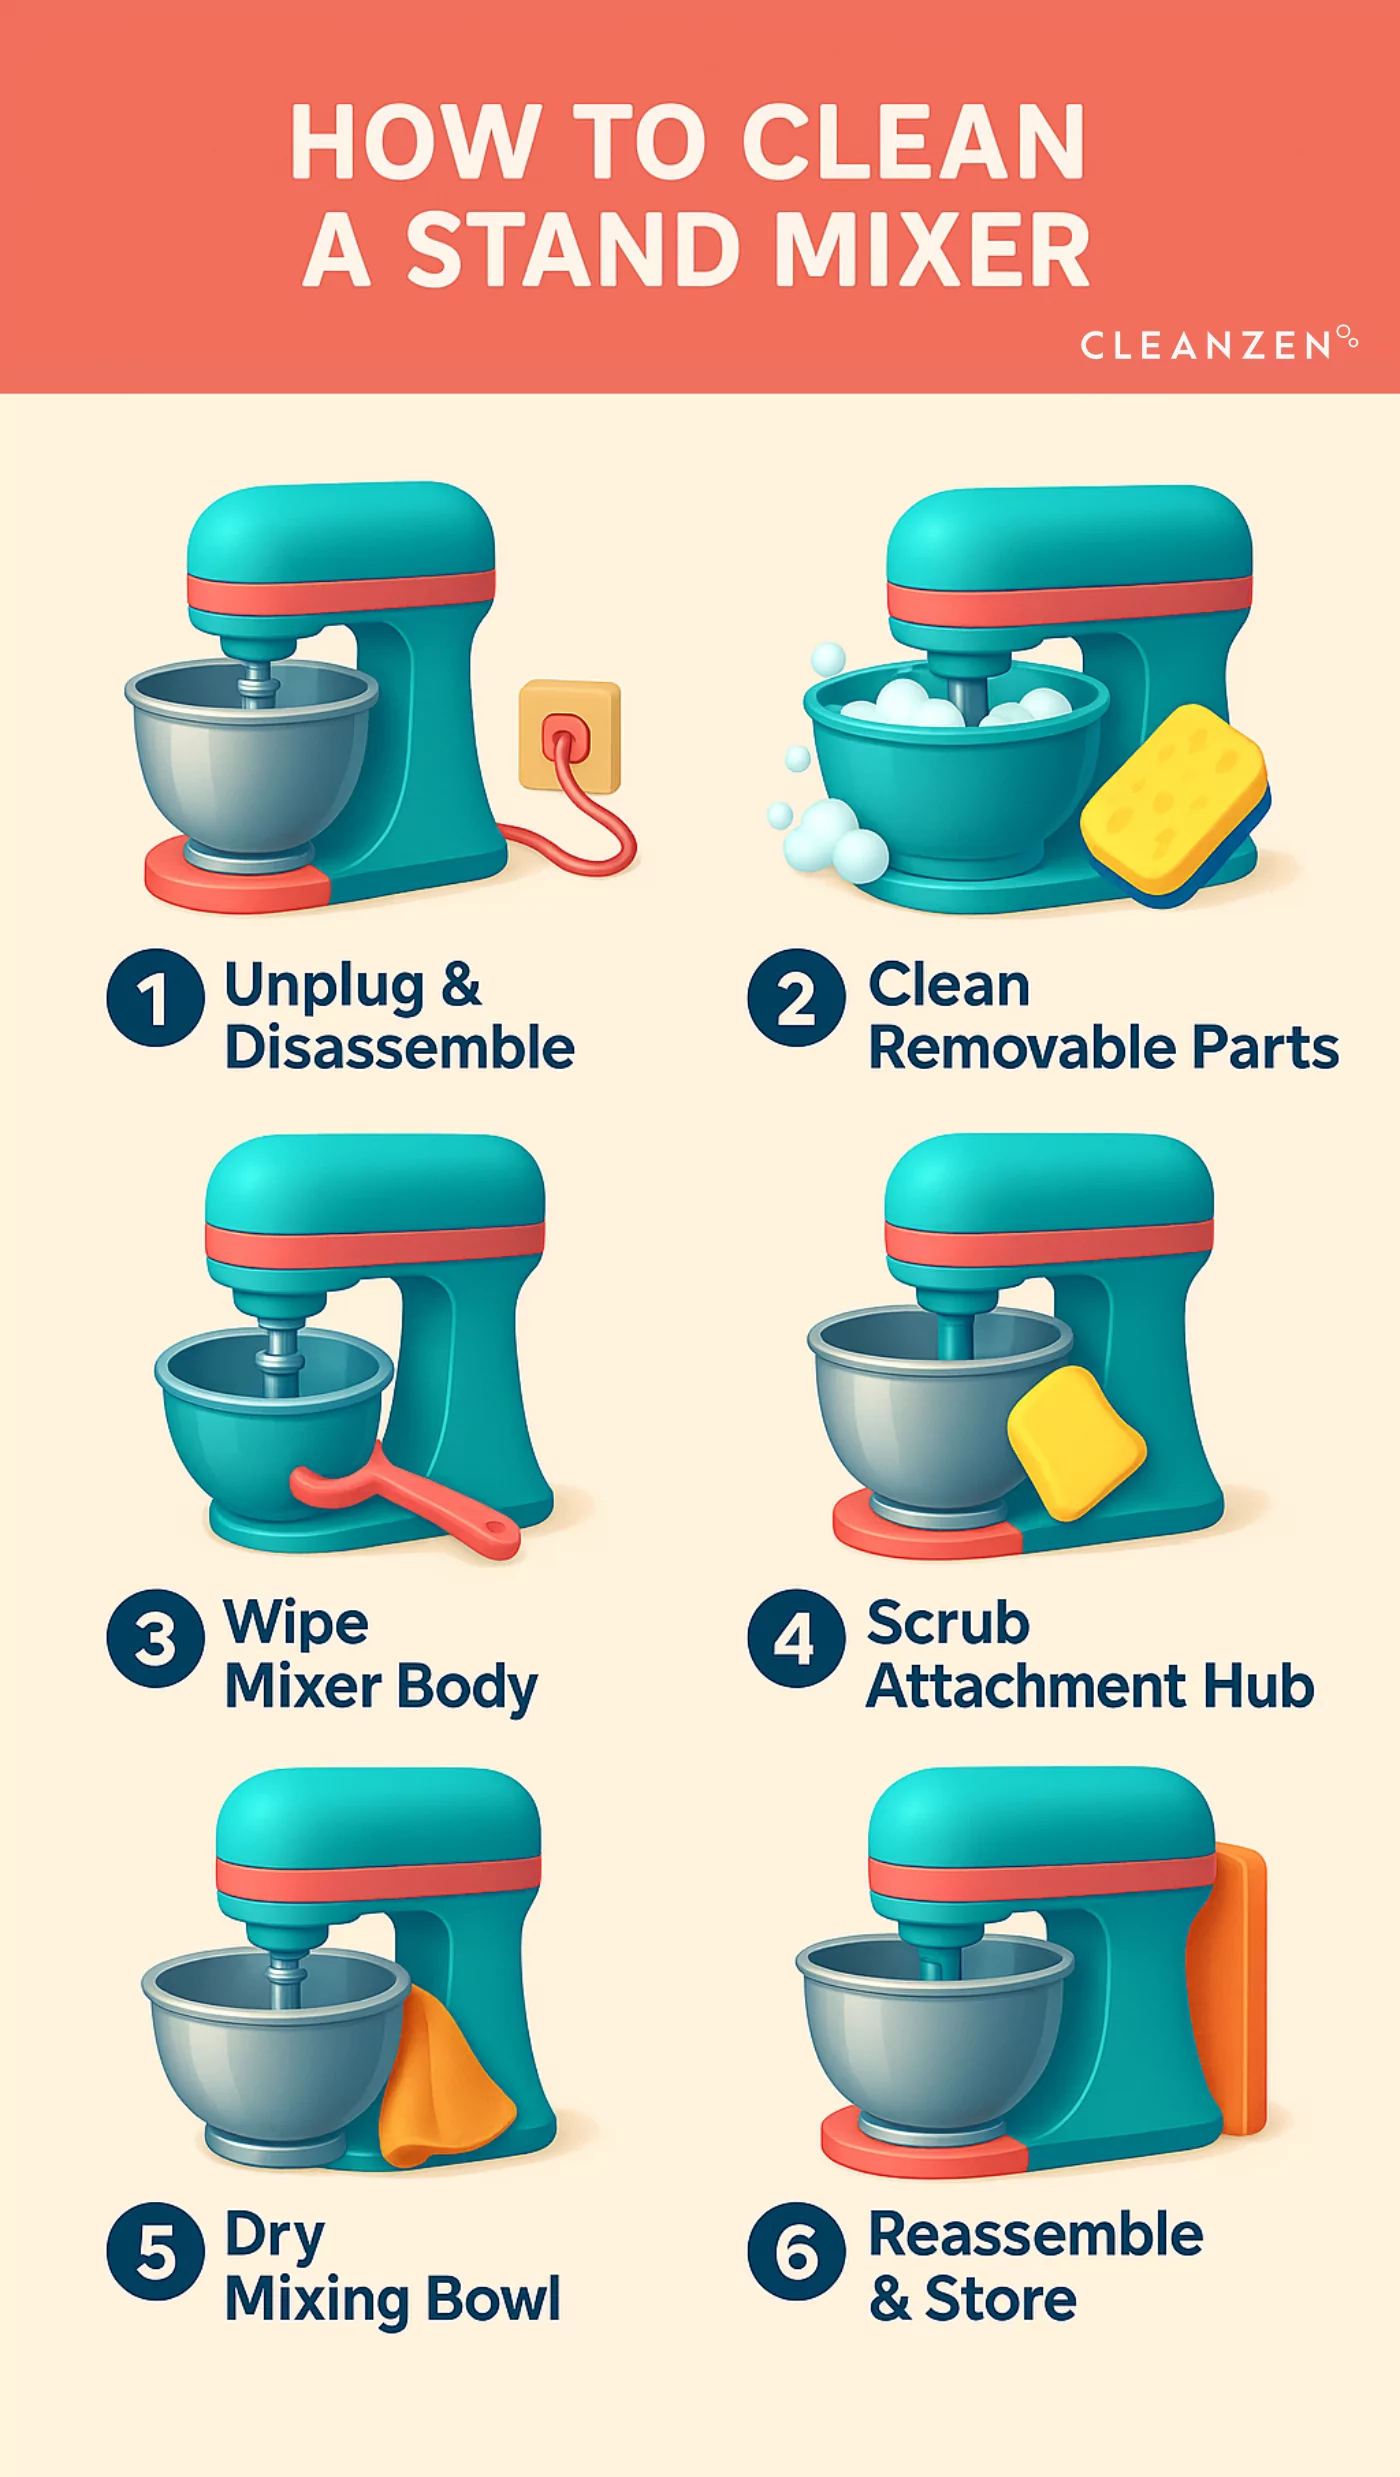
Unplug And Disassemble
Cleaning your stand mixer starts with safety. Always unplug the mixer before you begin.
Next, take apart the removable parts. This helps you clean every area well.
Unplug The Mixer
Disconnect the mixer from the power outlet. This stops the motor from running during cleaning.
Unplugging also prevents electric shock accidents. Never clean the mixer while plugged in.
Remove Attachments
Take off all attachments like the beaters, whisk, or dough hook. These parts usually twist or pull off.
Check your mixer’s manual if you are unsure how to remove them safely.
Detach The Mixing Bowl
Lift the mixing bowl off the stand. Some models have a locking mechanism to release it.
Remove the bowl before cleaning to avoid damaging the mixer’s base.
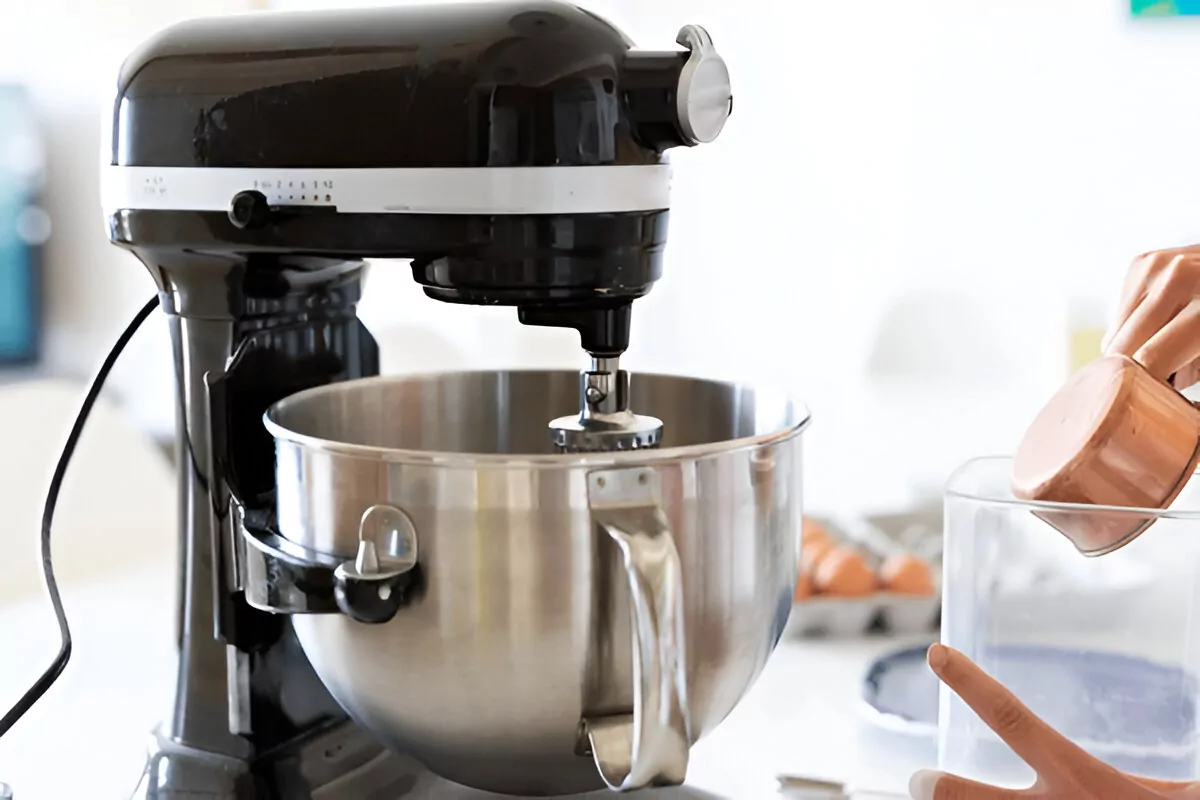
Cleaning The Bowl
Cleaning the bowl of your stand mixer keeps it ready for your next recipe. A clean bowl helps avoid mixing old food into new dough or batter.
Here are simple ways to clean your mixer bowl safely and well.
Hand Washing Techniques
Hand washing the bowl removes stuck-on food without harming the surface. Use warm water and mild soap for best results.
Clean the bowl right after use to stop food from drying. Use a soft sponge or cloth to avoid scratches.
- Fill the sink with warm water and mild dish soap.
- Soak the bowl for a few minutes if food is stuck.
- Use a soft sponge to scrub gently.
- Rinse well with clean water.
- Dry the bowl with a clean towel or air dry.
Dishwasher Tips
Many mixer bowls are dishwasher safe. Check your bowl’s instructions before placing it in the dishwasher.
Place the bowl on the top rack to avoid heat damage. Use a gentle cycle and mild detergent for best care.
- Confirm the bowl is dishwasher safe.
- Place the bowl on the top rack only.
- Choose a gentle or normal wash cycle.
- Use mild dishwasher detergent.
- Remove and dry the bowl after the cycle ends.
Scrubbing The Attachments
Cleaning your stand mixer attachments keeps them safe and working well. It also stops old food from building up.
Each attachment needs a little different care to get clean and last longer.
Beaters And Whisks
Beaters and whisks mix ingredients well but can trap food in small spots. Clean them soon after use.
Use warm water and dish soap to soak them for 10 minutes. Then scrub with a soft brush or sponge.
- Soak in warm, soapy water
- Use a soft brush for tight spots
- Rinse well to remove soap
- Dry completely before storing
Dough Hooks
Dough hooks are strong and thick. They often have dough stuck on them that is hard to remove.
Soak the dough hooks in warm water right after use. Use a cloth or sponge to scrub off dough pieces.
- Soak in warm water to soften dough
- Use a cloth or sponge to wipe clean
- Check for dough in crevices
- Dry fully before putting away
Wiping The Exterior
Cleaning the outside of your stand mixer keeps it looking nice. It also helps stop dirt build-up.
Use a soft cloth and mild cleaner for regular wiping. This keeps the surface safe and clean.
Removing Stubborn Stains
Some stains may not come off with simple wiping. Use gentle tools and cleaners to avoid damage.
- Mix warm water with a small amount of dish soap.
- Dip a soft cloth into the solution and wring it out.
- Gently rub the stained area in circular motions.
- For tough stains, try a paste of baking soda and water.
- Apply the paste, let it sit for 10 minutes, then wipe off.
- Dry the area with a clean, dry cloth.
Polishing The Surface
Polishing helps keep the stand mixer shiny and protects the finish.
| Polish Type | Use | How to Apply |
| Microfiber Cloth | Remove dust and light smudges | Wipe surface gently in one direction |
| Furniture Polish | Add shine and protect surface | Apply small amount on cloth, then rub surface |
| Vinegar Solution | Clean and brighten metal parts | Mix vinegar and water, wipe with cloth, dry well |

Credit: www.youtube.com
Cleaning The Base And Underside
Cleaning the base and underside of your stand mixer keeps it working well. Dirt and food bits can build up over time.
Regular cleaning helps avoid damage and keeps your kitchen tidy. Use gentle tools and avoid water near electrical parts.
Motor Housing Care
Wipe the motor housing with a soft, dry cloth. Avoid using wet cloths or sprays directly on it.
If there is sticky residue, lightly dampen the cloth with water. Do not let moisture enter the motor vents.
- Use a dry microfiber cloth to remove dust.
- Apply a slightly damp cloth for stubborn spots.
- Never spray cleaners directly on the motor housing.
- Keep the vents clear of dust and debris.
Base Plate Maintenance
Turn the mixer upside down to clean the base plate. Remove any flour, batter, or spills carefully.
Use a soft brush or cloth to clean tight spots. Avoid water pooling on the base plate to protect the motor.
- Unplug the mixer before cleaning the base plate.
- Use a soft brush to remove crumbs and debris.
- Wipe with a damp cloth, then dry immediately.
- Check for loose screws or damage regularly.
Reassemble The Mixer
After cleaning your stand mixer, you need to put it back together properly. This step ensures your mixer works well and lasts longer.
Take your time and follow these tips to reassemble the mixer safely and correctly.
Attach The Bowl
Place the bowl back on the mixer base. Turn or lock it into place depending on your model. Make sure it is secure before moving to the next step.
Reconnect The Beaters Or Attachments
Choose the correct attachment for your mixer. Insert it into the hub and push or twist it until it locks in place. Do not force it.
Check The Power Cord And Controls
Make sure the power cord is untangled and not damaged. Check that all buttons and switches are clean and working smoothly.
Test The Mixer
Plug in the mixer and turn it on at a low speed. Listen for any unusual sounds. If all works fine, your mixer is ready to use.
- Secure the bowl firmly
- Attach the correct beaters or tools
- Check the power cord for safety
- Test the mixer on low speed
Regular Maintenance Tips
Cleaning your stand mixer regularly keeps it working well. It also helps prevent damage and buildup.
Simple care steps make your mixer last longer and keep it safe to use.
Storage Advice
Store your stand mixer in a dry, clean place. Keep it covered to avoid dust and spills.
- Use a dust cover or clean cloth over the mixer
- Keep attachments in a sealed container
- Store the mixer on a stable surface to avoid falls
- Avoid areas with high humidity to stop rust
Routine Checks
Check your mixer often for signs of wear or damage. Fix small issues early to prevent bigger problems.
| Check | What to Look For | Action |
| Power cord | Frays or cuts | Replace immediately |
| Attachments | Rust or cracks | Clean or replace |
| Mixing bowl | Dents or residue | Wash and inspect |
| Motor sound | Unusual noise | Stop use and service |
Frequently Asked Questions
How Often Should I Clean My Stand Mixer?
Clean your stand mixer after every use to prevent buildup. Wipe the exterior and wash attachments promptly. Regular cleaning ensures better performance and hygiene.
Can I Put Stand Mixer Parts In The Dishwasher?
Most stand mixer attachments are dishwasher safe. Check the manufacturer’s instructions first. Hand wash the mixer body to avoid damage.
What Is The Best Cleaner For A Stand Mixer?
Use mild dish soap and warm water for cleaning. Avoid abrasive cleaners that can scratch the surface. A soft cloth or sponge works best.
How Do I Clean Hard-to-reach Areas On A Stand Mixer?
Use a small brush or toothbrush to clean crevices. Pay attention to the attachment hub and vents. This removes trapped food and dust effectively.
Conclusion
Cleaning your stand mixer keeps it working well and lasting longer. Take your time to clean every part carefully after use. Avoid using harsh chemicals that can damage the mixer. Regular cleaning stops food buildup and bad smells. A clean mixer makes baking more fun and safe.
Remember, small daily steps can prevent big cleaning tasks later. Keep your kitchen tools clean, and enjoy fresh, tasty results every time.