
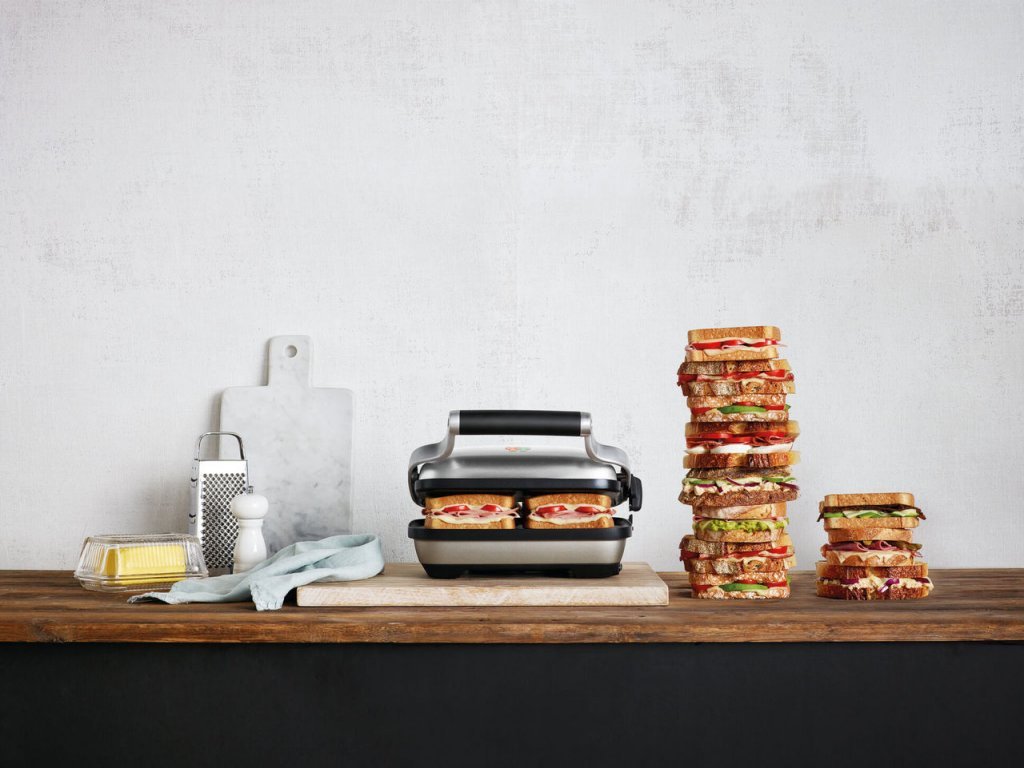
You love making quick, delicious sandwiches with your sandwich maker. But have you ever struggled with cleaning its sticky, greasy plates?
It can be frustrating and messy. What if you could clean your sandwich maker plates easily, without damaging them or wasting time? In this guide, you’ll discover simple and effective steps to keep your sandwich maker spotless and ready for your next tasty creation.
Keep reading—you’ll wonder why you didn’t try these cleaning hacks sooner!
Choosing The Right Cleaning Tools
Cleaning your sandwich maker plates properly keeps them working well. Picking the right tools helps remove food without damage.
Some tools clean better on non-stick surfaces. Others help reach small corners. Use tools made for kitchen appliances.
Soft Sponges And Cloths
Soft sponges or microfiber cloths clean the plates gently. They avoid scratching the non-stick coating. Use them with warm, soapy water for best results.
Plastic Or Silicone Scrapers
Plastic or silicone scrapers help remove stuck food safely. They are firm but will not harm the plate surface. Avoid metal scrapers as they can cause scratches.
Avoid Harsh Brushes And Abrasives
Do not use steel wool or hard brushes. These tools can damage the non-stick layer. Instead, choose soft tools designed for delicate surfaces.
Recommended Cleaning Tools
- Microfiber cloths or soft sponges
- Plastic or silicone scrapers
- Soft-bristled brushes made for kitchen use
- Mild dish soap
- Warm water
| Tool Type | Purpose | Safe for Non-Stick? |
|---|---|---|
| Soft Sponge | General cleaning | Yes |
| Microfiber Cloth | Wiping and polishing | Yes |
| Plastic Scraper | Removing stuck food | Yes |
| Steel Wool | Heavy scrubbing | No |
| Hard Bristle Brush | Scrubbing | No |
Preparing The Sandwich Maker
Cleaning your sandwich maker starts with proper preparation. This helps protect the plates and keeps your device working well.
Follow these simple steps before you begin cleaning the plates of your sandwich maker.
Unplug And Cool Down
Always unplug the sandwich maker from the power source. Let it cool completely to avoid burns or damage to the plates.
Remove Loose Crumbs
Before cleaning, remove any loose crumbs or food pieces. This prevents scratching the plates during wiping.
- Use a soft brush or dry cloth to clear crumbs
- Do not use sharp objects that can damage the coating
- Check all corners and edges carefully
Gather Cleaning Materials
Prepare gentle cleaning tools and solutions. Avoid harsh chemicals that can harm the non-stick surface.
| Item | Purpose |
| Soft sponge | Wipe plates without scratching |
| Warm soapy water | Remove grease and food residue |
| Dry cloth | Dry plates after cleaning |
| Soft brush | Remove crumbs gently |
Removing Loose Debris
Cleaning a sandwich maker starts with removing loose debris. This step keeps the plates clean and ready for deep cleaning.
Loose crumbs and bits can burn if not removed. This makes cleaning harder later.
Unplug And Cool Down
Always unplug the sandwich maker first. Let it cool completely to avoid burns.
Cleaning hot plates can be dangerous and may damage the appliance.
Use A Soft Brush Or Cloth
Gently brush the plates with a soft brush. This removes crumbs and food bits without scratching.
- Use a pastry brush or soft paintbrush
- Wipe with a damp cloth if needed
- Avoid metal brushes to protect the surface
Shake Out Loose Crumbs
Hold the sandwich maker upside down over a trash bin. Tap gently to release crumbs.
This simple action removes many loose pieces quickly and easily.
Clean Around The Edges
Check edges and corners for stuck crumbs. Use a toothpick or cotton swab to clean hard spots.
- Be gentle to avoid damage
- Focus on small crevices
- Use a damp cloth after to wipe away loosened debris
Using A Damp Cloth For Initial Wipe
Cleaning sandwich maker plates properly helps keep the appliance safe and ready to use. Using a damp cloth is an easy way to remove leftover crumbs and grease.
This method avoids damage to the plates and prepares them for deeper cleaning if needed. It is a simple first step that many people overlook.
Prepare The Sandwich Maker
Before wiping, unplug the sandwich maker and let it cool down. Cleaning when it is still hot can cause burns or damage.
Use A Damp Cloth Correctly
Choose a soft cloth and dampen it with warm water. Avoid soaking the cloth to prevent water from entering the electrical parts.
- Wring out excess water from the cloth.
- Gently wipe the sandwich maker plates in circular motions.
- Focus on areas with crumbs and grease spots.
- Do not use abrasive materials that can scratch the plates.
Drying And Inspection
After wiping, use a dry cloth to remove any moisture left on the plates. Check for any remaining food residue to decide if further cleaning is needed.
| Cleaning Tip | Reason |
|---|---|
| Unplug before cleaning | Prevents electric shock and injury |
| Use only a damp cloth | Avoids water damage inside the appliance |
| Dry plates after wiping | Stops rust and keeps plates in good condition |
Applying A Cleaning Solution
Cleaning sandwich maker plates is important to keep them working well. Using a good cleaning solution helps remove stuck food and grease.
Choosing the right solution makes cleaning easier and protects the plates from damage.
Homemade Cleaning Solutions
You can make cleaning solutions at home using simple ingredients. These solutions are gentle and safe for sandwich maker plates.
Mix equal parts of water and white vinegar to create a natural cleaner. Vinegar helps break down grease and food residue.
- Combine 1 cup water with 1 cup white vinegar
- Dip a soft cloth or sponge in the mixture
- Wipe the sandwich maker plates gently
- Rinse with a clean damp cloth afterward
- Dry the plates with a soft towel
Commercial Cleaners
Commercial cleaners designed for kitchen appliances also work well. They often remove tough stains faster than homemade solutions.
Choose cleaners labeled safe for non-stick surfaces. Follow the instructions on the product label for best results.
- Apply a small amount of cleaner to a soft cloth
- Gently rub the plates without scratching
- Use a damp cloth to wipe off residue
- Dry plates completely before using the sandwich maker
Scrubbing Stubborn Residues
Cleaning a sandwich maker is easy when the plates are not sticky. Stubborn residues need gentle scrubbing to avoid damage.
Use the right tools and techniques to remove tough food bits without scratching the plates.
Use A Soft Brush Or Sponge
Choose a soft brush or sponge for scrubbing. Avoid metal scrubbers because they can scratch the plates.
Gently scrub the plates in small circles to lift the stuck food without hurting the surface.
Apply Warm Soapy Water
Warm soapy water helps soften the food residues. Use a mild dish soap mixed with warm water.
Dip the sponge or brush in the solution before scrubbing to make cleaning easier and faster.
Use Baking Soda Paste For Tough Spots
Baking soda can help remove very stubborn stains. Make a paste using baking soda and water.
Spread the paste on the residue and let it sit for a few minutes. Then scrub gently with a soft sponge.
Avoid Excess Water On Electrical Parts
Be careful not to let water reach the sandwich maker’s electrical parts. Use a damp sponge, not a dripping wet one.
Dry the plates well after cleaning to prevent rust or damage to the device.
Rinsing And Drying The Plates
Cleaning sandwich maker plates keeps your appliance working well. Rinsing and drying the plates is an important part.
Proper rinsing removes food bits, and drying stops rust and damage.
How To Rinse The Plates Safely
Unplug the sandwich maker before rinsing. Let the plates cool completely. Use warm water to rinse off crumbs and grease.
- Do not soak the whole sandwich maker in water.
- Use a soft cloth or sponge for cleaning.
- Avoid abrasive scrubbers that can scratch the plates.
- Rinse gently to remove loose food particles.
Best Ways To Dry The Plates
After rinsing, dry the plates carefully. Use a soft towel or cloth to remove all moisture. Air drying also works well.
| Drying Method | Tip |
| Soft Cloth | Wipe plates gently and completely |
| Air Dry | Leave sandwich maker open to dry fully |
| Paper Towel | Use to soak excess water quickly |

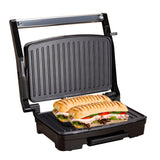
Credit: chimiya.com
Cleaning The Exterior
Keeping the exterior of your sandwich maker clean helps it look good and last longer. Dirt and grease can build up over time. Wiping it regularly is a smart habit.
Use gentle cleaning methods to avoid damage. The outside parts are often made of plastic or metal, so choose safe tools and cleaners.
Unplug And Cool Down
Always unplug the sandwich maker before cleaning. Let it cool completely to avoid burns or electric shock. Never clean the appliance while it is hot or plugged in.
Wipe With A Damp Cloth
Use a soft, damp cloth to wipe the exterior surface. This removes dust, crumbs, and light stains. Avoid soaking the cloth to prevent water from entering the appliance.
Use Mild Soap For Stubborn Dirt
For tough grease or dirt, mix a small amount of mild dish soap with warm water. Dip a cloth into the solution and wring it out well. Gently scrub the exterior, then wipe with a clean damp cloth to remove soap.
Avoid Harsh Cleaners And Tools
- Do not use abrasive pads or steel wool
- Avoid strong chemicals like bleach or ammonia
- Do not spray water or cleaner directly on the sandwich maker
- Use only soft cloths or sponges
Dry Thoroughly Before Storing
After cleaning, dry the exterior with a soft towel. Make sure no moisture remains on the surface. Store the sandwich maker in a dry place to prevent rust or damage.
| Cleaning Tip | Reason |
| Unplug and cool down | Prevent burns and electric shock |
| Use damp cloth | Remove dirt safely without water damage |
| Mild soap for stains | Effective but gentle cleaning |
| Avoid harsh tools | Protect surface from scratches |
| Dry well | Prevent rust and mold |
Maintaining The Sandwich Maker
Keeping your sandwich maker clean and stored properly helps it last longer. Good care also keeps your sandwiches tasty and safe to eat.
Follow simple steps regularly to clean and store your sandwich maker. This prevents damage and makes it ready for every use.
Regular Cleaning Schedule
Clean the plates and surfaces after each use. This stops food from sticking and stops germs from building up.
- Unplug the sandwich maker and let it cool completely.
- Remove loose crumbs with a soft brush or cloth.
- Use a damp cloth with mild soap to wipe the plates carefully.
- Do not use sharp tools or abrasive cleaners to avoid damage.
- Dry the plates well with a clean cloth before storing.
Proper Storage Tips
Store your sandwich maker in a dry place to avoid rust or damage. Keep cords neat to prevent tangles or breaks.
| Storage Tip | Reason |
| Keep the lid slightly open | Prevents moisture buildup inside |
| Wrap the power cord loosely | Avoids cord damage and tangling |
| Store in a cool, dry cabinet | Protects from dust and humidity |
| Place on a flat surface | Keeps the unit stable and safe |

Credit: keanecosmetics.com
Credit: sensiohome.com
Frequently Asked Questions
How Do I Clean Sandwich Maker Plates Safely?
Unplug the sandwich maker and let it cool completely. Use a damp cloth or sponge with mild soap. Avoid abrasive cleaners to protect the non-stick surface. Never immerse the appliance in water.
Can I Use Water To Clean Sandwich Maker Plates?
Yes, use a damp cloth or sponge with water. Avoid soaking or submerging the plates in water to prevent damage. Always dry thoroughly after cleaning.
How Often Should I Clean Sandwich Maker Plates?
Clean the plates after each use to prevent food buildup. Regular cleaning ensures better taste and extends the appliance’s lifespan. Quick wiping after use is best.
What Tools Are Best For Cleaning Sandwich Maker Plates?
Use a soft sponge or cloth with mild detergent. Avoid metal scrubbers or abrasive pads to protect the coating. A soft brush helps remove stuck crumbs gently.
Conclusion
Cleaning sandwich maker plates takes just a few simple steps. Regular care keeps your appliance working well and safe. Always unplug the sandwich maker before cleaning. Use a soft cloth or sponge with mild soap. Avoid harsh tools that can damage the plates.
Let the plates dry completely before storing. Clean plates make tasty sandwiches every time. Remember, a clean sandwich maker lasts longer. Keep your kitchen tools neat and ready to use. Simple habits help you enjoy fresh, delicious sandwiches daily.