

You want your pies to look as good as they taste, with a crust that’s perfectly flaky and golden. But getting that light, crumbly texture can feel tricky if you don’t know the right steps.
Imagine biting into a pie where the crust melts in your mouth, creating the perfect balance to the filling inside. You’ll discover simple tips and tricks that will help you bake pies with a flaky crust every single time. Ready to impress yourself and anyone who takes a bite?
Let’s get started!
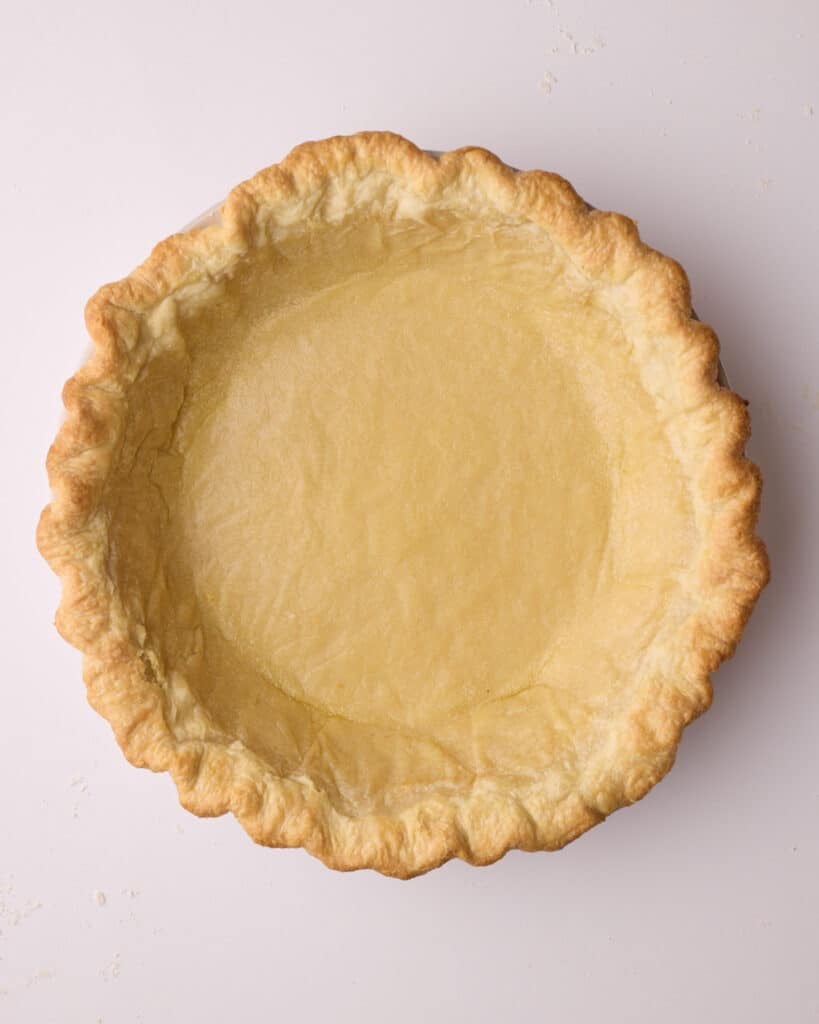
Credit: bonnibakery.com
Choosing The Right Ingredients
The crust of a pie is as important as the filling. Using the right ingredients helps you get a flaky and tasty crust. This guide explains key choices for your pie dough.
Focus on flour type, fat selection, and the water you add. These three parts shape the texture and flavor of your crust.
Flour Types And Their Impact
Different flours change the crust texture. All-purpose flour is common and gives a good balance. Pastry flour has less protein, making a tender crust. Bread flour has more protein, creating a chewier crust.
| Flour Type | Protein Content | Effect on Crust |
| All-purpose | 10-12% | Balanced texture, good flakiness |
| Pastry | 8-9% | More tender, less chewy |
| Bread | 12-14% | Chewier, less tender |
Fat Choices For Flakiness
Fat type and temperature affect crust flakiness. Butter adds flavor and creates layers. Shortening gives a very flaky texture but less taste. Lard can make crusts very tender and crisp.
- Butter: Best flavor, medium flakiness
- Shortening: Best flakiness, less flavor
- Lard: Very flaky and tender
Importance Of Cold Water
Cold water keeps fat from melting too soon. This helps create flaky layers in the crust. Use ice water and add it slowly to the flour and fat mixture.
Warm water can make dough sticky and tough. Cold water helps dough hold together without losing flakiness.
Mastering The Dough
Baking pies with a flaky crust starts with the dough. The dough must be handled gently to keep it tender. A good crust has many thin layers that stay crisp after baking.
This guide covers how to mix, knead, and rest the dough for the best results. Each step helps create a light, flaky crust that holds its shape and texture.
Proper Mixing Techniques
Mix flour and fat quickly using cold ingredients. Cold fat creates pockets of air that make the crust flaky. Use a pastry cutter or your fingers to blend until pea-sized pieces form.
Avoid melting the fat. Work fast and keep your hands cool. The mixture should look crumbly with small lumps of fat visible. Do not overmix into a smooth dough.
- Use cold butter or shortening
- Cut fat into flour until pea-sized
- Mix gently and quickly
- Keep ingredients cold
Kneading Without Overworking
Knead the dough just enough to bring it together. Use a light touch to avoid developing gluten. Overworking makes the crust tough and chewy.
Fold and press the dough gently on a floured surface. Stop kneading once the dough holds its shape and is smooth. This keeps the crust tender and flaky.
- Use light, gentle folds
- Stop when dough forms a ball
- Do not stretch or pull too much
- Keep flour handy to prevent sticking
Resting The Dough
Rest the dough in the fridge before rolling. This lets the fat firm up again and the flour hydrate. Resting helps prevent shrinking during baking.
Wrap the dough tightly in plastic wrap. Chill it for at least 30 minutes or up to 24 hours. Cold dough is easier to roll and shapes better.
- Wrap dough tightly in plastic
- Chill for minimum 30 minutes
- Rest up to 24 hours for best results
- Keep dough cold before rolling
Rolling Out The Perfect Crust
Rolling out a pie crust is an important step for a flaky and tasty pie. A good crust needs to be even and smooth. This helps the pie bake evenly and look great.
Many bakers find rolling the dough tricky. Using the right tools and techniques can make it easier. This guide will help you roll your pie crust perfectly every time.
Using The Right Tools
Using the right tools helps you roll dough with ease. A good rolling pin is smooth and the right size for your dough. A clean surface also makes a big difference.
Keep some flour nearby to stop the dough from sticking. You can use parchment paper or a silicone mat to roll the dough without mess.
- Wooden or marble rolling pin
- Flour for dusting
- Parchment paper or silicone mat
- Flat, clean surface
Achieving Uniform Thickness
Rolling the dough to the same thickness helps it bake evenly. Thin spots can burn and thick spots may stay raw. Check the dough often as you roll.
Use guide sticks or rolling pin rings to keep the dough even. Roll from the center outward to keep the shape round and smooth.
- Roll from center to edges
- Use guide sticks or rings
- Check thickness with a ruler
- Turn dough 90 degrees often
Handling Cracks And Tears
Cracks or tears can happen if the dough is dry or cold. Fix small cracks by pressing the dough gently together. For bigger tears, use a little water or flour to patch it.
Keep the dough cold but flexible. Warm it slightly if it cracks too much. Handle dough gently to avoid breaking it.
- Press small cracks gently
- Patch big tears with flour and water
- Keep dough cold but not too stiff
- Warm dough slightly if it breaks
Filling Tips For Flavor
The filling is the heart of any pie. Choosing the right flavors makes your pie delicious. Use simple tips to balance tastes and textures.
Good filling helps keep the crust flaky and prevents sogginess. Fresh, seasonal fruits add natural sweetness and flavor to your pies.
Balancing Sweetness And Tartness
Mix sweet and tart fruits to create a rich flavor in your pie. Too much sugar can hide the fruit’s natural taste. Too much tartness can make it sour.
- Use apples with a touch of lemon juice for brightness.
- Add berries with honey or maple syrup to sweeten naturally.
- Mix fruits like peaches and raspberries to balance flavors.
- Adjust sugar slowly and taste the filling before baking.
Preventing A Soggy Bottom
Keep the crust crisp by controlling moisture in the filling. Too much liquid makes the crust soft and soggy.
| Tip | Why It Helps |
| Drain excess juice from fruit | Reduces moisture in crust |
| Use a thickener like cornstarch or flour | Keeps filling firm |
| Brush crust with egg white before filling | Creates a moisture barrier |
| Blind bake crust partially | Sets crust before adding filling |
Incorporating Seasonal Fruits
Seasonal fruits taste better and cost less. Use fresh fruits to add vibrant colors and flavors to your pie.
Here are some fruits to try by season:
- Spring:Strawberries, rhubarb, cherries
- Summer:Peaches, blueberries, blackberries
- Fall:Apples, pears, cranberries
- Winter:Oranges, pomegranates, persimmons
Assembly And Baking Techniques
Baking pies with a flaky crust needs careful assembly. Paying attention to details makes your crust tender and crisp.
This guide covers how to seal your pie edges, choose the oven temperature, and time your baking for the best color.
Crimping And Sealing Edges
Sealing the pie edges stops the filling from leaking out. Crimping also shapes the pie’s look.
- Use your fingers or a fork to press the edges firmly together.
- For a classic look, pinch the dough between thumb and forefinger.
- Brush edges with a little water or egg wash to help them stick.
- Work quickly to keep the dough cold and flaky.
Choosing The Right Oven Temperature
Baking temperature affects crust flakiness and filling cooking. Too hot burns crust; too low makes it soggy.
| Temperature | Effect |
| 425°F (220°C) | Starts crust baking, creates steam for flakiness |
| 350°F (175°C) | Cooks filling evenly without burning crust |
| 300°F (150°C) | Used for slow cooking very juicy fillings |
Timing For Perfect Browning
Watch your pie closely to get golden brown crust without burning.
- Start baking at a high temperature for 15 minutes.
- Lower the heat for 30-40 minutes to cook filling through.
- Cover crust edges with foil if they brown too fast.
- Check pie after 45 minutes and adjust time if needed.

Credit: nodashofgluten.com
Troubleshooting Common Issues
Baking pies with a flaky crust can be tricky. Many bakers face problems like shrinkage, burning, or uneven baking. Fixing these issues helps make perfect pies every time.
This guide covers simple tips to solve common pie crust problems. Use these ideas to improve your baking skills and enjoy flaky, delicious pies.
Dealing With Shrinkage
Pie crust shrinkage happens when the dough pulls away from the pan during baking. This can ruin your pie’s look and texture.
- Chill the dough well before baking to relax the gluten.
- Avoid stretching the dough when placing it in the pan.
- Use pie weights or dry beans to keep the crust in place during blind baking.
- Do not cut slits too large in the dough, as this can cause shrinkage.
- Let the dough rest in the fridge after shaping, before baking.
Avoiding Burning
Burning often happens on the edges of the crust or the bottom of the pie. It can make the pie taste bitter and look burnt.
| Cause | Solution |
|---|---|
| Oven too hot | Lower oven temperature by 25°F (about 15°C) |
| Edges exposed | Use a pie shield or foil to cover edges |
| Thin crust bottom | Roll dough evenly and avoid thin spots |
| Overbaking | Check pie 5 minutes before time ends |
Ensuring Even Baking
Uneven baking causes parts of the crust to be raw or overdone. This affects the pie’s texture and taste.
Follow these tips for even baking:
- Preheat the oven fully before baking.
- Place the pie in the center rack for good air circulation.
- Use an oven thermometer to check accurate temperature.
- Rotate the pie halfway through baking for uniform heat.
- Use light-colored metal pans to avoid hot spots.
Enhancing Presentation
Baking pies with a flaky crust is not just about taste. How your pie looks can make it even more inviting.
Simple touches can make your pies look like they came from a bakery.
Decorative Edges And Lattice Tops
Decorative edges give your pie a neat and pretty look. Pinch or crimp the edges for a classic style.
Lattice tops add a fun and open design. Cut strips of dough and weave them over the filling.
- Use a fork to press edges for a simple pattern
- Try braided edges for a fancy touch
- Weave dough strips for a classic lattice look
- Cut shapes like leaves to place on top
Glazing For Shine
Glazing your pie crust makes it look golden and shiny. Brush the crust with egg wash before baking.
You can also use milk or cream for a softer shine. Add a little sugar on top for sparkle.
- Whisk one egg and brush evenly
- Use milk for a lighter color
- Sprinkle sugar for a crunchy top
- Apply glaze right before baking
Serving Suggestions
How you serve your pie can add to the experience. Use pretty plates and add simple toppings.
Fresh fruit, whipped cream, or a scoop of ice cream are great choices to serve with your pie.
- Cut pie slices neatly with a warm knife
- Serve with a small scoop of vanilla ice cream
- Add a dollop of whipped cream
- Garnish with fresh berries or mint leaves

Credit: www.tasteofhome.com
Frequently Asked Questions
How Do I Make Pie Crust Flaky?
Use cold butter and ice water for the dough. Handle dough minimally to avoid gluten overdevelopment. Chill the dough before rolling it out.
What Type Of Flour Is Best For Pie Crust?
All-purpose flour is ideal for pie crust. It balances gluten formation for a tender, flaky texture. Avoid using bread flour, which is too strong.
Can I Use Shortening Instead Of Butter For Flakiness?
Yes, shortening creates a tender, flaky crust. It lacks butter’s flavor but melts well for flakiness. Many bakers combine butter and shortening for best results.
How Long Should I Chill Pie Dough Before Baking?
Chill pie dough at least 1 hour before baking. This firms the fat and relaxes gluten, helping crust stay flaky and prevent shrinking.
Conclusion
Baking pies with flaky crust is easier than it seems. Use cold ingredients and handle dough gently. Keep the dough cold for best results. Don’t overwork the dough to keep it tender. Practice makes perfect—each pie gets better. Enjoy the process and share your delicious pies.
A flaky crust makes every bite special. Try these tips and enjoy baking soon!