

Cleaning the inside of your oven might feel like a tough job. But what if it didn’t have to be?
Imagine opening your oven to a fresh, spotless space that’s ready for your next meal. You’ll not only cook better food but also keep your kitchen safer and smell fresher. In this guide, you’ll discover simple, effective ways to clean your oven without harsh chemicals or endless scrubbing.
Keep reading, and by the end, you’ll feel confident tackling this task quickly and easily. Your oven—and your taste buds—will thank you.

Credit: www.angi.com
Gather Essential Cleaning Supplies
Cleaning the inside of your oven is easier with the right tools. Having all supplies ready saves time and effort.
This guide shows you what cleaning supplies you need for a safe and effective oven cleaning.
Protective Gear
Protect yourself before starting. Gloves keep your hands safe from harsh chemicals. Old clothes or an apron protect your skin and clothes from dirt and splashes.
Cleaning Agents
Choose the right cleaning products for your oven. Some ovens need special cleaners. Natural options like baking soda and vinegar also work well.
- Commercial oven cleaner
- Baking soda
- White vinegar
- Dish soap
- Water
Cleaning Tools
Use the proper tools for scrubbing and wiping. Soft cloths and sponges avoid scratches. A plastic scraper helps remove burnt food safely.
| Tool | Purpose |
| Soft cloth | Wipe surfaces clean |
| Non-abrasive sponge | Scrub without scratching |
| Plastic scraper | Remove stuck-on food |
| Spray bottle | Apply vinegar or cleaner |
| Bucket | Mix cleaning solutions |
Additional Items
Extra supplies can make cleaning smoother. Paper towels help dry surfaces. A flashlight helps see inside dark ovens.
- Paper towels
- Trash bag for debris
- Flashlight
- Old toothbrush for corners
Prepare The Oven For Cleaning
Cleaning your oven starts with good preparation. Getting the oven ready makes the cleaning easier and safer.
Remove any items and get tools ready before you start scrubbing inside the oven.
Remove Oven Racks
Take out the oven racks carefully. This gives you full access to the oven’s interior.
You can clean the racks separately for better results and avoid damage to them.
- Open the oven door fully
- Grip each rack firmly
- Pull the racks straight out
- Set them aside in a safe place
Wipe Out Loose Debris
Use a dry cloth or paper towel to wipe out crumbs and loose dirt from the oven walls.
Removing loose debris helps cleaners work better and stops messes from spreading.
- Check the oven floor and corners
- Remove bits of food or burnt material
- Use a small brush for tight spots
- Dispose of debris in the trash
Homemade Cleaning Solutions
Cleaning the inside of an oven can be simple using homemade solutions. These solutions use common household items. They are safe and effective for removing grease and grime.
Two popular options are baking soda paste and vinegar spray. Each works differently but both help clean well without harsh chemicals.
Baking Soda Paste
Baking soda paste is thick and easy to spread on oven surfaces. It loosens baked-on food and grease after sitting for some time.
- Mix half a cup of baking soda with a few tablespoons of water to form a paste.
- Spread the paste inside the oven, avoiding heating elements.
- Let it sit for 12 hours or overnight for best results.
- Use a damp cloth to wipe away the paste and loosened grime.
- Spray some water to help rinse and wipe clean again.
Vinegar Spray
Vinegar spray helps dissolve grease and remove baking soda residue. It also leaves the oven smelling fresh.
| Ingredients | Use |
| White vinegar | Spray on oven surfaces after baking soda paste |
| Water | Mix with vinegar to reduce acidity |
| Spray bottle | Apply the mixture evenly |
Mix equal parts of white vinegar and water in a spray bottle. Spray the oven surface after removing baking soda paste. Wipe with a clean cloth to finish cleaning.
Apply The Cleaning Solution
Cleaning the inside of your oven starts with applying a cleaning solution. This step helps loosen grease and food residue.
Use a safe solution made for ovens or a mix of baking soda and water. Make sure the oven is cool before you begin.
Coat The Oven Interior
Spread the cleaning solution evenly inside the oven. Cover the walls, floor, and door with a thick layer.
Use a sponge or cloth to apply the solution. Avoid spraying too much liquid in one spot to prevent dripping.
Focus On Stubborn Stains
Stubborn stains need extra attention. Apply more cleaning paste directly on these spots.
Let the solution sit for at least 15 minutes. This helps break down tough grease and burnt food.
- Use a brush to scrub stuck-on stains gently
- Reapply cleaning solution if stains remain
- Do not use harsh tools that can scratch the oven
Let The Solution Sit
After applying your cleaning solution inside the oven, it needs time to work. Letting it sit allows grime and grease to soften. This step makes scrubbing easier and more effective.
Patience here can save you effort later. Avoid rushing to wipe or scrub right after application. The solution needs several minutes to break down tough stains.
Recommended Sitting Time
Different solutions require different times to act. Check the instructions for your cleaner. Usually, waiting 15 to 30 minutes works well for homemade and commercial cleaners.
- Spray or spread the cleaning solution evenly inside the oven.
- Close the oven door to keep moisture and heat inside.
- Wait for at least 15 minutes, or as directed.
- Do not disturb the solution during this time.
Effects Of Letting The Solution Sit
The solution breaks down burnt food and grease. It loosens stuck-on particles. This makes wiping or scrubbing much easier and less tiring.
| Effect | Benefit |
| Softens grime | Reduces scrubbing force |
| Breaks down grease | Speeds up cleaning time |
| Loosens burnt food | Prevents damage to oven surfaces |
Tips For Best Results
- Cover tough spots with extra solution.
- Use a plastic wrap to keep moisture in.
- Wear gloves to protect your skin.
- Ensure good ventilation in the kitchen.
Credit: honey.nine.com.au
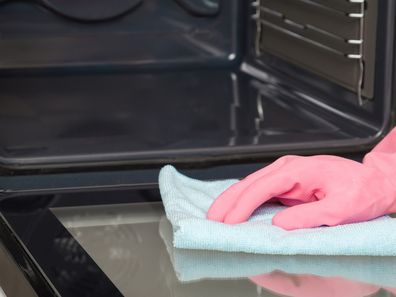
Scrub And Wipe Down
Cleaning the inside of your oven helps keep it safe and working well. Scrubbing and wiping remove grease and food bits.
Use gentle tools and water to avoid damage. This makes your oven clean without scratches or smells.
Use A Non-abrasive Sponge
Choose a soft sponge that does not scratch. Avoid steel wool or rough scrubbers that can harm the oven’s surface.
Gently scrub the oven walls and racks with the sponge. This helps lift dirt without causing damage.
- Pick a sponge labeled non-abrasive
- Use warm water and mild soap
- Scrub in small circles for better cleaning
Rinse With Clean Water
After scrubbing, rinse the sponge with clean water. Wipe the oven surfaces to remove soap and dirt.
Make sure no soap remains inside the oven. Leftover soap can cause smells or smoke when you use the oven again.
- Use a damp sponge or cloth for rinsing
- Wipe all areas you scrubbed
- Dry the oven with a clean towel if needed
Clean The Oven Racks
Oven racks collect grease and food spills over time. Cleaning them keeps your oven fresh and safe to use. It also helps your food cook evenly.
Removing the racks before cleaning makes the job easier. You can clean the racks outside of the oven with simple supplies.
Soak In Soapy Water
Fill a large container or your bathtub with hot water. Add dish soap to create a soapy mix. Place the oven racks in the water and let them soak.
- Use enough water to cover the racks fully.
- Let them soak for at least 30 minutes.
- Soaking loosens baked-on grease and food bits.
- For tough grime, soak overnight.
Scrub And Rinse
After soaking, scrub the racks to remove loosened dirt. Use a sponge, brush, or steel wool for best results. Rinse the racks well to remove soap and debris.
| Tool | Use For |
| Sponge | Light dirt and grease |
| Brush | Hard-to-reach spots |
| Steel wool | Stubborn grime |
| Water | Rinsing |
Perform A Final Inspection
After cleaning the inside of your oven, a final inspection is important. This helps ensure the oven is safe and ready to use.
Checking carefully prevents missed spots and damage. It also confirms the cleaning process is complete.
Check For Leftover Cleaning Residue
Look closely inside the oven for any cleaning product residue. Residue can cause smoke or bad smells when the oven heats up.
Use a damp cloth to wipe any leftover spots until the oven is fully clean.
Inspect Oven Racks And Trays
Make sure oven racks and trays are clean and dry. Check for any rust or damage caused by cleaning.
- Remove racks and trays to inspect both sides
- Dry them well before placing back inside
- Replace any damaged parts if needed
Verify Oven Door And Seal Condition
Check the oven door for dirt or cleaning residue. Look at the door seal to ensure it is intact and clean.
A good seal keeps heat inside. Clean the seal gently without damaging it.
Test Oven Controls And Lights
Turn on the oven controls briefly to check if they work properly. The oven light should also turn on without problems.
- Set the oven to a low temperature
- Observe if the oven heats up evenly
- Watch for any unusual smells or noises
Confirm No Water Or Moisture Remains
Dry the oven fully to avoid moisture buildup. Moisture can cause rust or damage electronic parts.
Use a dry cloth or let the oven air dry with the door open.
Regular Maintenance Tips
Keeping your oven clean inside helps it work better. Dirt and spills can cause bad smells and smoke.
Regular cleaning stops buildup and makes cooking safer. Small habits keep your oven fresh and ready.
Wipe Spills Immediately
Clean spills as soon as the oven cools down. Fresh spills are easier to remove than baked-on stains.
Use a damp cloth or sponge with mild soap. Avoid harsh chemicals that can damage the oven surface.
- Turn off oven and wait to cool
- Use soft cloth or sponge
- Apply mild soap and water
- Wipe spills gently and dry the area
Schedule Monthly Cleanings
Set a regular time each month to clean the oven inside. This stops grease and grime from building up.
Use oven cleaner or a homemade mix of baking soda and vinegar. Follow instructions carefully for safe use.
- Remove oven racks before cleaning
- Apply cleaner and let it sit as directed
- Scrub with a soft brush or cloth
- Rinse and dry the oven interior
- Replace racks and test oven

Credit: www.express.co.uk
Frequently Asked Questions
How Often Should I Clean The Inside Of My Oven?
You should clean your oven every 3 to 6 months. Frequent cleaning prevents buildup of grease and food residue. For heavy use, clean more often to maintain efficiency and hygiene.
What Is The Safest Way To Clean Oven Interiors?
Use a mixture of baking soda and water for safe cleaning. Avoid harsh chemicals to protect your oven’s surface. Wipe with a damp cloth after applying the paste for best results.
Can I Use Vinegar To Clean Inside My Oven?
Yes, vinegar is an effective natural cleaner for ovens. Spray vinegar on stains and let it sit before wiping. It helps dissolve grease and neutralize odors safely.
How Do I Remove Burnt Food From My Oven?
Soak burnt food with baking soda paste or vinegar spray. Let it sit for 20 minutes before scrubbing gently with a non-abrasive sponge. Repeat if necessary to avoid scratching the oven surface.
Conclusion
Cleaning your oven’s inside keeps it working well and safe. Regular cleaning stops bad smells and smoke. Use gentle tools and safe cleaners for the best results. Take your time and follow steps carefully. A clean oven helps cook food evenly and tastes better.
Make oven cleaning part of your home routine. It feels good to cook in a fresh oven. Try these simple tips to keep your oven shiny and clean.