
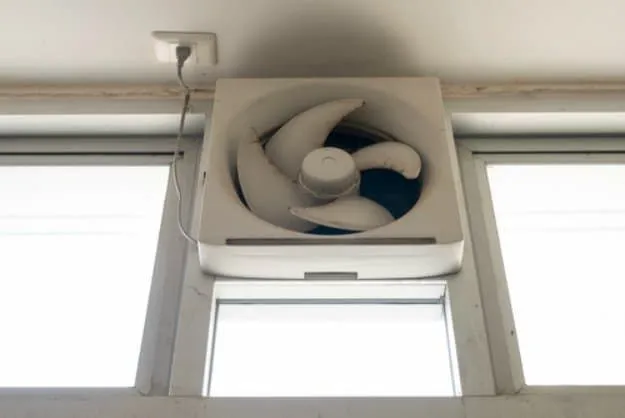
Is your kitchen exhaust fan looking greasy and clogged? If you’ve noticed it’s not working as well or making strange noises, it’s time for a deep clean.
A dirty exhaust fan can slow down airflow, cause unpleasant smells, and even be a fire hazard. But don’t worry—you don’t need to be a cleaning pro to get it sparkling again. In this guide, you’ll learn simple, step-by-step tips to clean your kitchen exhaust fan thoroughly and keep your kitchen fresh and safe.
Ready to get started? Let’s dive in!
Credit: www.sydneyrangehoods.com.au
Importance Of Cleaning Kitchen Exhaust Fans
Kitchen exhaust fans remove smoke, grease, and odors from cooking areas. Keeping them clean helps maintain air quality. Dirty fans can cause bad smells and health problems.
Regular cleaning also protects your kitchen from fire risks. Grease buildup can ignite and cause dangerous fires. Clean fans work better and last longer.
Improves Air Quality
Cleaning the exhaust fan removes dust and grease that block airflow. This helps clear smoke and harmful gases from your kitchen. Fresh air reduces breathing problems and allergies.
Reduces Fire Hazards
Grease and oil can build up inside the fan and ducts. These materials catch fire easily. Cleaning removes these flammable substances and lowers fire risks.
- Grease buildup inside the fan
- Clogged ducts reducing airflow
- Increased chance of sparks and flames
Extends Equipment Life
Dirt and grease make the fan motor work harder. This causes wear and tear faster. Cleaning keeps the fan running smoothly and saves money on repairs.
Maintains Kitchen Hygiene
A clean exhaust fan stops grease and dirt from spreading. This keeps kitchen surfaces cleaner. It also prevents pests that like greasy areas.
| Benefit | Why It Matters |
| Better Air Quality | Reduces smoke and odors |
| Lower Fire Risk | Removes flammable grease |
| Longer Fan Life | Prevents motor damage |
| Cleaner Kitchen | Stops grease buildup and pests |
Gather Necessary Cleaning Supplies
Cleaning your kitchen exhaust fan well keeps your kitchen safe and fresh. Start by gathering all the supplies you need. This helps you finish the job quickly and correctly.
Having the right tools and safety gear makes cleaning easier and protects you from harm. Prepare everything before you begin.
Essential Tools And Materials
You need specific tools and cleaning materials to clean the exhaust fan deeply. These items help remove grease and dust well.
- Dish soap or degreaser for tough grease
- Warm water to mix with soap
- Scrub brush or sponge for scrubbing
- Old toothbrush for small parts
- Soft cloths or rags for wiping
- Bucket or large bowl for soaking parts
- Vacuum cleaner with brush attachment
- Screwdriver to remove the fan cover
Safety Gear And Precautions
Wear safety gear to protect your hands and eyes. Cleaning chemicals and grease can cause irritation or injury.
- Rubber gloves to protect your skin
- Safety goggles to shield your eyes
- Old clothes or apron to avoid stains
- Face mask to avoid inhaling dust or fumes
Turn off the power to the exhaust fan before cleaning. This stops accidents and keeps you safe.
Preparing The Kitchen For Cleaning
Cleaning the kitchen exhaust fan is important to keep your kitchen safe and fresh. Preparing the kitchen well helps make the cleaning easier and more effective.
Before you start, take some steps to protect your kitchen and keep the air clear. This guide will help you get ready for a thorough cleaning.
Protecting Surfaces And Appliances
Kitchen surfaces and appliances can get dirty or damaged during cleaning. Cover them to avoid stains and water damage.
Use plastic sheets or old towels to cover counters, stovetops, and nearby electronics. This stops grease and cleaning solutions from making a mess.
- Clear the area around the exhaust fan
- Cover countertops with plastic or cloth
- Unplug or protect small appliances
- Move items away from the cleaning zone
Ensuring Proper Ventilation
Good airflow helps dry wet surfaces and removes cleaning fumes. Open windows and doors to let fresh air in.
Turn on fans or use a portable fan to move air around. This keeps the kitchen safe and comfortable during cleaning.
- Open windows near the kitchen
- Keep doors open to other rooms
- Use exhaust or ceiling fans
- Consider a portable fan for extra airflow
Credit: www.sydneyrangehoods.com.au
Disassembling The Exhaust Fan
Cleaning your kitchen exhaust fan starts with careful disassembly. Taking apart the fan allows you to clean each part deeply.
Follow the steps below to remove the cover or filter and detach the fan blade safely.
Removing The Cover Or Filter
The cover or filter protects the fan and traps grease. Removing it carefully helps you clean it well without damage.
- Turn off the power to the exhaust fan for safety.
- Look for clips, screws, or tabs holding the cover or filter in place.
- Use a screwdriver if screws secure the cover. Keep screws safe for reassembly.
- Gently pull or slide the cover or filter off the fan housing.
- Inspect the cover or filter for grease build-up or damage.
Detaching The Fan Blade
The fan blade moves air and collects grease. Removing it lets you clean the blades and the motor area thoroughly.
| Tool Needed | Action |
|---|---|
| Screwdriver | Remove screws that hold the fan blade to the motor shaft. |
| Wrench | Loosen any nuts securing the fan blade if present. |
| Gloves | Protect your hands from sharp edges and grease. |
After loosening screws or nuts, pull the fan blade gently from the motor shaft. Avoid forcing it to prevent damage.
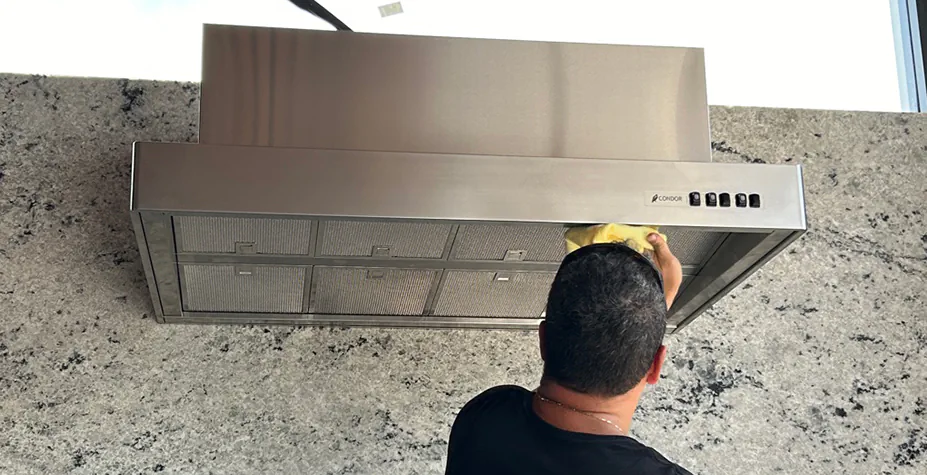
Cleaning The Fan Blade And Cover
Keeping your kitchen exhaust fan clean helps it work better. Dirt and grease build up on the blades and cover. Cleaning them regularly stops smoke and smells.
This guide shows how to clean the fan blade and cover using soaking and scrubbing. It also explains drying and checking for damage.
Soaking And Scrubbing Techniques
First, remove the fan cover and blades carefully. Soak them in warm, soapy water to loosen grease and dirt. Let them sit for at least 20 minutes.
- Use a mild dish soap mixed with warm water.
- Submerge the fan blades and cover fully.
- Let parts soak to soften tough grease.
- Use a soft brush or sponge to scrub gently.
- Pay special attention to corners and edges.
- Rinse all parts with clean water after scrubbing.
Drying And Inspecting For Damage
After washing, dry the fan blades and cover completely. Use a clean towel or air dry in a ventilated area. Moisture left on parts can cause rust.
| Inspection Point | What to Check |
|---|---|
| Fan Blade | Look for cracks or bends that affect balance |
| Cover | Check for dents or broken clips |
| Screws and Fasteners | Ensure none are loose or missing |
| Grease Residue | Confirm all grease is removed |
Credit: alturascontractors.com
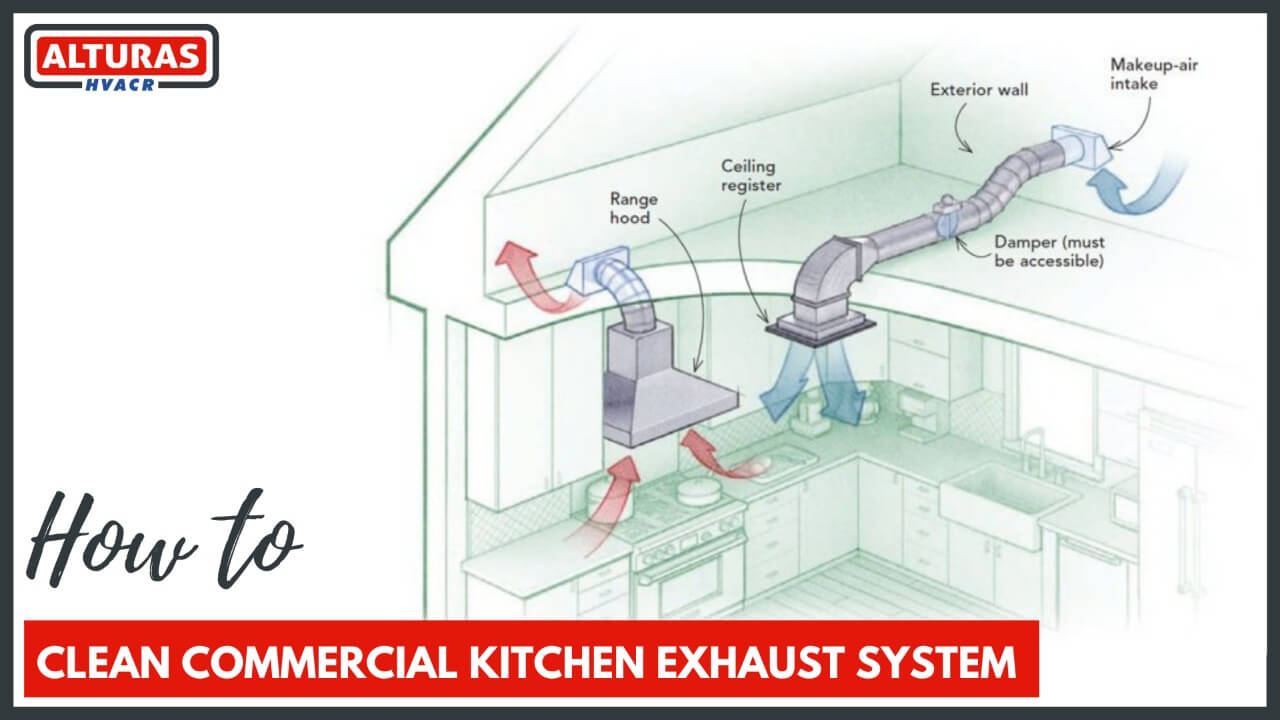
Degreasing The Exhaust Duct
Cleaning your kitchen exhaust fan is important for safety and efficiency. The exhaust duct collects grease that can catch fire.
Degreasing the exhaust duct removes built-up grease and keeps the fan working well.
Choosing The Right Degreaser
Pick a degreaser made for kitchen grease and safe for metal parts. Avoid harsh chemicals that can damage the duct.
Look for degreasers that are biodegradable and easy to rinse off to protect the environment.
- Use a heavy-duty degreaser for thick grease layers
- Choose a non-toxic option for safer indoor use
- Check if the product works on stainless steel or aluminum ducts
Application And Rinsing Process
First, spray the degreaser inside the duct. Let it sit for 10 to 15 minutes to break down the grease.
Use a brush or cloth to scrub the duct surface gently. Avoid hard scrubbing that can damage the duct.
- Wear gloves to protect your hands
- Work in a well-ventilated area
- Use warm water to rinse off the degreaser and grease
- Dry the duct with a clean cloth to prevent rust
Reassembling And Testing The Fan
After cleaning your kitchen exhaust fan, you need to put it back together carefully. Proper reassembly ensures the fan works well and stays safe.
Testing the fan after reassembly helps confirm that everything fits right and runs smoothly. Follow these steps to secure the fan blade and reattach the cover or filter.
Securing The Fan Blade
Make sure the fan blade is firmly attached to the motor shaft. A loose blade can cause noise and damage the fan.
- Align the fan blade with the motor shaft carefully.
- Push the blade onto the shaft until it fits snugly.
- Tighten any screws or bolts that hold the blade in place.
- Check that the blade spins freely without wobbling.
- Make sure the blade is balanced to avoid vibration.
Reattaching The Cover Or Filter
Once the blade is secured, put the cover or filter back on. This keeps the fan clean and protects the motor.
| Cover/Filter Part | Reattachment Tip |
|---|---|
| Metal Cover | Align screw holes and tighten screws firmly. |
| Mesh Filter | Snap filter clips into place without forcing. |
| Plastic Cover | Press tabs gently until you hear a click. |
After reassembling, plug in the fan and turn it on. Listen for smooth operation and check for unusual noises. If the fan runs well, your cleaning and reassembly are complete.
Regular Maintenance Tips
Cleaning your kitchen exhaust fan often keeps it working well. Dirt and grease can build up fast. This can cause bad smells and poor air flow.
Regular care stops problems before they start. It also helps your kitchen stay safe and fresh.
Frequency Of Cleaning
How often you clean depends on how much you cook. Heavy cooking means more grease and dirt. Light cooking means less build-up.
- Clean light-use fans every three months.
- Clean moderate-use fans every two months.
- Clean heavy-use fans every month.
Preventative Measures
Taking care of your fan stops dirt from piling up. You can follow simple rules to keep it cleaner longer.
- Wipe the fan surface weekly with a damp cloth.
- Use a degreaser spray every month to remove sticky grease.
- Change or clean filters regularly as per the manufacturer.
- Check the fan blades for dust and clean if needed.
- Turn on the exhaust fan every time you cook to reduce grease.
Frequently Asked Questions
How Often Should I Clean My Kitchen Exhaust Fan?
Clean your kitchen exhaust fan every 3 to 6 months. Frequent cleaning prevents grease buildup. This keeps the fan efficient and reduces fire risks.
What Materials Are Needed To Clean An Exhaust Fan?
You need a degreaser, warm water, a soft brush, and microfiber cloths. Safety gloves and a screwdriver help remove fan parts safely.
Can I Clean The Exhaust Fan Without Removing It?
Light cleaning can be done without removal. Use a degreaser spray and wipe down accessible areas. Deep cleaning requires removing the fan for thorough results.
How Do I Safely Remove Grease From The Fan Blades?
Apply a degreaser and let it sit for 10 minutes. Use a soft brush to scrub grease gently. Rinse with warm water and dry completely.
Conclusion
Cleaning your kitchen exhaust fan keeps your kitchen safe and fresh. Regular cleaning stops grease buildup and bad smells. Use simple tools and safe cleaners for best results. Take time every few months to clean the fan well. A clean fan works better and lasts longer.
Small steps make a big difference in kitchen hygiene. Keep your kitchen air clean and healthy for your family. Easy to do, worth the effort.