

Is your kitchen exhaust fan looking greasy and clogged? Cleaning it might seem like a tough job, but what if you could do it easily using natural ingredients right from your home?
You don’t need harsh chemicals or expensive cleaners to get your fan sparkling clean and working efficiently again. You’ll discover simple, natural methods that save you time, money, and keep your kitchen fresh and safe. Keep reading to learn how to make your kitchen exhaust fan shine without any toxins or stress.
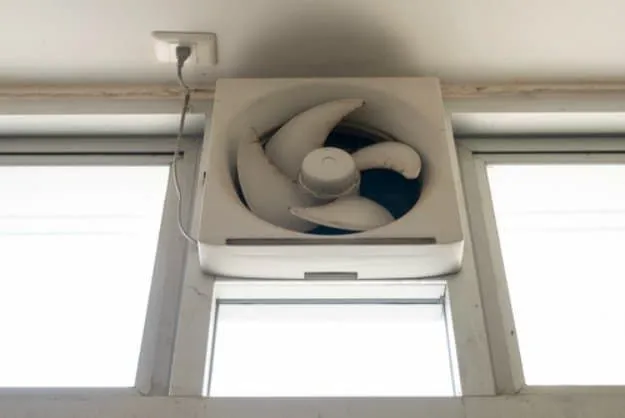
Credit: www.nobroker.in
Importance Of Cleaning Kitchen Exhaust Fan
Kitchen exhaust fans remove smoke, grease, and odors from cooking. Keeping them clean helps the fan work well.
Dirty fans can cause problems like bad smells and poor air flow. Cleaning them is important for safety and health.
Prevents Fire Hazards
Grease builds up inside the exhaust fan over time. This grease can catch fire if not cleaned regularly.
Cleaning the fan lowers the risk of kitchen fires. It keeps your home safe from accidents.
Improves Air Quality
A clean exhaust fan removes smoke and odors better. This keeps the kitchen air fresh and healthy to breathe.
It also helps reduce dust and allergens that collect in a dirty fan.
Increases Fan Efficiency
When the fan is clean, it works faster and uses less energy. Dirt and grease make the fan slow and noisy.
Regular cleaning keeps the fan running smoothly and saves electricity.
Extends Fan Lifespan
Grease and dirt can damage fan parts over time. Cleaning stops this damage and keeps the fan working longer.
A well-maintained fan costs less to fix and does not need to be replaced often.

Credit: www.express.co.uk
Signs Your Exhaust Fan Needs Cleaning
Your kitchen exhaust fan removes smoke, steam, and odors. Over time, dirt and grease build up inside it.
Recognizing signs that your exhaust fan needs cleaning helps keep your kitchen fresh and safe.
Reduced Airflow
If your fan seems weaker and does not clear smoke well, it may be clogged with grease and dust.
Blocked vents slow down air movement and reduce the fan’s efficiency.
Unusual Noises
When your exhaust fan makes loud or strange sounds, dirt or grease may be stuck inside the blades.
These noises show the fan needs cleaning to run smoothly again.
Visible Grease Buildup
You can see a thick layer of grease or dust on the fan cover or blades. This buildup lowers fan performance.
Cleaning this grease helps the fan work better and look cleaner.
Lingering Kitchen Odors
If cooking smells stay in your kitchen longer than usual, the exhaust fan might be dirty.
A clean fan removes odors quickly and keeps the air fresh.
Excessive Heat Or Smoke
More heat or smoke stays in the kitchen after cooking when the exhaust fan is blocked.
This shows the fan’s airflow is reduced and it needs cleaning.
Safety Precautions Before Cleaning
Cleaning your kitchen exhaust fan naturally is safe if you follow important steps. Taking safety precautions helps prevent accidents and damage.
Always prepare your workspace and tools before starting. This keeps the cleaning process smooth and safe.
Turn Off The Power
Switch off the exhaust fan from the main power source. Unplug the fan or turn off the circuit breaker to avoid electric shock.
Do not start cleaning if the fan is still connected to electricity. Make sure the power is completely off.
Wear Protective Gear
Wear gloves to protect your hands from grease and dirt. Use a mask to avoid breathing in dust and particles.
Safety glasses can protect your eyes from splashes of cleaning solutions or debris.
Prepare Your Cleaning Area
Clear the area around the exhaust fan. Remove items that can get wet or dirty during cleaning.
Place old towels or newspapers under the fan to catch drips and debris. This keeps your kitchen clean and dry.
Use Safe Cleaning Solutions
Choose natural cleaning products like vinegar, baking soda, or lemon juice. Avoid harsh chemicals that can cause harm.
Test any solution on a small part of the fan first. This prevents damage or discoloration.
Handle Parts Carefully
Remove fan parts gently to avoid breaking them. Keep screws and small pieces in a safe place.
Do not force any parts to move. If a part is stuck, check the manual or ask for help.
Gathering Natural Cleaning Supplies
Cleaning your kitchen exhaust fan with natural supplies is safe and effective. It helps remove grease and grime without harsh chemicals.
This guide lists common natural items you need before starting the cleaning process.
White Vinegar
White vinegar cuts through grease and kills bacteria. It is a powerful natural cleaner for your exhaust fan parts.
Baking Soda
Baking soda acts as a gentle abrasive. It helps scrub off stuck-on dirt without damaging surfaces.
Lemon Juice
Lemon juice adds a fresh scent and natural bleach power. It brightens metal parts and cuts grease effectively.
Essential Supplies List
- White vinegar (1 cup)
- Baking soda (2 tablespoons)
- Fresh lemon juice (½ cup)
- Warm water (enough to soak parts)
- Soft scrub brush or sponge
- Microfiber cloths
- Old toothbrush for tight spots
Tools And Safety Items
| Tool | Purpose |
| Gloves | Protect hands from grease and acids |
| Bucket | Hold warm cleaning solution |
| Spray bottle | Apply vinegar or lemon juice evenly |
| Old newspapers or towels | Protect work area from drips |
Step-by-step Cleaning Process
Cleaning your kitchen exhaust fan keeps it working well and your kitchen fresh. Using natural methods helps avoid harsh chemicals.
This guide shows simple steps to clean your exhaust fan safely and naturally.
Removing The Exhaust Fan
First, turn off the power to the fan to stay safe. Find the screws or clips that hold the fan in place.
Use a screwdriver to remove the fan from the wall or ceiling. Keep the screws in a safe place for later.
Cleaning Fan Blades
Mix warm water with a few drops of natural dish soap. Dip a soft cloth or sponge into the mix.
Wipe each blade gently to remove dust and dirt. Avoid bending the blades while cleaning.
- Use a soft brush for hard-to-reach spots
- Dry blades with a clean cloth to prevent rust
Dealing With Grease Build-up
Make a natural grease cleaner by mixing equal parts vinegar and water. Add a teaspoon of baking soda for extra power.
Spray the solution on greasy areas and let it sit for 10 minutes. Use a sponge or brush to scrub off the grease.
- Wear gloves to protect your skin
- Rinse with warm water after scrubbing
- Repeat if grease is very thick
Cleaning The Exhaust Cover
Remove the exhaust cover carefully. Soak it in warm, soapy water for 15 minutes to loosen dirt.
Scrub the cover with a soft brush. Rinse it well and let it air dry before putting it back.
- Check for cracks or damage while cleaning
- Clean the area behind the cover if needed
- Reattach the cover firmly after drying
Using Vinegar For Stubborn Stains
Kitchen exhaust fans get greasy and dirty over time. Vinegar is a natural cleaner that removes tough stains easily.
This guide explains how to use vinegar to clean stubborn grime from your kitchen exhaust fan safely.
Prepare The Vinegar Solution
Mix equal parts of white vinegar and warm water in a spray bottle. This solution breaks down grease and dirt effectively.
Use this natural cleaner to avoid harsh chemicals that can damage your fan or affect your kitchen air.
Apply Vinegar To The Fan Surface
Turn off the fan and remove the cover or filter if possible. Spray the vinegar solution on stained areas.
Let the solution sit for 10 to 15 minutes. This time helps loosen the grease and grime stuck on the fan parts.
Scrub Stubborn Stains
Use a soft brush or sponge to scrub the stained spots gently. The vinegar solution makes scrubbing easier and safer.
- Focus on corners and crevices where grease builds up
- Avoid using metal brushes that can scratch the surface
- Repeat spraying and scrubbing if stains remain
Rinse And Dry The Fan Parts
Wipe the fan parts with a clean cloth dampened in warm water. This removes leftover vinegar and grease.
Let all parts dry completely before reassembling the exhaust fan. This prevents moisture buildup and mold growth.
Baking Soda Paste For Deep Cleaning
Cleaning your kitchen exhaust fan is important to keep it working well. Using a natural cleaner like baking soda paste is safe and effective. It removes grease and dirt without harsh chemicals.
Baking soda paste breaks down tough grime and freshens your kitchen exhaust fan. It is simple to make and easy to use for deep cleaning.
Prepare The Baking Soda Paste
Mix baking soda with water to form a thick paste. The paste should be easy to spread but not too runny. This paste will help lift grease and dirt from the fan parts.
- Start with 1/2 cup of baking soda
- Add 2-3 tablespoons of water slowly
- Stir until you get a thick paste
Apply Paste To Fan Parts
Remove the fan cover and blades carefully. Spread the baking soda paste on all greasy and dirty areas. Let it sit for 15 to 20 minutes to break down grime.
- Use a sponge or cloth to apply the paste
- Cover all metal and plastic surfaces
- Focus on areas with heavy grease
Scrub And Rinse Thoroughly
After waiting, scrub the fan parts with a soft brush or sponge. This removes loosened dirt. Rinse everything with warm water to clear away the paste and grime.
- Use a toothbrush for small crevices
- Rinse under running water or use a wet cloth
- Dry parts completely before reassembling
Clean The Surrounding Area
Wipe down the fan housing and nearby surfaces. Use the baking soda paste or a damp cloth. This keeps the whole exhaust fan area fresh and clean.
- Apply paste on greasy spots around the fan
- Wipe with a clean, damp cloth
- Dry the area to prevent moisture build-up

Credit: www.victorianplumbing.co.uk
Reassembling The Exhaust Fan
After cleaning your kitchen exhaust fan naturally, you need to put it back together. Reassembling ensures the fan works well and stays safe.
Take your time to fit each part in the right place. Follow these steps carefully to avoid damage or poor performance.
Prepare The Parts
Check all parts for cleanliness and dryness. Make sure you have every piece before starting to reassemble.
Attach The Fan Blades
Place the fan blades on the motor shaft carefully. Tighten the screws to secure the blades but do not overtighten them.
Fix The Fan Cover And Filter
Put the fan cover back in place. Then, attach the filter, making sure it fits snugly and does not block airflow.
Secure The Exhaust Fan To The Wall
Use screws or brackets to mount the exhaust fan on the wall or ceiling. Check that it is stable and does not move.
- Align the exhaust fan with the mounting holes.
- Insert screws or bolts into the holes.
- Tighten all screws evenly for a secure fit.
- Check the fan’s stability after mounting.
Test The Exhaust Fan
Turn on the fan to check if it runs smoothly. Listen for unusual noises or vibrations.
| Issue | Possible Cause | Solution |
|---|---|---|
| Fan does not run | Loose wiring | Check and secure all electrical connections |
| Loud noise | Loose blades or screws | Tighten screws and realign blades |
| Vibration | Uneven mounting | Adjust mounting screws for balance |
Tips For Maintaining A Clean Exhaust Fan
Keeping your kitchen exhaust fan clean helps it work well and last longer. Dirt and grease can slow it down and cause bad smells.
Use natural methods to clean your fan safely. These tips make cleaning easier and keep your kitchen fresh.
Regular Cleaning Schedule
Set a regular time to clean your exhaust fan. This stops grease from building up and keeps the air clean.
- Clean the fan every month if you cook a lot.
- Wipe the fan cover weekly to remove dust.
- Check the filters and clean or replace them as needed.
Use Natural Cleaning Solutions
Natural cleaners are safe and effective for kitchen fans. They remove grease without harsh chemicals.
- Mix equal parts of vinegar and water in a spray bottle.
- Use baking soda paste for tough grease spots.
- Lemon juice helps remove odors and shines surfaces.
Proper Cleaning Techniques
Follow these steps to clean your exhaust fan safely and well. Turn off power before cleaning.
- Remove the fan cover and filters carefully.
- Soak filters in hot water with baking soda for 15 minutes.
- Spray the vinegar solution on fan blades and wipe clean.
- Use a soft brush to scrub hard-to-reach areas.
- Dry all parts completely before reassembling the fan.
Safety Tips During Cleaning
Safety Tips:
- Always turn off the fan and unplug it before cleaning.
- Wear gloves to protect your hands from grease and cleaning agents.
- Use a sturdy ladder if the fan is high up.
- Do not use abrasive tools that can damage fan parts.
Frequently Asked Questions
How Often Should I Clean My Kitchen Exhaust Fan Naturally?
Clean your kitchen exhaust fan every 3 months for optimal performance. Frequent cleaning prevents grease buildup and maintains airflow. Natural cleaning methods reduce chemical exposure and keep your kitchen safe and fresh.
What Natural Ingredients Effectively Clean Kitchen Exhaust Fans?
Use a mixture of warm water, vinegar, and baking soda. These natural ingredients dissolve grease and grime without harsh chemicals. They are safe, affordable, and environmentally friendly for regular kitchen exhaust fan cleaning.
Can I Clean The Exhaust Fan Without Removing The Filter?
Yes, you can clean the exterior and fan blades without removing the filter. Use a damp cloth with natural cleaner to wipe surfaces. However, removing the filter allows for deeper cleaning and better results.
Is Vinegar Safe To Use On Kitchen Exhaust Fans?
Vinegar is safe and effective for cleaning kitchen exhaust fans. Its acidic nature breaks down grease and kills bacteria naturally. Avoid harsh chemicals to protect fan components and maintain a healthy kitchen environment.
Conclusion
Cleaning your kitchen exhaust fan naturally keeps your air fresh and clear. Simple ingredients like vinegar and baking soda work well. Regular cleaning stops grease buildup and bad smells. It also helps your fan last longer and work better. Try these easy steps to keep your kitchen safe and clean.
A little effort goes a long way. Your kitchen will feel fresher and more comfortable every day. Give natural cleaning a try for a healthier home.