
If you love crispy, golden fried food, you know how important a deep fryer is in your kitchen. But cleaning it can feel like a tough, messy job.
What if you could learn a simple, safe way to clean your deep fryer without the stress? In this guide, you’ll discover easy steps to keep your fryer sparkling clean and working perfectly. By the end, you’ll save time, avoid accidents, and enjoy better-tasting fried food every time.
Ready to make deep fryer cleaning a breeze? Let’s get started!
Gather Necessary Supplies
Cleaning a deep fryer safely needs the right supplies. Gather everything before you start to make the job easier.
Using proper tools helps avoid accidents and ensures a thorough clean. Keep all items close by as you work.
Protective Gear
Wear gloves and eye protection to keep yourself safe from hot oil and cleaning chemicals. Long sleeves help protect your arms.
Cleaning Tools
- Soft scrub brush to remove grease
- Non-abrasive sponge for delicate parts
- Microfiber cloth to dry and polish
- Plastic scraper to lift stuck food
- Bucket to hold soapy water
Cleaning Solutions
| Supply | Purpose |
| Dish soap | Breaks down grease and oil |
| Baking soda | Removes stubborn stains |
| White vinegar | Disinfects and deodorizes |
| Warm water | Helps dissolve grease |
Additional Items
Have a trash bag for waste and paper towels for quick cleanups. A flashlight can help you see inside the fryer clearly.

Credit: www.youtube.com
Unplug And Cool Down
Cleaning a deep fryer is important for safety and good cooking. Always start by unplugging the fryer.
Let the fryer cool down completely before you touch or clean it. Hot oil can cause serious burns.
Unplug The Deep Fryer
Always unplug the deep fryer from the power outlet. This stops electricity flow and prevents accidents.
Do not clean the fryer while it is still plugged in. Water and electricity together are very dangerous.
Allow Time To Cool Down
After unplugging, wait for the fryer to cool down fully. This can take at least 30 minutes or more.
Never try to clean or move the fryer when the oil is hot. Hot oil can splash and burn your skin.
- Unplug the fryer from the wall
- Wait 30 minutes or until cool
- Check oil temperature before cleaning
Remove Fryer Basket And Oil
Cleaning your deep fryer starts with removing the fryer basket and oil safely. This helps prevent spills and keeps your kitchen clean.
Always handle hot oil with care to avoid burns or accidents. Follow these steps to remove the basket and oil properly.
Remove The Fryer Basket
First, turn off and unplug the fryer. Let the oil cool down to avoid burns. Use heat-resistant gloves if needed. Lift the basket slowly and place it on a heatproof surface.
Drain And Store The Oil
After removing the basket, carefully drain the oil. You can pour it through a strainer into a container for reuse or disposal. Avoid pouring oil down the sink to prevent clogs.
- Let the oil cool to a safe temperature.
- Place a heatproof container on a stable surface.
- Use a strainer to filter food particles.
- Pour the oil slowly into the container.
- Seal the container tightly for storage or disposal.
Clean The Fryer Components
| Component | Cleaning Tip |
|---|---|
| Fryer Basket | Soak in warm soapy water, then scrub gently. |
| Oil Container | Wipe with paper towels before washing. |
| Fryer Body | Use a damp cloth to clean the exterior. |
Dispose Of Old Oil
Old oil from deep fryers can harm the environment if not disposed of properly. It is important to handle it safely to avoid pollution and hazards.
Follow these tips to dispose of your used cooking oil in a safe and responsible way.
Cool The Oil Completely
Before handling the oil, let it cool down to room temperature. Hot oil can cause burns and spills, which are dangerous.
Use A Sealable Container
Pour the cooled oil into a clean, leak-proof container. A plastic bottle or jar with a tight lid works well.
Find Local Disposal Options
Many communities offer special recycling or disposal programs for cooking oil. Do not pour oil down the drain or toilet.
- Check with your local waste management service
- Use designated oil recycling centers
- Take oil to hazardous waste collection events
- Some restaurants or stores accept used oil for recycling
Avoid Mixing Oil With Other Waste
Do not mix used oil with water, chemicals, or other trash. This can make disposal harder and cause pollution.
Store Oil Safely Until Disposal
- Keep the container sealed tightly
- Store in a cool, dry place away from children and pets
- Label the container clearly as “Used Cooking Oil”
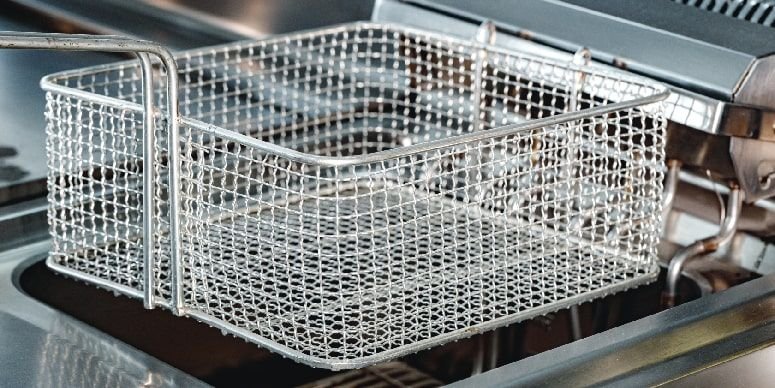
Clean The Fryer Basket
Cleaning the fryer basket keeps your cooking safe and tasty. Grease and food bits build up quickly.
Regular cleaning stops smells and helps the basket last longer. It also keeps oil cleaner.
Remove Loose Debris
Start by shaking off crumbs and food bits from the basket. Use a brush or cloth to wipe away any stuck pieces.
Soak The Basket In Hot Water
Fill a sink or basin with hot water and add mild dish soap. Let the basket soak for 15 to 30 minutes to loosen grease.
Scrub The Basket Thoroughly
- Use a non-abrasive brush or sponge to clean all sides.
- Focus on corners and wire joints where oil hides.
- Rinse with warm water to remove soap and dirt.
Dry The Basket Completely
Use a clean towel to dry the basket well. Air drying helps prevent rust and keeps the basket ready for use.
Tips For Regular Maintenance
| Tip | Reason |
|---|---|
| Clean after each use | Prevents grease buildup and odors |
| Use soft brushes | Protects basket coating and material |
| Check for damage | Ensures safe frying and basket lifespan |
| Store dry | Stops rust and mold growth |

Credit: www.sparklesisterscleaners.com
Wipe Down The Interior
Cleaning the inside of your deep fryer keeps it safe and working well. Dirt and grease can build up inside, making it hard to cook properly.
Wiping down the interior carefully removes leftover oil and food bits. This stops bad smells and smoke during future use.
Unplug And Cool The Fryer
Always unplug the deep fryer before cleaning. Let the oil and machine cool completely to avoid burns and accidents.
Remove Oil And Debris
Pour out the used oil into a safe container. Use a paper towel to wipe away leftover food crumbs and grease inside the fryer.
Use The Right Cleaning Tools
- Soft cloth or sponge
- Mild dish soap
- Warm water
- Non-abrasive brush for stuck bits
Do not use sharp tools or harsh chemicals. These can damage the fryer’s interior surface.
Wipe The Interior Gently
Mix warm water with a small amount of dish soap. Dip the cloth or sponge in the solution and wring it out well.
Wipe all inside surfaces carefully. For tough spots, use the soft brush with the soapy water.
Rinse the cloth with clean water and wipe again to remove soap residue.
Dry The Interior Completely
Use a dry cloth or paper towel to dry the inside fully. Moisture can cause oil to splatter and damage the fryer.
Clean The Heating Element
Cleaning the heating element of your deep fryer keeps it working well. Dirt and grease can build up on it. This can cause the fryer to heat unevenly or stop working.
Always clean the heating element carefully. You want to avoid damage or electric shock. Follow these simple tips to clean it safely and well.
Turn Off And Unplug The Fryer
Before cleaning, make sure the fryer is off and unplugged. Wait until the heating element cools down completely. This prevents burns and electric accidents.
Remove Oil And Debris
Drain the oil from the fryer. Use a container to catch the oil for disposal or reuse. Wipe away any crumbs or food bits stuck to the heating element gently with a paper towel.
Clean With A Soft Cloth
Use a soft cloth or sponge dampened with warm, soapy water. Wipe the heating element carefully. Avoid getting water inside electrical parts. Do not scrub hard to prevent damage.
- Use mild dish soap
- Dip cloth in water, then wring it out
- Wipe the element gently
- Dry with a clean towel after cleaning
Check The Manufacturer’s Instructions
Look at the fryer’s manual for special cleaning advice. Some heating elements need specific care or cleaning tools. Following instructions helps avoid damage.
Avoid Submerging The Element
Do not soak or immerse the heating element in water. This can cause short circuits or rust. Clean only the surface with a damp cloth.
Scrub The Exterior
Cleaning the outside of your deep fryer keeps it safe and looking good. Dirt and grease can build up on the surface.
Scrubbing the exterior helps stop damage and keeps your kitchen clean.
Always unplug the deep fryer before cleaning. Let it cool completely to avoid burns.
Use Gentle Cleaning Tools
Use a soft cloth or sponge to scrub the exterior. Avoid metal scrubbers that can scratch the surface.
- Soft cloth or sponge
- Mild dish soap
- Warm water
Apply Mild Soap And Water
Mix a small amount of mild soap with warm water. Dip your cloth in this mix to clean the fryer’s outside.
Wipe gently to remove grease and stains without damaging the finish.
Avoid Water Inside The Unit
Do not let water enter the fryer’s electrical parts. Use a damp cloth, not a soaking wet one.
Keep water away from vents and controls to prevent damage.
Dry The Exterior Thoroughly
After scrubbing, use a dry cloth to wipe the fryer. This stops water marks and keeps it safe.
Make sure no moisture stays on the surface before plugging the fryer back in.
Dry And Reassemble
After cleaning your deep fryer, drying it properly is key. Water left inside can cause damage or unsafe oil splatters.
Once dry, put the parts back together carefully. This keeps your fryer safe and ready for use.
Dry The Deep Fryer Thoroughly
Use a clean towel to wipe every part of the fryer. Make sure to dry the oil tank and heating element well.
Let parts air dry for a while. This helps remove any leftover moisture that towels might miss.
- Wipe with a dry cloth or paper towel
- Allow air drying for at least 30 minutes
- Check inside corners and crevices for water
Reassemble The Deep Fryer Correctly
Put the oil tank back into the fryer base. Make sure it fits securely and lines up with connectors.
Attach the lid and heating element as shown in your fryer’s guide. Check that all parts are tight and in place.
- Insert the oil tank fully into the base
- Secure the heating element properly
- Close the lid firmly
- Test buttons or switches before use

Credit: www.restaurantsupply.com
Test The Reassembled Fryer
After cleaning and putting the deep fryer back together, it is important to test it. This ensures it works safely and correctly. Testing helps avoid accidents and damage.
Follow these steps to check the fryer before you use it for cooking. Testing also confirms all parts fit well and the appliance heats up properly.
Check For Proper Assembly
Look over the fryer to see if all parts are in place. Make sure the basket, lid, and heating element are secure. Loose parts can cause problems or spills.
Plug In And Power On
Plug the fryer into a suitable outlet. Turn the power on and watch for any unusual sounds or smells. These could mean something is wrong inside.
Heat Test And Temperature Check
Fill the fryer with fresh oil to the correct level. Set the temperature dial and wait for the oil to heat. Use a cooking thermometer to check the oil temperature.
- Turn the fryer on and set temperature as needed.
- Wait 5 to 10 minutes for oil to heat up.
- Use a thermometer to check if oil reaches the set temperature.
- Watch for steady heating without sudden drops or spikes.
- If temperature is stable, the fryer is ready for use.
Safety Features And Controls
| Safety Feature | What to Check |
|---|---|
| Automatic shut-off | Does fryer turn off at set temperature? |
| Cool-touch handles | Are handles safe to touch during use? |
| Power indicator light | Does light turn on when fryer is running? |
| Reset button | Does reset work after overheating? |
Test each safety feature to make sure it works well. These help prevent burns and fires during cooking.
Frequently Asked Questions
How Often Should I Clean My Deep Fryer?
Clean your deep fryer after every use to prevent oil buildup. Regular cleaning ensures food safety and maintains the fryer’s performance.
What Is The Safest Way To Clean A Deep Fryer?
Always unplug and cool the fryer completely before cleaning. Use warm soapy water and a soft cloth to avoid damage.
Can I Use Dishwasher To Clean Deep Fryer Parts?
Most removable parts are dishwasher safe, but check the manual. Avoid washing electrical components in a dishwasher to prevent damage.
How Do I Remove Stubborn Grease From Deep Fryer?
Use baking soda mixed with water to scrub greasy spots. This natural cleaner breaks down grease without harsh chemicals.
Conclusion
Cleaning your deep fryer safely keeps it working well and lasts longer. Always unplug and cool the fryer before starting. Use gentle cleaning tools to avoid damage. Regular cleaning prevents oil buildup and bad smells. Take your time and follow safety steps carefully.
A clean fryer means better tasting food every time. Simple care makes a big difference. Keep safety first, and enjoy frying with confidence.