
Scratches on your wooden floor can be frustrating to see every day. They make your beautiful floor look old and worn out.
But don’t worry—you don’t have to replace or refinish your entire floor to fix them. What if you could make those scratches disappear quickly and easily with simple steps? You’ll learn exactly how to clean and restore your wooden floor scratches, bringing back the shine and smoothness you love.
Keep reading, and discover the tricks that will save your floors and impress your guests.
Types Of Wooden Floor Scratches
Wooden floors can get scratched in many ways. Knowing the type helps you fix them better.
This guide explains three common types of scratches on wooden floors. Each type needs a different approach.
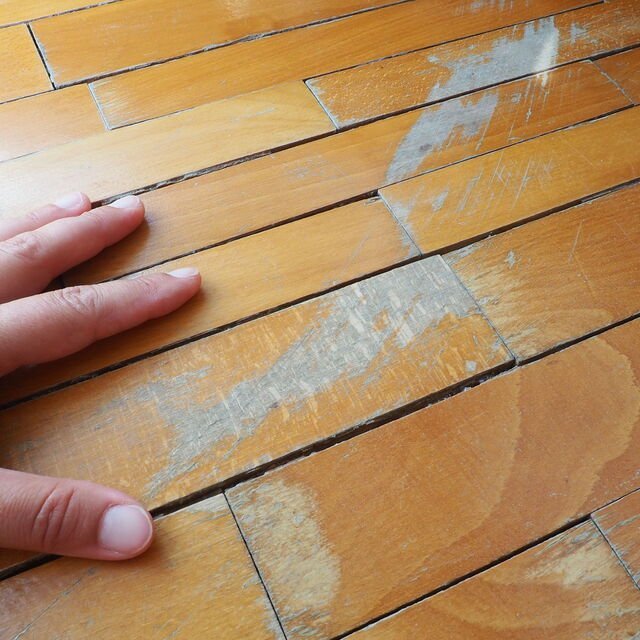
Surface Scratches
Surface scratches are light marks on the finish of the wood. They do not go deep into the wood itself.
- They appear as small lines or scuffs.
- Often caused by dirt, pets, or moving furniture.
- Easy to fix with polishing or a touch-up marker.
Deep Gouges
Deep gouges cut into the wood. These scratches are deeper and can damage the floor structure.
| Type | Description | Fixing Method |
| Shallow Gouge | Less than 1/8 inch deep | Wood filler and sanding |
| Deep Gouge | More than 1/8 inch deep | Wood patch and refinishing |
| Cracks | Split wood grain | Glue and clamps |
Finish Damage
Finish damage happens when the protective layer wears off or peels. It leaves the wood exposed.
Common signs of finish damage include:
- Discoloration or dull spots
- Rough or sticky areas
- Water rings or stains

Credit: www.express.co.uk
Tools And Materials Needed
Fixing scratches on wooden floors needs the right tools and materials. These help clean, repair, and shine the wood.
Using proper supplies keeps your floor looking smooth and fresh. Here are the main items to have.
Cleaning Supplies
Before repairing scratches, the floor must be clean. Dirt and dust can stop repair products from working well.
- Soft broom or vacuum cleaner
- Microfiber mop or cloth
- Mild wood floor cleaner
- Bucket of warm water
- Soft towels for drying
Scratch Repair Kits
Scratch repair kits contain tools and fillers to hide and fill scratches on wood floors.
| Kit Item | Purpose |
| Wood filler or wax sticks | Fill deep scratches and gouges |
| Touch-up markers or crayons | Match floor color for small scratches |
| Putty knife | Spread filler evenly |
| Fine sandpaper | Smooth filler after drying |
| Instruction guide | Step-by-step repair directions |
Polishing Products
Polishing products bring back shine and protect wood after scratch repair.
- Wood floor polish or wax
- Soft polishing cloth
- Buffing pad or soft brush
Preparing The Floor
Cleaning wooden floor scratches starts with a well-prepared surface. This helps repair products work better. Careful preparation prevents more damage.
First, clear the floor area and make sure no furniture blocks your work. You need a clean and smooth surface before fixing scratches.
Cleaning The Surface
Use a soft cloth or mop to clean the floor surface. Avoid wet mops that leave water on the wood. Water can cause stains or warping.
Removing Dust And Debris
Dust and debris can block scratch repair materials. Remove them carefully before starting any treatment. Use gentle tools to avoid more scratches.
- Sweep the floor with a soft broom
- Vacuum using a brush attachment
- Wipe with a dry microfiber cloth
- Check corners and edges for hidden dust
Fixing Light Scratches
Light scratches on wooden floors can make them look old and worn. Fixing these scratches helps your floor look fresh again. You can use simple items at home to hide or remove these scratches.
Here are three easy ways to fix light scratches on wooden floors. Each method uses common tools or products that work well to improve the floor’s appearance.
Using Wood Markers
Wood markers come in many colors to match different floors. They are easy to use and dry quickly. You just color over the scratch to hide it.
Make sure to pick a marker that matches your floor color. Test the marker on a small hidden area first. This helps you see how it looks before applying to scratches.
Applying Walnut Or Crayons
Rubbing a walnut on scratches can fill and cover them. The natural oils from the walnut darken the wood and blend the scratch.
You can also use crayons that match your floor color. Rub the crayon over the scratch and then smooth it with a soft cloth. This fills the scratch and hides it well.
Buffing With Oil
Buffing scratches with oil helps to restore the wood’s shine. Use oils like olive or mineral oil. Apply a small amount to a cloth and rub the scratched area gently.
This method nourishes the wood and makes light scratches less visible. Repeat the process if needed for better results.
Repairing Deep Scratches
Deep scratches on wooden floors need careful repair to restore their look. Fixing them involves filling, sanding, and sealing the damaged area.
These steps help protect the floor and make the scratches less visible. Follow each part for the best results.
Filling With Wood Filler
Use wood filler to fill deep scratches and holes. Choose a filler that matches your floor color.
- Clean the scratched area well before applying filler.
- Apply the filler with a putty knife, pressing it into the scratch.
- Remove excess filler around the scratch for a smooth surface.
- Let the filler dry completely as per the product instructions.
Sanding And Smoothing
Sanding smooths the filled area and blends it with the floor surface. Use fine-grit sandpaper for best results.
| Tool | Purpose | Tip |
| Fine-grit sandpaper (220 grit) | Smooth filler and floor | Sand gently to avoid damage |
| Vacuum or cloth | Remove dust after sanding | Clean thoroughly before staining |
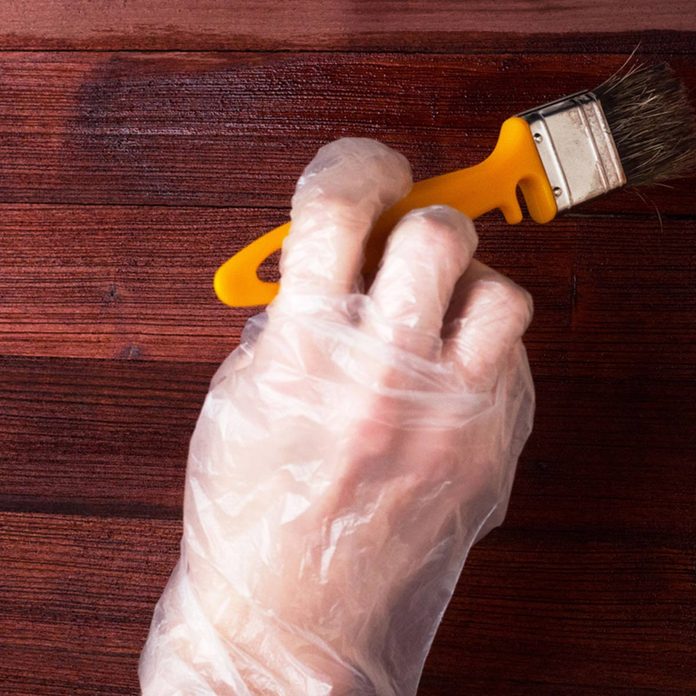
Staining And Sealing
Stain the sanded area to match your floor color. Use a brush or cloth for even coverage.
Seal the repaired spot with a clear wood finish. Choose one that suits your floor type.
- Apply stain and let it dry fully.
- Use a brush to apply the sealant evenly.
- Allow the sealant to dry before walking on the floor.
Credit: www.familyhandyman.com
Polishing For Shine
Wooden floors can lose their shine from scratches and wear. Polishing helps restore their smooth, glossy look. It also protects the wood from damage.
Using the right polish and applying it correctly can make your floor look new. Regular maintenance keeps the shine lasting longer.
Choosing The Right Polish
Pick a polish made for wooden floors. Check if it fits your floor’s finish type, like oil-based or water-based. Some polishes add shine, others protect the wood.
Test polish on a small, hidden spot first. This ensures it does not damage or discolor the wood.
- Match polish to your floor’s finish
- Choose polish for the level of shine you want
- Look for polish with protective ingredients
- Always test on a hidden area first
Applying Polish Evenly
Clean the floor before you polish. Remove dust and dirt to avoid scratches. Use a soft cloth or mop for cleaning.
Apply polish in small sections. Use a clean, soft cloth or applicator. Spread the polish in thin, even layers to avoid streaks.
- Clean floor fully before polishing
- Work in small areas
- Use soft cloth or applicator
- Spread polish thin and even
- Let polish dry completely before walking
Maintaining The Shine
Keep your floor clean by sweeping or vacuuming regularly. Avoid harsh cleaners that can dull the polish. Use a damp mop with water or gentle cleaner.
Apply polish again when the shine starts to fade. Use furniture pads to stop scratches. Place rugs in high-traffic areas to protect the floor.
- Sweep or vacuum often
- Use gentle cleaning solutions
- Reapply polish as needed
- Protect floor with furniture pads
- Place rugs in busy areas
Preventing Future Scratches
Wooden floors look beautiful but can get scratched easily. Taking care of your floors helps keep them smooth and shiny.
Preventing scratches saves time and money on repairs. Small steps can protect your floors for years.
Using Rugs And Pads
Rugs and pads act as barriers between your floor and heavy traffic. They stop dirt and small stones from scratching the wood.
Place rugs in busy areas like entrances and hallways. Use pads under furniture to avoid dents and marks.
- Choose non-slip rug pads to keep rugs steady
- Use soft pads under chair and table legs
- Clean rugs regularly to avoid grit buildup
- Replace worn-out pads to maintain protection
Furniture Protection Tips
Furniture can scratch floors when moved or pushed. Protect floors by adding soft covers under furniture legs.
Lift furniture instead of dragging it. This prevents deep scratches and damage to your wooden floor.
- Use felt pads or rubber caps on legs
- Check pads regularly and replace if worn
- Avoid sharp or metal furniture feet directly on wood
- Move furniture carefully, lifting rather than sliding
Regular Maintenance Habits
Keeping your floor clean helps prevent scratches from dirt and dust. Sweep or vacuum often using soft tools.
Wipe spills quickly and avoid using harsh cleaners. Regular care keeps the wood strong and scratch-resistant.
- Sweep or vacuum floors daily with a soft brush
- Use a damp mop with mild cleaner once a week
- Clean up spills immediately to avoid stains and damage
- Keep pet nails trimmed to reduce scratches

Credit: www.reddit.com
Frequently Asked Questions
How Do I Remove Scratches From Wooden Floors?
To remove scratches from wooden floors, use a wood floor cleaner and a soft cloth. Gently rub the scratched area in a circular motion. For deeper scratches, apply a wood filler or crayon that matches your floor color. Finish by buffing the area with a clean cloth.
Can Vinegar Fix Scratches On Wood Floors?
Yes, vinegar can help with minor scratches on wood floors. Mix equal parts of vinegar and olive oil, then apply it to the scratch using a soft cloth. Rub gently in a circular motion. The vinegar will clean the area, while the olive oil adds moisture, making scratches less noticeable.
Are There Special Products For Wood Floor Scratches?
Yes, there are special products available for wood floor scratches. Scratch repair kits, wood fillers, and touch-up markers are effective. These products are designed to match your floor’s color and finish. Always follow the manufacturer’s instructions for the best results and longevity of your wood floor.
Can I Use A Diy Method For Wood Scratches?
Yes, you can use DIY methods for wood scratches. Common household items like walnuts, tea bags, or baking soda can work. Rub the walnut meat on scratches, or use a damp tea bag for darker wood. These methods can help make scratches less visible.
Conclusion
Cleaning scratches on wooden floors does not have to be hard. Small scratches can disappear with simple home remedies. For deeper marks, some sanding or filling may help. Always test any method on a hidden spot first. Taking care of your floor regularly keeps it looking fresh.
A little effort goes a long way in wood care. Keep your wooden floors shining and smooth with these tips. Your home will feel warm and inviting again.