
Your kitchen sponge is one of the dirtiest items in your home, yet you probably use it every day without giving it much thought. If you don’t clean your sponge regularly, it can become a breeding ground for bacteria and germs that can harm your health.
But don’t worry—keeping your sponge fresh and safe doesn’t have to be a hassle. You’ll discover simple, effective ways to clean your kitchen sponges regularly, so you can protect your family and keep your kitchen sparkling clean. Keep reading to learn how easy it is to make your sponge last longer and stay hygienic.
Why Clean Kitchen Sponges Matter
Kitchen sponges help keep our dishes clean. But they can get dirty fast. Cleaning them is important for health.
Dirty sponges can spread germs and make us sick. Regular cleaning helps prevent this.
Bacteria Build-up
Kitchen sponges are often wet and warm. This makes them perfect for bacteria to grow.
Germs from food particles can live in the sponge. This can lead to cross-contamination.
Unpleasant Odors
Sponges can start to smell bad if not cleaned. The smell comes from bacteria and food residue.
Regular cleaning removes these odors and keeps the kitchen fresh.
Effective Cleaning
Dirty sponges do not clean dishes well. They leave behind germs and grime.
Clean sponges ensure dishes are truly clean and safe to use.
Cost Efficiency
Replacing sponges often can be costly. Keeping them clean extends their life.
This saves money over time and is better for the environment.
Common Germs In Sponges
Kitchen sponges are useful but can hold many germs. These germs grow because sponges stay wet and dirty.
Cleaning sponges often helps stop these germs from spreading in your kitchen.
Escherichia Coli (e. Coli)
E. coli is a common germ in kitchen sponges. It comes from raw meat and dirty hands.
This germ can cause stomach pain and diarrhea if it spreads to food or dishes.
Salmonella
Salmonella bacteria live in raw poultry and eggs. They can get into sponges during cleaning.
Eating food with Salmonella can cause fever, cramps, and vomiting.
Staphylococcus Aureus
Staphylococcus aureus is found on skin and in noses. It spreads to sponges through touch.
This germ can cause food poisoning and skin infections.
Campylobacter
Campylobacter lives in raw meat and poultry. It can contaminate kitchen sponges easily.
It causes diarrhea, cramps, and fever when it infects people.
Mold And Yeast
Sponges often stay damp, which helps mold and yeast grow. These fungi can smell bad.
Mold spores can cause allergies and breathing problems for some people.
Daily Sponge Care Habits
Kitchen sponges get dirty fast because they hold food and water. Cleaning them every day keeps germs away. It also helps your sponge last longer.
Follow simple daily habits to keep your sponge fresh and safe for use. These small steps make a big difference in kitchen hygiene.
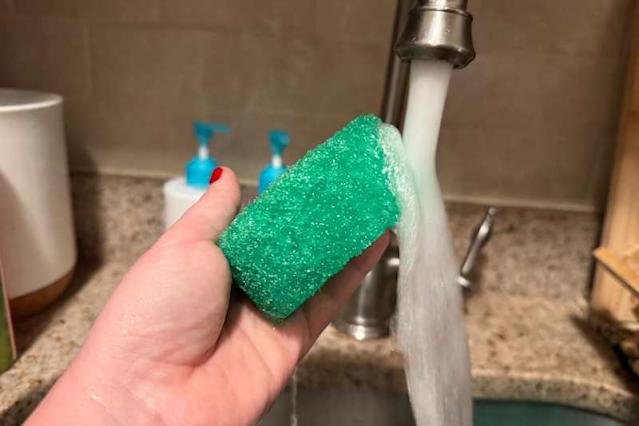
Rinse Your Sponge Well After Each Use
After washing dishes, rinse the sponge under hot water. This removes food bits and soap. Squeeze the sponge to get water out.
- Use running hot water for at least 20 seconds
- Remove any visible food pieces
- Squeeze until the sponge feels mostly dry
Store The Sponge In A Dry Place
Keep the sponge where air can reach it. Avoid leaving it in the sink or a wet dish rack. Dry sponges grow fewer bacteria.
- Place the sponge on a raised rack or holder
- Avoid enclosed containers that trap moisture
- Let the sponge dry completely between uses
Use Separate Sponges For Different Tasks
Use one sponge for dishes and another for cleaning surfaces. This stops germs from spreading. Label sponges if needed to keep track.
- Keep a sponge for dishes only
- Use a different sponge for counters and sinks
- Replace sponges used on raw meat surfaces more often
Clean Your Sponge Daily With Heat Or Soap
Heat kills many germs in sponges. You can microwave or boil the sponge daily. Using soap or detergent also helps remove bacteria.
- Microwave a damp sponge for one minute (watch closely)
- Boil the sponge in water for five minutes
- Wash with dish soap and rinse well before drying
Replace Your Sponge Every One To Two Weeks
Even with care, sponges wear out. Change sponges often to avoid bad smells and germs. A new sponge cleans better.
- Check for tears or bad smells
- Replace if it feels slimy or breaks easily
- Keep extra sponges ready for quick swaps

Credit: sqwishful.com
Microwave Method For Cleaning
Kitchen sponges hold many germs and dirt. Cleaning them often keeps your kitchen safe.
The microwave method is a quick way to kill bacteria on sponges. It uses heat to clean well.
Prepare The Sponge
First, rinse the sponge with water. Make sure it is wet before microwaving.
A wet sponge heats evenly and prevents fire in the microwave. Do not microwave a dry sponge.
Microwave The Sponge
Place the wet sponge in the microwave. Heat it on high for about 1 to 2 minutes.
Stay nearby to watch the sponge. Stop if you see smoke or smell burning.
Handle The Sponge Safely
Let the sponge cool before taking it out. It will be very hot right after microwaving.
Use tongs or a cloth to avoid burning your fingers. After cooling, the sponge is cleaner.
Important Safety Tips
- Always wet the sponge before microwaving.
- Do not microwave sponges with metal parts.
- Watch the microwave while heating the sponge.
- Use a microwave-safe container if needed.
Dishwasher Cleaning Technique
Kitchen sponges can carry many germs. Cleaning them often keeps your kitchen safe.
Using your dishwasher cleans sponges well. It uses hot water and soap to kill bacteria.
Place Sponges Properly
Put sponges on the top rack of the dishwasher. This spot avoids direct heat damage.
Keep sponges away from sharp items. This stops them from tearing during the wash.
Choose The Right Cycle
Use a hot water cycle for cleaning sponges. High heat kills most germs and bacteria.
A regular wash cycle with detergent works well. It removes food and dirt from the sponge.
Dry Sponges After Washing
Let sponges dry completely after the dishwasher cycle. Damp sponges can grow new bacteria.
Place sponges in a well-ventilated area. Air drying helps them stay clean longer.
Clean Sponges Often
Run sponges through the dishwasher at least once a week. Regular cleaning keeps them fresh.
Replace sponges if they smell or break apart. Dishwashers clean but do not fix worn sponges.
Soaking Sponges With Solutions
Cleaning kitchen sponges regularly helps remove germs and bacteria. Soaking sponges in different solutions is an easy way to keep them fresh.
Using common household items can kill germs and extend sponge life. Here are three effective soaking solutions you can try.
Bleach Soak
Bleach is a strong cleaner that kills most bacteria and viruses. Soaking your sponge in bleach can disinfect it well.
Mix one tablespoon of bleach with one gallon of water. Soak the sponge for five minutes, then rinse it thoroughly with water.
- Use gloves to protect your skin
- Do not soak for more than 5 minutes
- Rinse well to remove bleach residue
Vinegar Soak
White vinegar is a natural cleaner with antibacterial properties. It helps remove odors and germs from sponges.
Soak the sponge in a cup of vinegar for at least five minutes. Rinse the sponge well with water before using it again.
- Use undiluted white vinegar
- Soak for 5 to 10 minutes
- Rinse thoroughly after soaking
Baking Soda Soak
Baking soda helps neutralize smells and clean dirt from sponges. It is mild and safe to use regularly.
Dissolve two tablespoons of baking soda in one cup of warm water. Soak the sponge for 15 minutes, then rinse well.
- Use warm water for better dissolving
- Soak for at least 15 minutes
- Rinse completely before use
Drying And Storing Sponges
Cleaning your kitchen sponge regularly helps keep your kitchen clean. Drying and storing sponges properly stops bacteria growth.
Sponges stay wet for a long time if not dried well. This makes them a place for germs to grow.
Dry Sponges Completely After Use
After using your sponge, rinse it well with clean water. Squeeze out all the water to remove moisture.
Let the sponge dry in an open area where air can reach it. Avoid leaving it in the sink or on a wet surface.
- Rinse sponge thoroughly
- Squeeze out excess water
- Place sponge in a dry, open place
- Avoid wet or closed spaces
Store Sponges In A Dry Place
Store your sponge where it can stay dry between uses. A sponge holder with good airflow works well.
Keep sponges away from the sink or any water source. This helps them dry faster and last longer.
- Use sponge holders with holes or slots
- Keep sponge away from water sources
- Change sponge regularly to avoid germs

Credit: www.goodhousekeeping.com
When To Replace Kitchen Sponges
Kitchen sponges are useful but can hold many germs. Cleaning them often helps, but sponges still wear out. Knowing when to replace them keeps your kitchen safe.
Replacing sponges regularly stops bad smells and bacteria growth. It also keeps your dishes cleaner and healthier.
Sponges With Bad Smell
If a sponge smells bad even after cleaning, it is time to replace it. The smell shows bacteria are growing inside.
Smelly sponges can spread germs to your dishes and surfaces.
Visible Wear And Tear
Check your sponge for tears, holes, or falling apart. A worn sponge does not clean well and traps dirt.
Replace your sponge if it looks damaged or breaks easily.
After Cleaning Raw Meat Or Eggs
Sponges used to clean raw meat or eggs may have harmful bacteria. It is safer to replace them after such use.
Changing sponges reduces the risk of food poisoning.
After Two Weeks Of Use
Even if your sponge looks clean, replace it every two weeks. This helps avoid bacteria buildup you cannot see.
Regular replacement keeps your kitchen healthier and fresher.
Alternatives To Traditional Sponges
Kitchen sponges can hold a lot of germs if not cleaned often. Many people look for safer cleaning tools. Using alternatives helps keep your kitchen cleaner.
Here are some popular options that you can use instead of regular sponges. These tools often last longer and clean better.
Silicone Scrubbers
Silicone scrubbers are soft and easy to clean. They do not absorb water, so bacteria do not grow easily.
You can wash them in the dishwasher or boil them to sanitize. They dry quickly and last a long time.
Dishcloths
Dishcloths are reusable and easy to wash. Use cotton or microfiber cloths for better cleaning.
After use, wash them in hot water and hang them to dry. Replace them often to avoid germs.
Natural Loofahs
Natural loofahs come from a plant and are biodegradable. They scrub well and dry faster than sponges.
Keep them dry between uses to stop mold. Replace them every few weeks for best results.
Bamboo Brushes
Bamboo brushes have firm bristles that clean pots and pans well. They do not hold water inside.
Rinse them after use and let them air dry. Bamboo is a natural material that breaks down easily.
Cellulose Sponges
Cellulose sponges are made from wood fibers. They absorb water but dry faster than regular sponges.
You can clean them in hot water or the dishwasher. Replace them every few weeks to avoid bacteria build-up.

Credit: www.aol.com
Frequently Asked Questions
How Often Should I Clean Kitchen Sponges?
You should clean kitchen sponges at least once a week. Regular cleaning prevents bacteria buildup and odors. If heavily used, clean them more frequently to maintain hygiene and extend sponge life.
What Is The Best Way To Sanitize Kitchen Sponges?
Microwaving damp sponges for 1-2 minutes effectively kills most bacteria. Alternatively, soak sponges in a bleach solution or run them through a dishwasher cycle for thorough sanitization.
Can I Use Vinegar To Clean Kitchen Sponges?
Yes, soaking sponges in white vinegar for 5 minutes helps disinfect and deodorize them. Vinegar is a natural cleaner and reduces bacteria without harsh chemicals.
How Do I Dry Kitchen Sponges Properly?
After cleaning, squeeze out excess water and air-dry sponges in a well-ventilated area. Avoid leaving them damp or in closed containers to prevent mold and bacterial growth.
Conclusion
Cleaning kitchen sponges often keeps your kitchen fresh and safe. Regular washing stops germs from growing and spreading. Use simple methods like soaking in vinegar or microwaving wet sponges. Change sponges when they look worn or smell bad. Small habits make a big difference in kitchen hygiene.
Keep sponges clean to protect your family’s health daily. A clean sponge means a cleaner kitchen and happier cooking. Try these easy steps to maintain your sponges well.