
Are you ready to make cooking easier, faster, and safer? Setting up your smart induction cooktop is the first step to transforming your kitchen experience.
But you might be wondering, “Where do I start? ” Don’t worry—this guide will walk you through every simple step to get your cooktop up and running. By the end, you’ll know exactly how to use your new appliance like a pro, saving time and energy with every meal.
Keep reading to unlock the full potential of your smart induction cooktop!
Choosing The Right Smart Induction Cooktop
Smart induction cooktops use electricity to heat pots quickly and safely. They offer precise temperature control and easy cleaning. Picking the right one depends on your kitchen and cooking style.
Look at your needs and compare models before buying. This helps you find a cooktop that fits your kitchen and budget.
Assessing Kitchen Needs
Think about your cooking habits and kitchen size. Check how many burners you need and the space available. Some cooktops have more features than others.
- Count the number of people you cook for daily
- Measure your countertop space for the cooktop size
- Decide if you need extra features like timers or child locks
- Consider how often you cook and what meals you make
Comparing Popular Models
Check different brands and models to see what fits your needs. Look for easy controls, safety features, and power levels. Read reviews to learn about real user experiences.
| Model | Number of Burners | Power Levels | Key Features |
|---|---|---|---|
| Model A | 2 | 10 | Touch controls, child lock |
| Model B | 4 | 15 | Timer, Wi-Fi control |
| Model C | 1 | 8 | Portable, energy-saving |
Budget Considerations
Set a budget before shopping. Prices vary based on size and features. Choose a cooktop that fits your budget but meets your needs.
- Basic models cost less but have fewer features
- Higher-priced models offer more power and smart functions
- Consider long-term savings from energy efficiency
- Check warranty and service options
Credit: www.kitchenaid.com
Unboxing And Inspecting Your Cooktop
Setting up a smart induction cooktop starts with careful unboxing. This step ensures you have all parts and no damage.
Taking time to inspect your cooktop helps avoid problems during installation and use.
Checking For Damage
Look closely at the cooktop for cracks, scratches, or dents. Damage can affect how it works.
Check the glass surface and edges. Make sure the control panel is not broken or stuck.
- Remove the cooktop from the box carefully.
- Inspect all sides and the bottom.
- Note any dents or cracks.
- Check if the glass top is clean and unbroken.
- Test the buttons or touch controls for any issues.
Understanding Included Components
Your cooktop box contains more than just the main unit. Each part is important for setup and use.
Knowing what comes in the box helps you check if anything is missing before installation.
- Smart induction cooktop unit
- User manual and installation guide
- Power cord or wiring accessories
- Mounting brackets or screws
- Warranty and safety cards
Selecting The Ideal Location
Choosing the right place for your smart induction cooktop is very important. It helps the cooktop work well and keeps your kitchen safe.
This guide explains where to place your cooktop for the best results.
Countertop Requirements
Your countertop must be strong and flat to hold the cooktop. It should not bend or crack under heat.
Use heat-resistant materials like granite, quartz, or solid surface for safety and durability.
- Flat and level surface for stable installation
- Heat-resistant to avoid damage
- Durable enough to support the cooktop weight
- Clean and dry before installation
Proximity To Power Source
Your cooktop needs a strong power source nearby. This helps it work without power issues or hazards.
Place the cooktop close to an electrical outlet that matches its power needs. Avoid using long extension cords.
- Use a dedicated circuit for safety
- Ensure outlet voltage matches cooktop requirements
- Keep power source within easy reach
- Follow local electrical codes and guidelines
Credit: www.maytag.com
Installing The Cooktop
Setting up a smart induction cooktop needs care and attention. Proper installation helps it work safely and well.
Follow the right steps to place and connect the cooktop in your kitchen. This guide explains how to install it.
Positioning The Cooktop
Choose a flat and stable surface to put the cooktop. It should fit well into the counter space.
Leave enough space around the cooktop for safety and ease of use. Avoid placing it near water sources.
- Check the size of the cutout in your countertop.
- Keep the cooktop away from edges to prevent accidents.
- Allow at least 4 inches of space on each side for safety.
- Make sure the cooktop is not under low cabinets.
Ensuring Proper Ventilation
Good ventilation stops heat and steam from building up under the cooktop. This helps keep it cool.
Check the manufacturer’s guide for ventilation needs. Use vents or fans if your kitchen lacks airflow.
- Leave space below the cooktop for air to flow freely.
- Install a range hood or exhaust fan above the cooktop.
- Avoid blocking vents on the cooktop itself.
- Regularly clean vents to prevent dust and grease buildup.
Connecting To Power
Setting up your smart induction cooktop needs a proper power connection. This ensures safe and efficient use. Follow these steps carefully to connect your cooktop to electricity.
Understanding the power needs and making a safe connection prevents damage or hazards. It also keeps your kitchen safe.
Identifying Power Requirements
Check the cooktop’s manual for its power rating. This tells you the voltage and current it needs to work. Most smart induction cooktops use 220-240 volts.
Make sure your kitchen’s electrical system matches these needs. Using the wrong power can cause damage or poor performance.
- Look for voltage (V) and wattage (W) on the label or manual
- Verify your home’s power supply matches these numbers
- Check if the cooktop needs a dedicated circuit
- Note if a specific breaker size is required
Safe Electrical Connection
Turn off the main power before you start connecting the cooktop. This keeps you safe from electric shocks. Use a certified electrician if you are unsure.
Use proper wiring and connectors. The wires must fit tightly to avoid sparks. Grounding the cooktop is important to prevent electrical faults.
- Switch off main power at the breaker panel
- Use wires matching the cooktop’s current rating
- Connect the ground wire to a proper earth point
- Secure all connections to avoid loose contacts
- Test the connection with a voltage tester before use
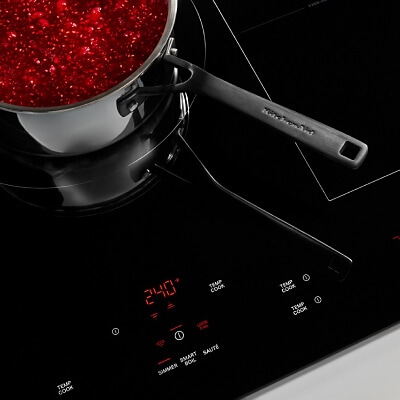
Calibrating The Cooktop
Calibrating your smart induction cooktop ensures it heats accurately. Proper calibration helps cook meals evenly and safely.
This guide covers key steps for calibration during setup and keeping your cooktop updated.
Initial Setup And Configuration
Start by placing a compatible pot on the cooktop. The cooktop should detect the pot automatically.
Follow the on-screen instructions to adjust temperature settings. This helps the cooktop match your cookware.
- Place a flat-bottom pot on the cooktop
- Turn on the cooktop and wait for detection
- Adjust temperature using the control panel
- Run a test heating cycle to check accuracy
- Repeat if the temperature feels off
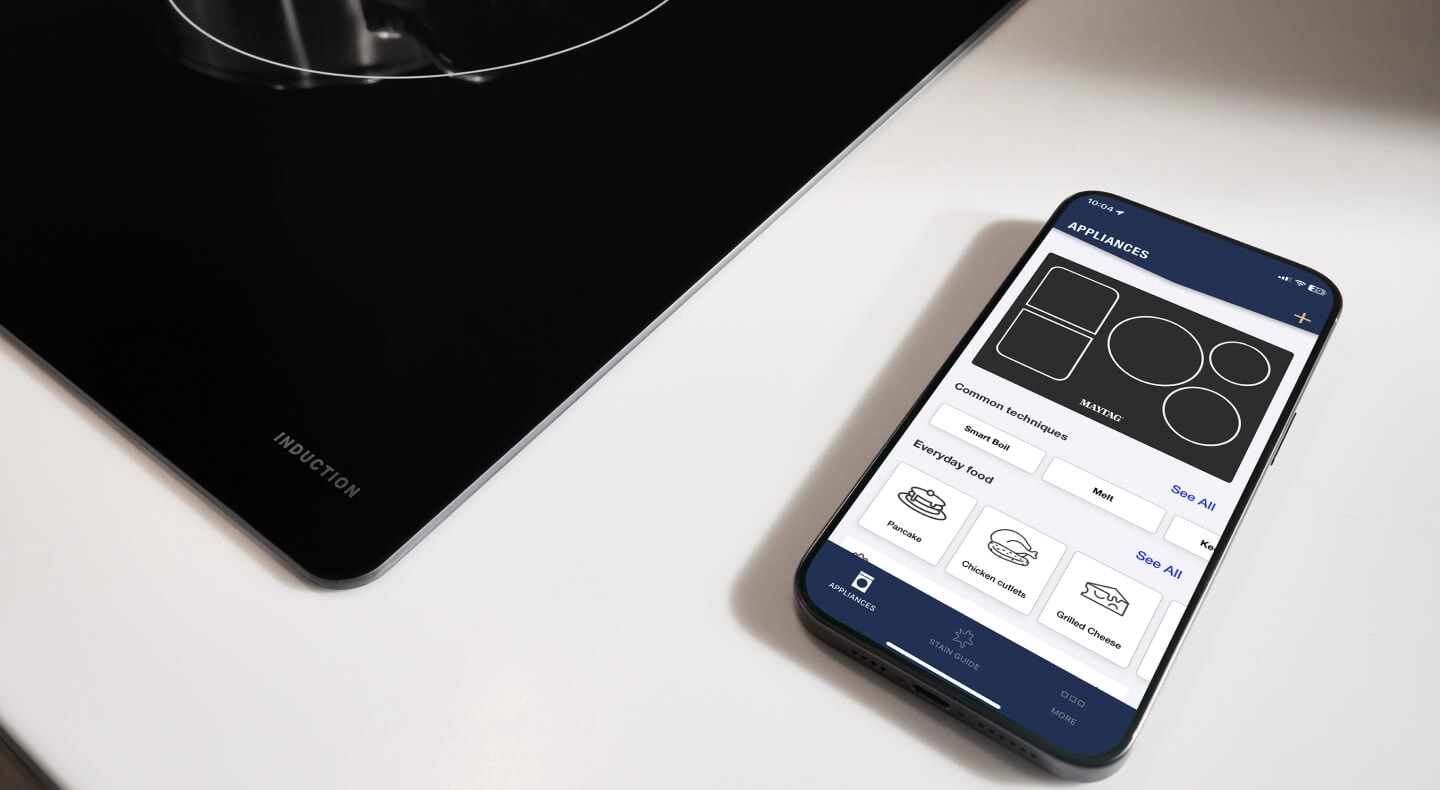
Software Updates And Connectivity
Keep your cooktop’s software updated to maintain calibration accuracy. Updates fix bugs and improve sensor performance.
Connect the cooktop to Wi-Fi if available. This allows automatic updates and remote monitoring through apps.
- Check for software updates regularly
- Connect the cooktop to a secure Wi-Fi network
- Enable automatic updates if possible
- Use the companion app for remote control and alerts
- Restart the cooktop after each update
Testing Your Cooktop
After installing your smart induction cooktop, testing it is important. Testing ensures the cooktop works safely and correctly.
This guide shows how to perform a basic test and fix common issues.
Performing A Basic Test
Start by turning on the cooktop without any cookware. Check if the display and lights turn on as expected.
Next, place a compatible pot or pan on the cooktop. The cooktop should detect it and allow you to adjust the heat.
- Turn on the cooktop and watch for power indicators
- Place cookware on the cooking zone
- Adjust heat levels and listen for any unusual sounds
- Check if the cooktop heats the cookware evenly
- Turn off the cooktop and remove the cookware
Troubleshooting Common Issues
If the cooktop does not turn on, check the power connection and circuit breaker. Ensure the cooktop is properly plugged in.
If the cooktop does not detect cookware, verify you use induction-compatible pots. Cookware must have a magnetic base.
- Power does not turn on: Check power supply and reset breaker
- Cookware not detected: Use induction-ready pots and pans
- Heat does not adjust: Restart cooktop and try again
- Unusual noises: Make sure cookware sits flat on the surface
- Display errors: Consult the user manual for error codes
Safety Tips And Best Practices
Smart induction cooktops are fast and energy-efficient. They need careful use to keep your kitchen safe.
Follow safety tips and best practices to avoid accidents and keep your cooktop working well.
Avoiding Common Hazards
Keep flammable items away from the cooktop to stop fires. Avoid using damaged or cracked cookware on the surface.
Do not touch the cooktop surface right after cooking. It can stay hot for a while and cause burns.
- Use cookware with flat, magnetic bottoms for best contact
- Do not place metal objects like knives on the cooktop
- Keep children and pets away from the cooktop while in use
- Turn off the cooktop immediately if you smell gas or see sparks
Maintenance And Care
Clean the cooktop regularly to avoid buildup that can affect performance. Use a soft cloth and mild cleaner designed for induction surfaces.
Check the cooktop and power cord for damage. Do not try to fix electrical parts yourself. Call a professional for repairs.
- Wipe spills immediately to prevent stains
- Do not use abrasive pads or harsh chemicals
- Keep ventilation openings clear and clean
- Schedule regular professional inspections if used often

Credit: www.spencerstv.com
Frequently Asked Questions
How Do I Install A Smart Induction Cooktop Safely?
Ensure the power supply matches the cooktop requirements. Use a certified electrician for installation. Follow the manufacturer’s manual carefully to avoid damage or hazards during setup.
What Cookware Works Best With Smart Induction Cooktops?
Use magnetic cookware such as cast iron or stainless steel. Avoid aluminum, copper, or glass pots as they won’t heat properly on induction surfaces.
How To Connect Smart Induction Cooktops To Wi-fi?
Access the cooktop’s settings menu and select Wi-Fi setup. Enter your network credentials accurately. Use the manufacturer’s app for easy control and firmware updates.
Can Smart Induction Cooktops Improve Cooking Efficiency?
Yes, they heat faster and offer precise temperature control. This reduces cooking time and energy consumption, making them more efficient than traditional cooktops.
Conclusion
Setting up a smart induction cooktop is easier than it seems. Follow the steps carefully for safe use. Check the power supply and connect the device properly. Use compatible cookware for the best cooking results. Regular cleaning helps keep your cooktop in good shape.
Enjoy faster cooking with precise temperature control. Smart cooktops save energy and time in the kitchen. With simple care, your cooktop will serve you well. Start cooking smart and make your kitchen more efficient today.