
Imagine this: you’re cooking a delicious meal, and your kitchen timer goes off exactly when you need it to. No more burnt dishes or forgotten pots on the stove.
Wouldn’t it be great if you could program your smart kitchen timer to fit your cooking style perfectly? You’ll discover simple, step-by-step ways to set up your smart timer so it works like an extra pair of hands in your kitchen.
By the end, you’ll save time, reduce stress, and cook with confidence every single day. Ready to make your kitchen smarter? Let’s dive in.
Choosing The Right Kitchen Timer
Kitchen timers help you cook food perfectly. Picking the right timer makes cooking easier and more fun.
There are many kinds of timers. This guide will help you choose one that fits your needs.
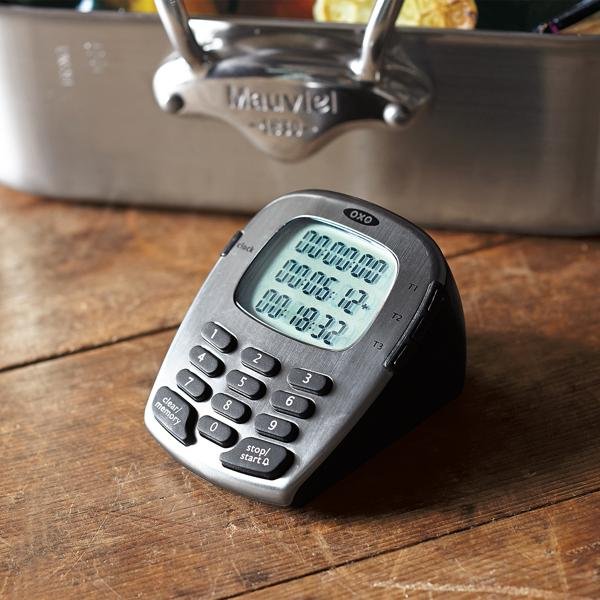
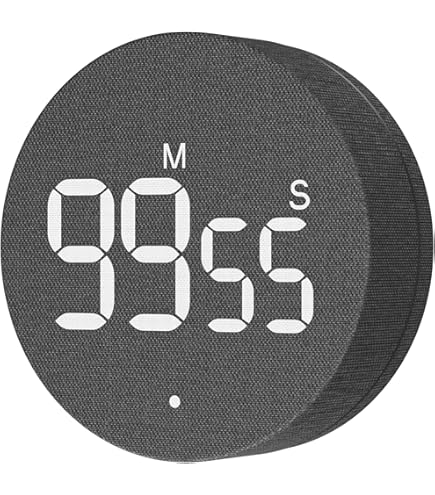
Digital Vs. Analog Timers
Digital timers show time on a screen. They are easy to read and set. Analog timers use a dial to set time.
Digital timers often have extra features. Analog timers are simple and do not need batteries.
- Digital timers: Clear display, precise timing, often loud alarms
- Analog timers: Simple to use, no batteries, quiet ticking sound
Features To Consider
Think about what features you need in a kitchen timer. Some timers have magnets to stick on the fridge.
Other features include loud alarms, countdown settings, and memory for past times.
- Easy-to-read display
- Loud and clear alarm sound
- Magnetic backing or stand
- Battery life or no battery needed
- Simple controls for quick setting
Setting Up The Timer
Setting up a smart kitchen timer is easy. It helps you cook food perfectly on time.
This guide will show you how to install batteries and configure initial settings.
Installing Batteries
First, find the battery compartment on the timer. It is usually at the back or bottom.
Open the compartment carefully. Insert the batteries in the right direction.
- Check the battery type required (AA, AAA, or button cells)
- Match the plus (+) and minus (–) signs on batteries and compartment
- Close the compartment securely to avoid damage
Initial Settings Configuration
Turn on the timer by pressing the power button. The screen will light up.
Set the time format first. Choose 12-hour or 24-hour mode.
- Press the mode button to access settings
- Use the plus (+) and minus (–) buttons to change values
- Confirm each choice by pressing the OK or set button
- Adjust volume or sound alerts if available
Programming Simple Timers
Smart kitchen timers help you cook food perfectly. You can set the time easily using simple commands.
This guide shows how to program basic timers on smart kitchen devices. Follow the steps to use your timer well.
Basic Time Setting
Start by turning on your smart timer. Use the buttons or voice to set the time you want.
Most timers let you set hours and minutes. Press or say the numbers, then confirm to save the time.
- Turn on the timer device
- Select hours by pressing buttons or voice command
- Set minutes similarly
- Press confirm or say “start” to begin
Using Countdown Functionality
The countdown feature lets the timer count down to zero. It alerts you when time is up.
To use countdown, enter the total cooking time. The timer will show the remaining time as it counts down.
- Set the total time for cooking
- Start the countdown by pressing start or saying “go”
- Watch the timer count down on the display
- Listen for the alert when time ends

Credit: www.amazon.ca
Advanced Timer Functions
Smart kitchen timers can do much more than count down minutes. They offer advanced functions to help you cook with ease.
These features improve cooking accuracy and let you multitask without stress.
Multiple Timer Settings
You can set several timers at once on smart kitchen devices. This helps when cooking different foods together.
Each timer works independently, so you can track all dishes easily.
- Set timers for different cooking times
- Label each timer for easy identification
- Start, pause, or reset timers separately
- Receive alerts for each timer when done
Preset Cooking Programs
Many smart timers come with preset cooking programs. These are built-in timer settings for common foods.
Using presets saves time and ensures proper cooking for specific recipes.
- Choose presets for boiling, baking, or grilling
- Adjust preset time based on food quantity
- Use presets to avoid overcooking
- Save your own custom presets for future use
Integrating With Smart Home Systems
Smart kitchen timers can connect with your smart home devices. This makes cooking easier and more efficient.
Linking timers with systems like Alexa or Google Home lets you control them hands-free. This integration saves time and adds convenience.
Connecting To Wi-fi
First, connect your smart timer to your home Wi-Fi network. This allows it to communicate with other smart devices.
Use the timer’s app to find your Wi-Fi network. Enter the password carefully to avoid connection issues.
- Open the timer’s mobile app
- Go to Wi-Fi settings
- Select your home network
- Enter the Wi-Fi password
- Confirm the connection
Using Voice Commands
After connecting to Wi-Fi, link your timer to a voice assistant. This lets you set timers using simple voice commands.
Say commands like “Start a 10-minute timer” to begin cooking. You can also ask for the remaining time without touching the device.
- Enable the timer skill in your voice assistant app
- Use clear commands for setting or stopping timers
- Check the timer status by asking your assistant
Credit: www.amazon.com
Troubleshooting Common Issues
Smart kitchen timers help you cook with ease. Sometimes, they may not work as expected. This guide covers common problems and how to fix them.
Knowing how to solve timer issues saves time and stress in the kitchen. Read on to learn about two frequent problems.
Timer Not Starting
If your smart kitchen timer does not start, check the power source first. Make sure it has fresh batteries or is plugged in properly.
Also, check if the start button is pressed correctly. Some timers need a long press to begin counting down.
- Replace old batteries with new ones
- Ensure the power cable is connected
- Press and hold the start button firmly
- Reset the timer if it still won’t start
- Refer to the user manual for specific instructions
Incorrect Time Display
The timer may show the wrong time if it is not set properly. Double-check the time input before starting the countdown.
Sometimes, a software glitch causes the display error. Restarting the timer often fixes this problem.
- Verify the time you set matches your cooking needs
- Clear the timer and set it again
- Turn the device off and on to reset
- Update the timer’s firmware if available
- Contact support if the display remains wrong
Maintenance And Care
Keeping your smart kitchen timer in good shape helps it last longer. Regular care stops problems and keeps it working well.
Simple steps like cleaning and changing batteries keep your timer ready for use every time.
Cleaning Tips
Clean your smart kitchen timer often to remove dirt and food spills. Use a soft cloth to avoid scratches.
Do not use water or harsh chemicals. They can damage the timer’s electronics.
- Turn off the timer before cleaning
- Use a dry or slightly damp cloth
- Clean the buttons gently
- Keep the screen clear of smudges
- Store the timer in a dry place
Battery Replacement
Replace the batteries when the timer shows low power or stops working. Old batteries can leak and harm the device.
Use the correct battery type as the manual says. Remove batteries if you won’t use the timer for a long time.
- Open the battery compartment carefully
- Take out old batteries fully
- Insert new batteries with correct polarity
- Close the compartment securely
- Test the timer after replacement

Credit: www.amazon.eg
Frequently Asked Questions
How Do I Set A Smart Kitchen Timer?
To set a smart kitchen timer, use the touchscreen or voice command. Input the desired time, then start the timer. Many models offer customizable alerts and countdown options for convenience.
Can Smart Kitchen Timers Connect To Other Devices?
Yes, smart kitchen timers often connect via Wi-Fi or Bluetooth. They sync with smartphones, voice assistants, or smart home systems. This enables remote control and notifications for better cooking management.
What Are Common Features Of Smart Kitchen Timers?
Common features include multiple timer settings, voice control, loud alarms, and app integration. Some models offer recipe guidance and automatic time adjustments for precise cooking.
Are Smart Kitchen Timers Easy To Program?
Yes, most smart kitchen timers have intuitive interfaces. They allow quick time input through touchscreens or voice commands, making programming fast and user-friendly.
Conclusion
Programming smart kitchen timers can save time and prevent mistakes. Set the timer clearly and double-check your settings. Use the timer for different cooking tasks to stay organized. Practice a few times to feel comfortable with your device. This simple skill helps you cook meals with ease and confidence.
Enjoy your cooking without worrying about overcooking or burning food. Smart timers make kitchen work smoother and more fun. Keep experimenting to find what works best for you.