
Imagine turning a simple stick of butter into elegant, eye-catching curls that make every meal feel special. You might think this is a tricky skill reserved for chefs, but it’s easier than you believe.
If you want to impress your guests or simply add a touch of charm to your dining table, learning how to use a butter curler will change the way you serve butter forever. Keep reading, and you’ll discover simple steps that anyone can follow to create beautiful butter curls with ease.
Your next meal presentation is about to get a delicious upgrade!
Choosing The Right Butter Curler
Using a butter curler makes serving butter easier and more elegant. Choosing the right one helps you get smooth curls every time.
There are different types of butter curlers. Picking the best fit depends on your needs and style.
Material Of The Butter Curler
Butter curlers come in different materials like stainless steel, plastic, and wood. Each material has its own benefits.
Stainless steel is strong and easy to clean. Plastic curlers are lightweight and often cheaper. Wooden curlers look nice but need careful cleaning.
- Stainless steel lasts longer and resists rust
- Plastic is light and less expensive
- Wood gives a classic look but needs care
Size And Shape Of The Curler
Butter curlers come in various sizes and shapes. Choose one that fits your butter blocks and serving style.
Small curlers make delicate curls. Larger curlers create bigger curls for a bold look. Some have flat edges, others have rounded shapes.
- Small curlers work well for individual servings
- Larger curlers suit buffet or party settings
- Rounded edges create smooth curls
- Flat edges produce thin ribbons of butter
Handle Comfort And Grip
A good handle helps you curl butter easily. Look for a curler with a comfortable grip and solid handle.
Some handles have rubber or textured grips. These prevent slipping when your hands are wet or greasy.
- Ergonomic handles reduce hand strain
- Textured grips prevent slipping
- Long handles give better control
Ease Of Cleaning
Choose a butter curler that is easy to clean. Some materials and designs clean better than others.
Stainless steel curlers are dishwasher safe. Plastic may stain but cleans quickly. Wood should be washed by hand and dried well.
- Dishwasher-safe curlers save time
- Avoid curlers with hard-to-reach spots
- Wood curlers need gentle cleaning
Selecting The Ideal Butter
Using a butter curler works best with the right butter. Choosing the proper butter helps you make smooth curls easily.
Butter texture and temperature affect how well the curler works. Learn what type and temperature to pick.
Butter Type
Choose butter with a firm texture. Salted or unsalted butter both work well for curling.
Butter with high fat content curls better. Avoid whipped or spreadable butter as they are too soft.
- Use block butter, not tub butter
- High-fat butter makes smooth curls
- Regular salted or unsalted butter is fine
- Avoid whipped and spreadable types
Optimal Temperature
Butter should be cold but not rock hard. This helps the curler glide smoothly without breaking the curls.
Let butter sit at room temperature for 5 to 10 minutes before curling. Too soft butter will smear instead of curl.
- Butter temperature: 40°F to 50°F (4°C to 10°C)
- Too cold: butter breaks easily
- Too warm: butter smears and melts
- Test by pressing gently; should be firm but pliable
Preparing The Butter
Using a butter curler works best when your butter is ready. Preparing the butter means making it soft enough to curl but still firm.
This guide helps you soften and shape butter for smooth curls. Follow simple steps to get perfect results.
Softening Techniques
Butter needs to be soft, not melted. Soft butter curls easily and holds shape better.
Try these ways to soften your butter safely and quickly.
- Leave butter out at room temperature for 10-15 minutes
- Cut butter into small pieces to soften faster
- Use a microwave on low power for 5 seconds only
- Place butter between two sheets of wax paper and press gently
Creating A Butter Block
Create a firm block of butter for easy curling. A neat block fits well in the curler.
Shape the butter by pressing and trimming it with a knife or spatula.
- Cut butter to a size that fits your curler
- Press butter into a clean, flat block
- Trim edges to make smooth, straight sides
- Keep the block cool but soft enough to curl
Curling Technique
Using a butter curler helps create beautiful, decorative butter shapes. The curling technique makes the butter look smooth and elegant.
It is important to hold the tool correctly and move it smoothly. This guide explains the proper grip and curling motion.
Proper Grip
Hold the butter curler firmly but not too tight. Use your dominant hand to control the tool easily.
Place your thumb on one side and your fingers on the other side of the handle. Keep your wrist relaxed.
- Use a comfortable grip to avoid slipping
- Keep your fingers away from the blade
- Hold the curler steady for smooth curls
Curling Motion
Start with a small piece of cold butter. Press the curler lightly against the butter surface.
Move the curler forward in a gentle, steady motion. Let the blade shave thin curls from the butter.
- Apply light pressure to avoid breaking curls
- Keep the motion smooth and even
- Practice on cold butter for best results
Troubleshooting Common Issues
Using a butter curler can be tricky at times. Small problems might stop you from getting perfect curls.
This guide helps you fix common issues with your butter curler. Follow simple tips to improve your results.
Dealing With Breaks
Butter curls can break if the butter is too hard or the curler is dull. Breaks happen when you press too hard or use cold butter.
To avoid breaks, use butter that is firm but not frozen. Make smooth, gentle strokes with the curler. Sharpen the blade if needed.
- Use butter at cool room temperature
- Apply light pressure while curling
- Keep curler blade clean and sharp
- Try smaller curls to reduce breakage
Avoiding Melted Butter
Melted butter can stick to the curler and ruin your curls. Warm hands or a warm room can melt the butter quickly.
Keep your butter cold before use. Chill the curler in the fridge to help it stay cool. Work quickly to prevent melting.
- Store butter in the fridge until ready
- Chill the curler before use
- Hold butter with a cold utensil or gloves
- Work in a cool room to slow melting
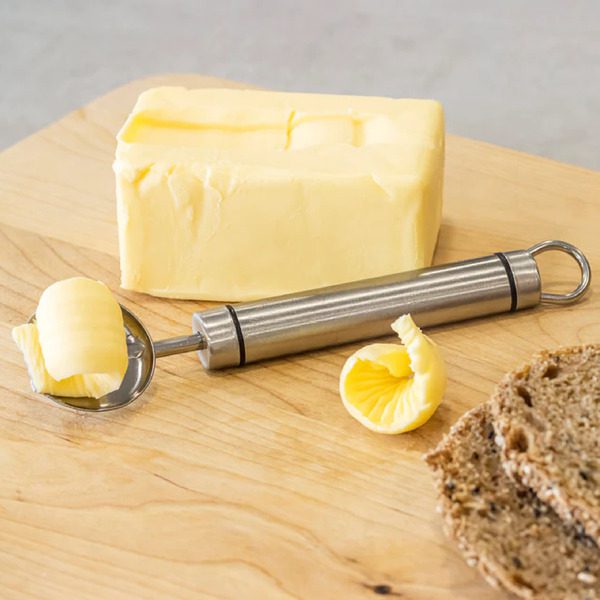
Credit: cookinstores.co.za
Creative Uses For Butter Curls
Butter curlers create small, beautiful shapes from butter. These curls add a special touch to meals.
Using butter curls can make simple dishes look elegant and tasty. They are easy to use and fun to try.
Garnishing Dishes
Butter curls add a fresh and creamy look to many dishes. Place them on warm bread or rolls for a tasty touch.
You can also use butter curls on steamed vegetables or baked potatoes. They melt slowly and add rich flavor.
- Top hot rolls with a few butter curls
- Place curls on warm vegetables like carrots or green beans
- Add curls to mashed potatoes for a smooth finish
- Use curls on pancakes or waffles instead of regular butter pats
Enhancing Presentation
Butter curls make dishes look more inviting and professional. They add texture and shine to the plate.
You can arrange curls in patterns or small piles. This simple step improves how your food looks.
- Arrange curls in a circle on a bread basket
- Place curls on the edge of serving plates
- Use curls to decorate butter dishes at the table
- Add curls to brunch plates for a neat appearance
Caring For Your Butter Curler
Keeping your butter curler clean helps it last longer. Proper care makes curling butter easier.
Simple cleaning and storing steps keep your tool in good shape. Learn how to care for it well.
Cleaning Tips
Clean your butter curler after every use. This stops butter from hardening on the tool.
Use warm water and mild soap to wash it. Avoid harsh chemicals that can damage the surface.
- Rinse with warm water immediately after use
- Use a soft brush or cloth to remove butter bits
- Dry it completely before storing
- Do not soak for long periods to prevent rust
Storage Advice
Store your butter curler in a dry place. Moisture can cause rust or damage metal parts.
Keep it away from heavy objects that can bend or break it. A small box or drawer works well.
- Use a cloth pouch or wrap it in a soft towel
- Place in a kitchen drawer or utensil holder
- Keep away from heat sources like stoves
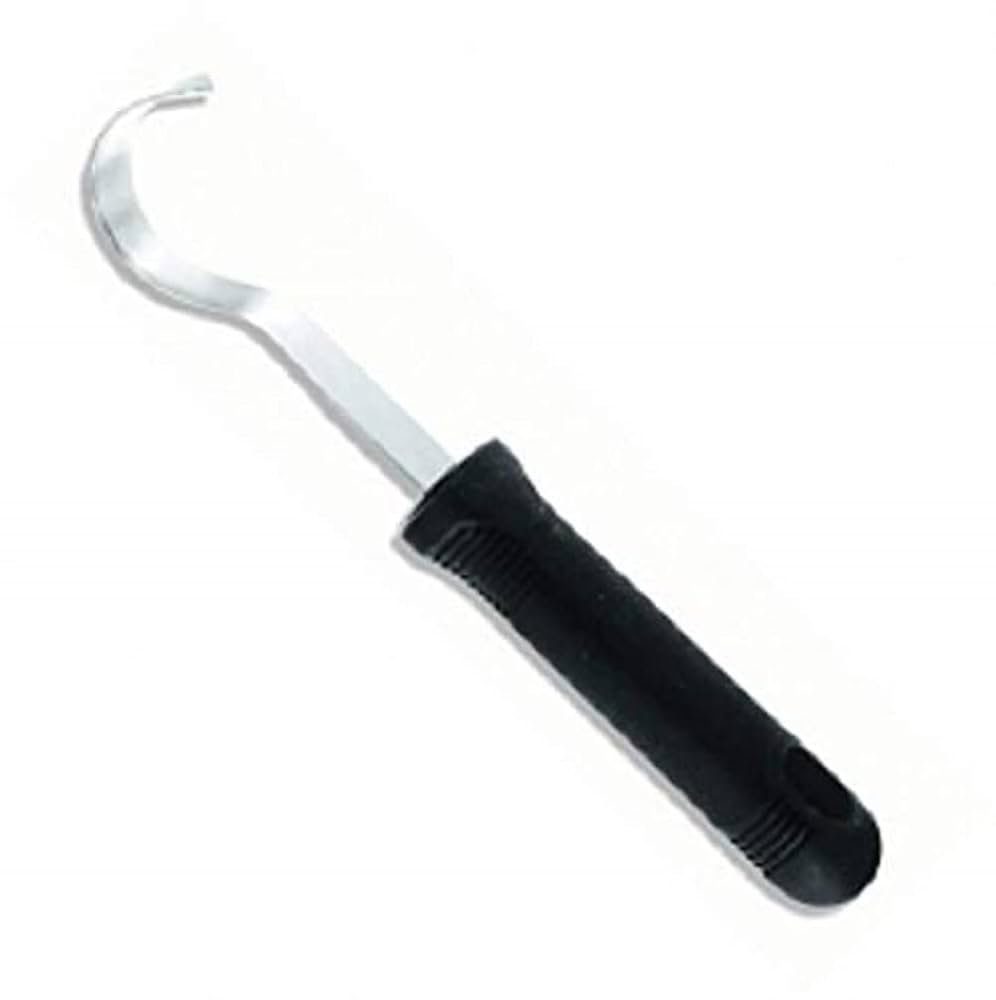
Credit: www.ebay.ca

Credit: www.amazon.ca
Frequently Asked Questions
What Is A Butter Curler Used For?
A butter curler creates decorative butter shapes for serving. It enhances presentation and adds elegance to meals. Using a curler is simple and quick. It softens butter while maintaining its shape. Perfect for parties and special occasions.
How Do You Properly Use A Butter Curler?
Start with cold, firm butter for best results. Press the curler gently into the butter’s surface. Move it evenly to create curls or ribbons. Avoid soft or melted butter to prevent sticking. Chill curls before serving to keep their shape.
Can A Butter Curler Work With Margarine Or Other Spreads?
Yes, a butter curler works well with margarine and similar spreads. The key is to use firm, chilled spreads. Softer spreads may not form proper curls. Experiment with different brands for best curling results. It’s a versatile tool for various spreads.
How To Clean And Maintain A Butter Curler?
Clean the curler immediately after use with warm, soapy water. Avoid abrasive scrubbers that can damage the tool. Dry thoroughly to prevent rust or corrosion. Store in a dry place for longevity. Regular cleaning ensures smooth curling every time.
Conclusion
Using a butter curler adds style to your dishes. It makes butter look nice and easy to spread. Practice a little to get smooth curls every time. Keep your butter cold for best results. Enjoy serving butter in a new, fun way.
Small touches like this can brighten any meal. Try it today and see the difference. Simple tools bring a special touch to your table.